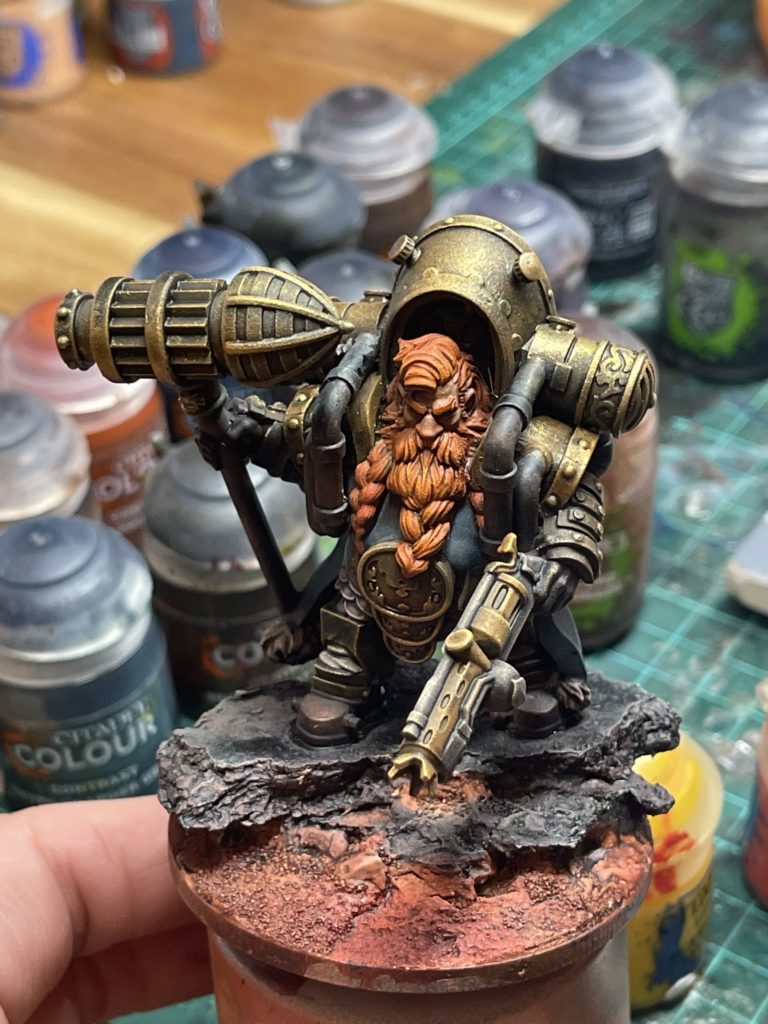
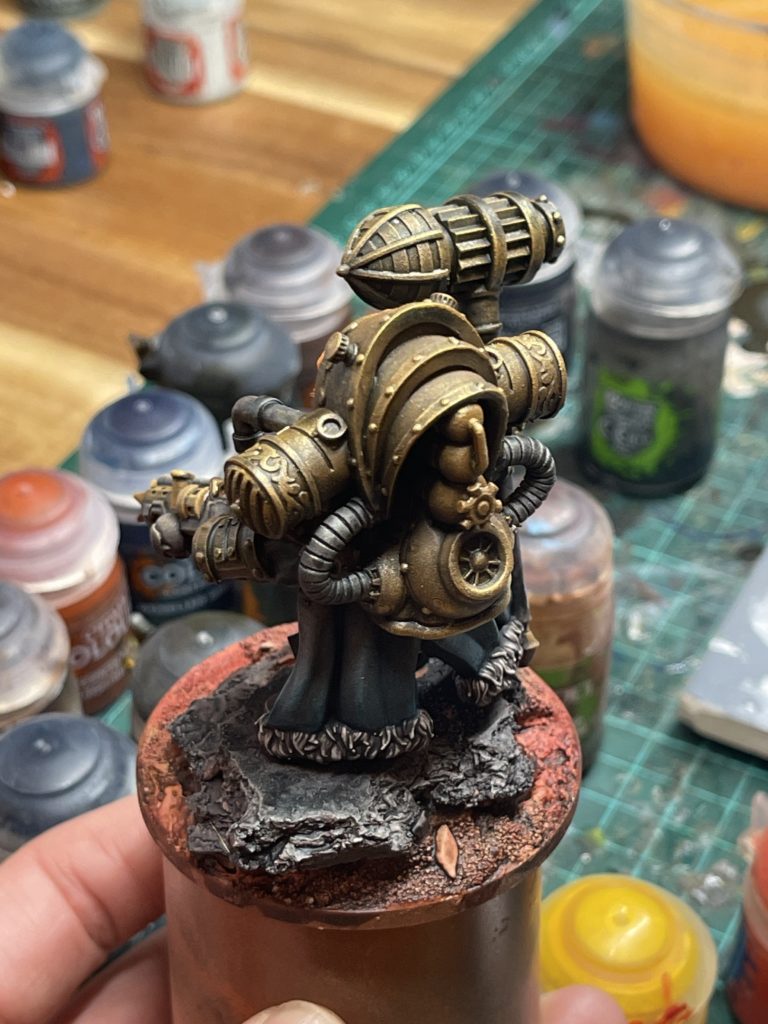
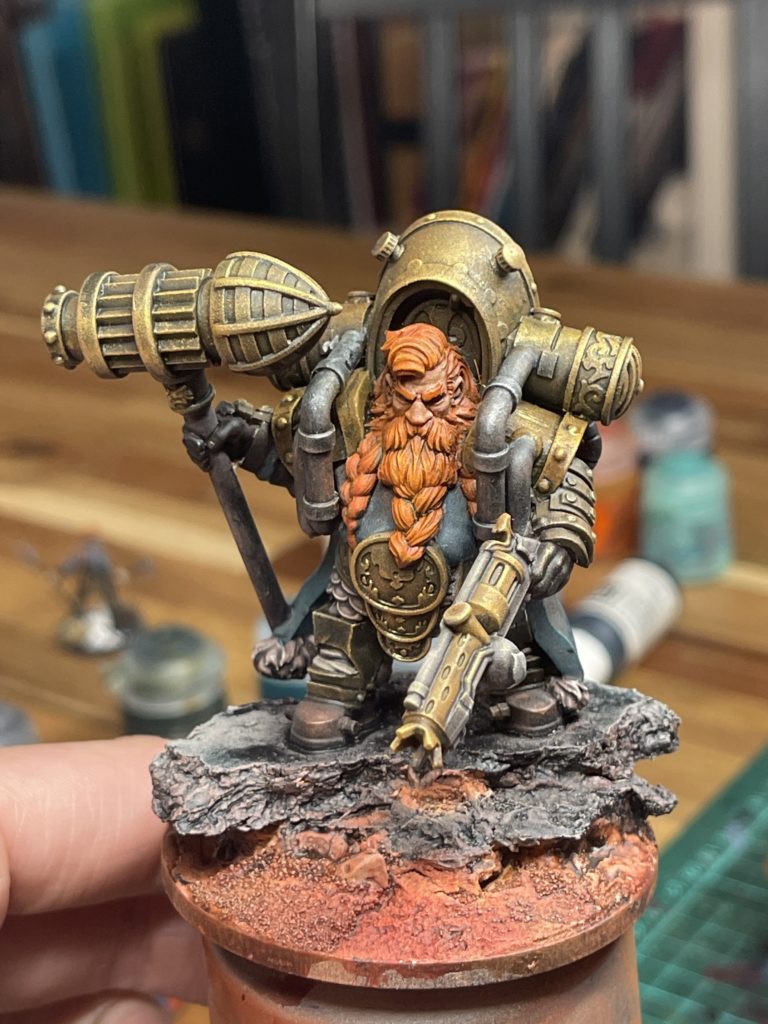
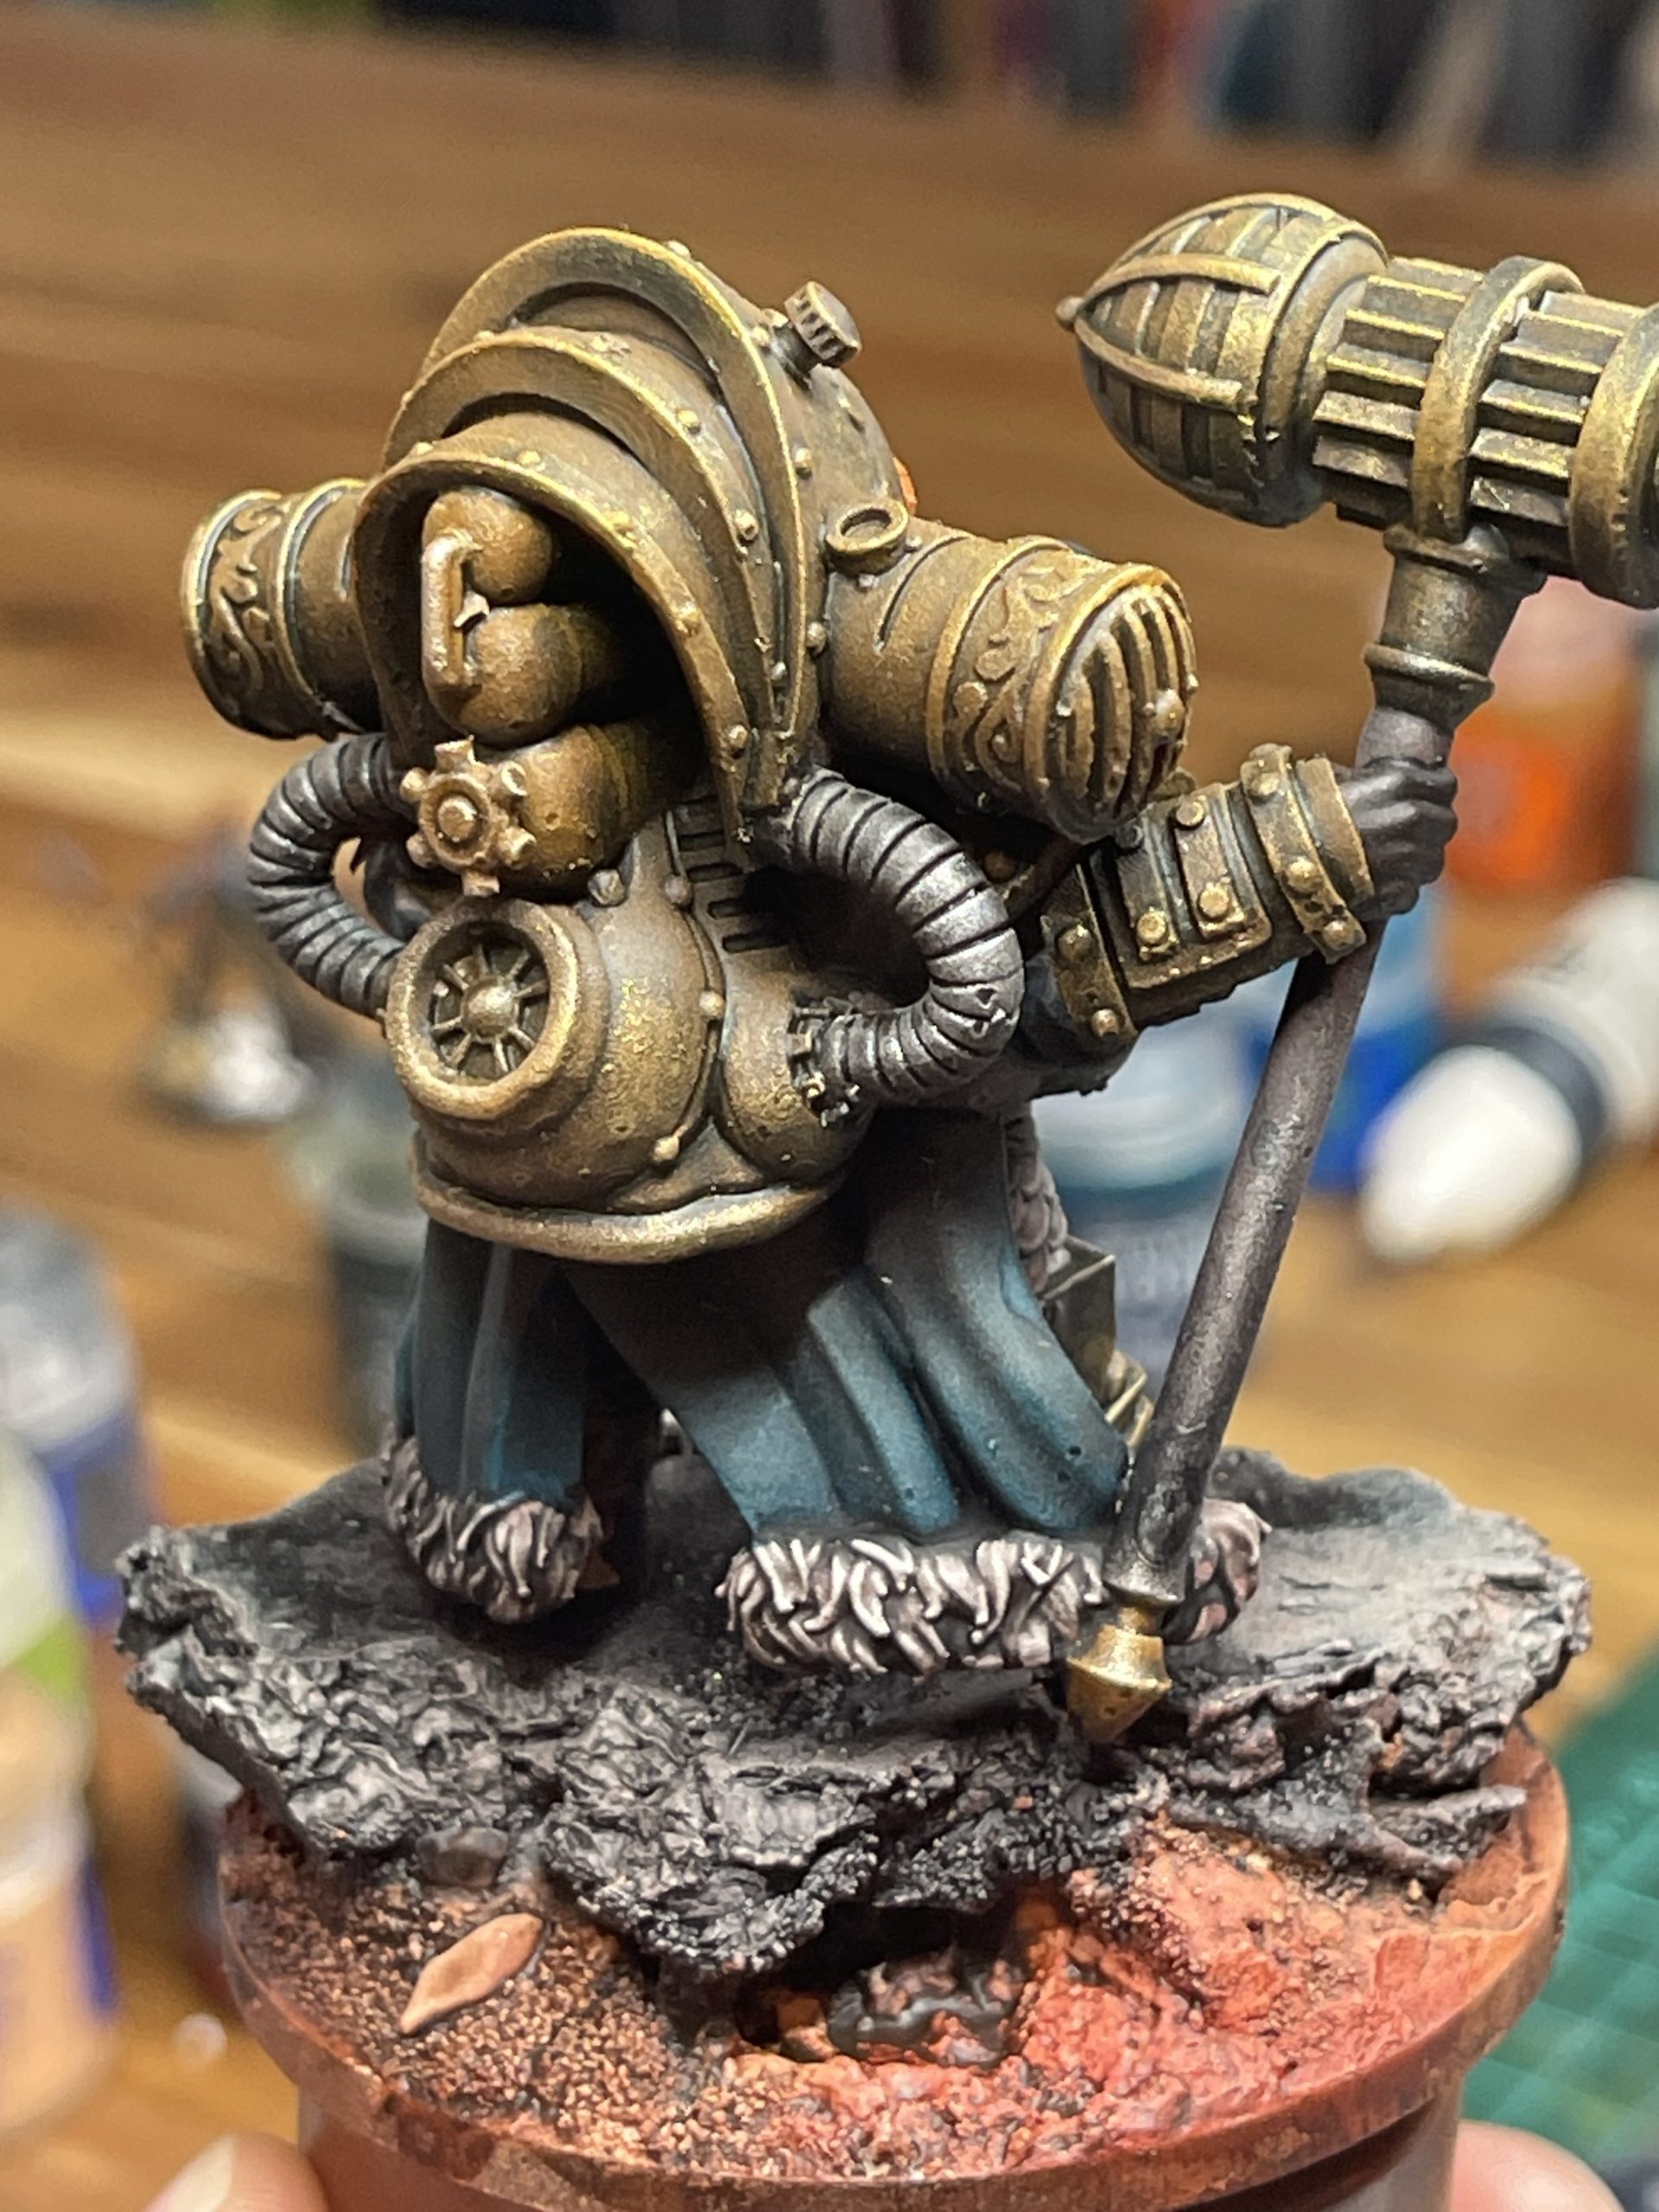
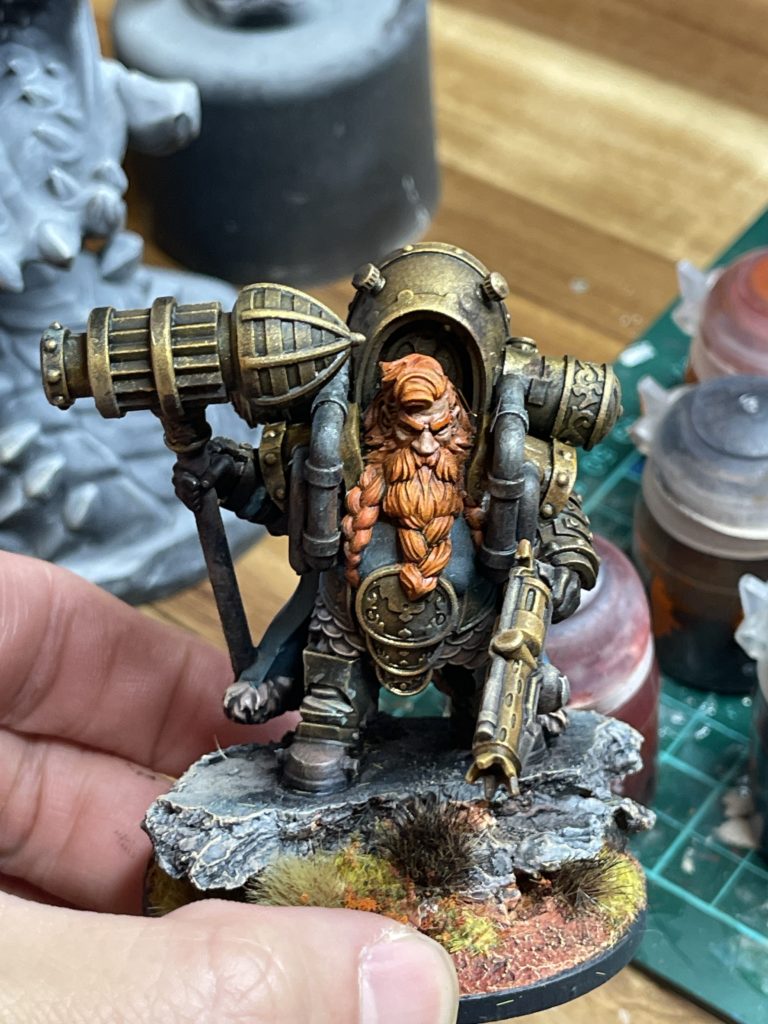
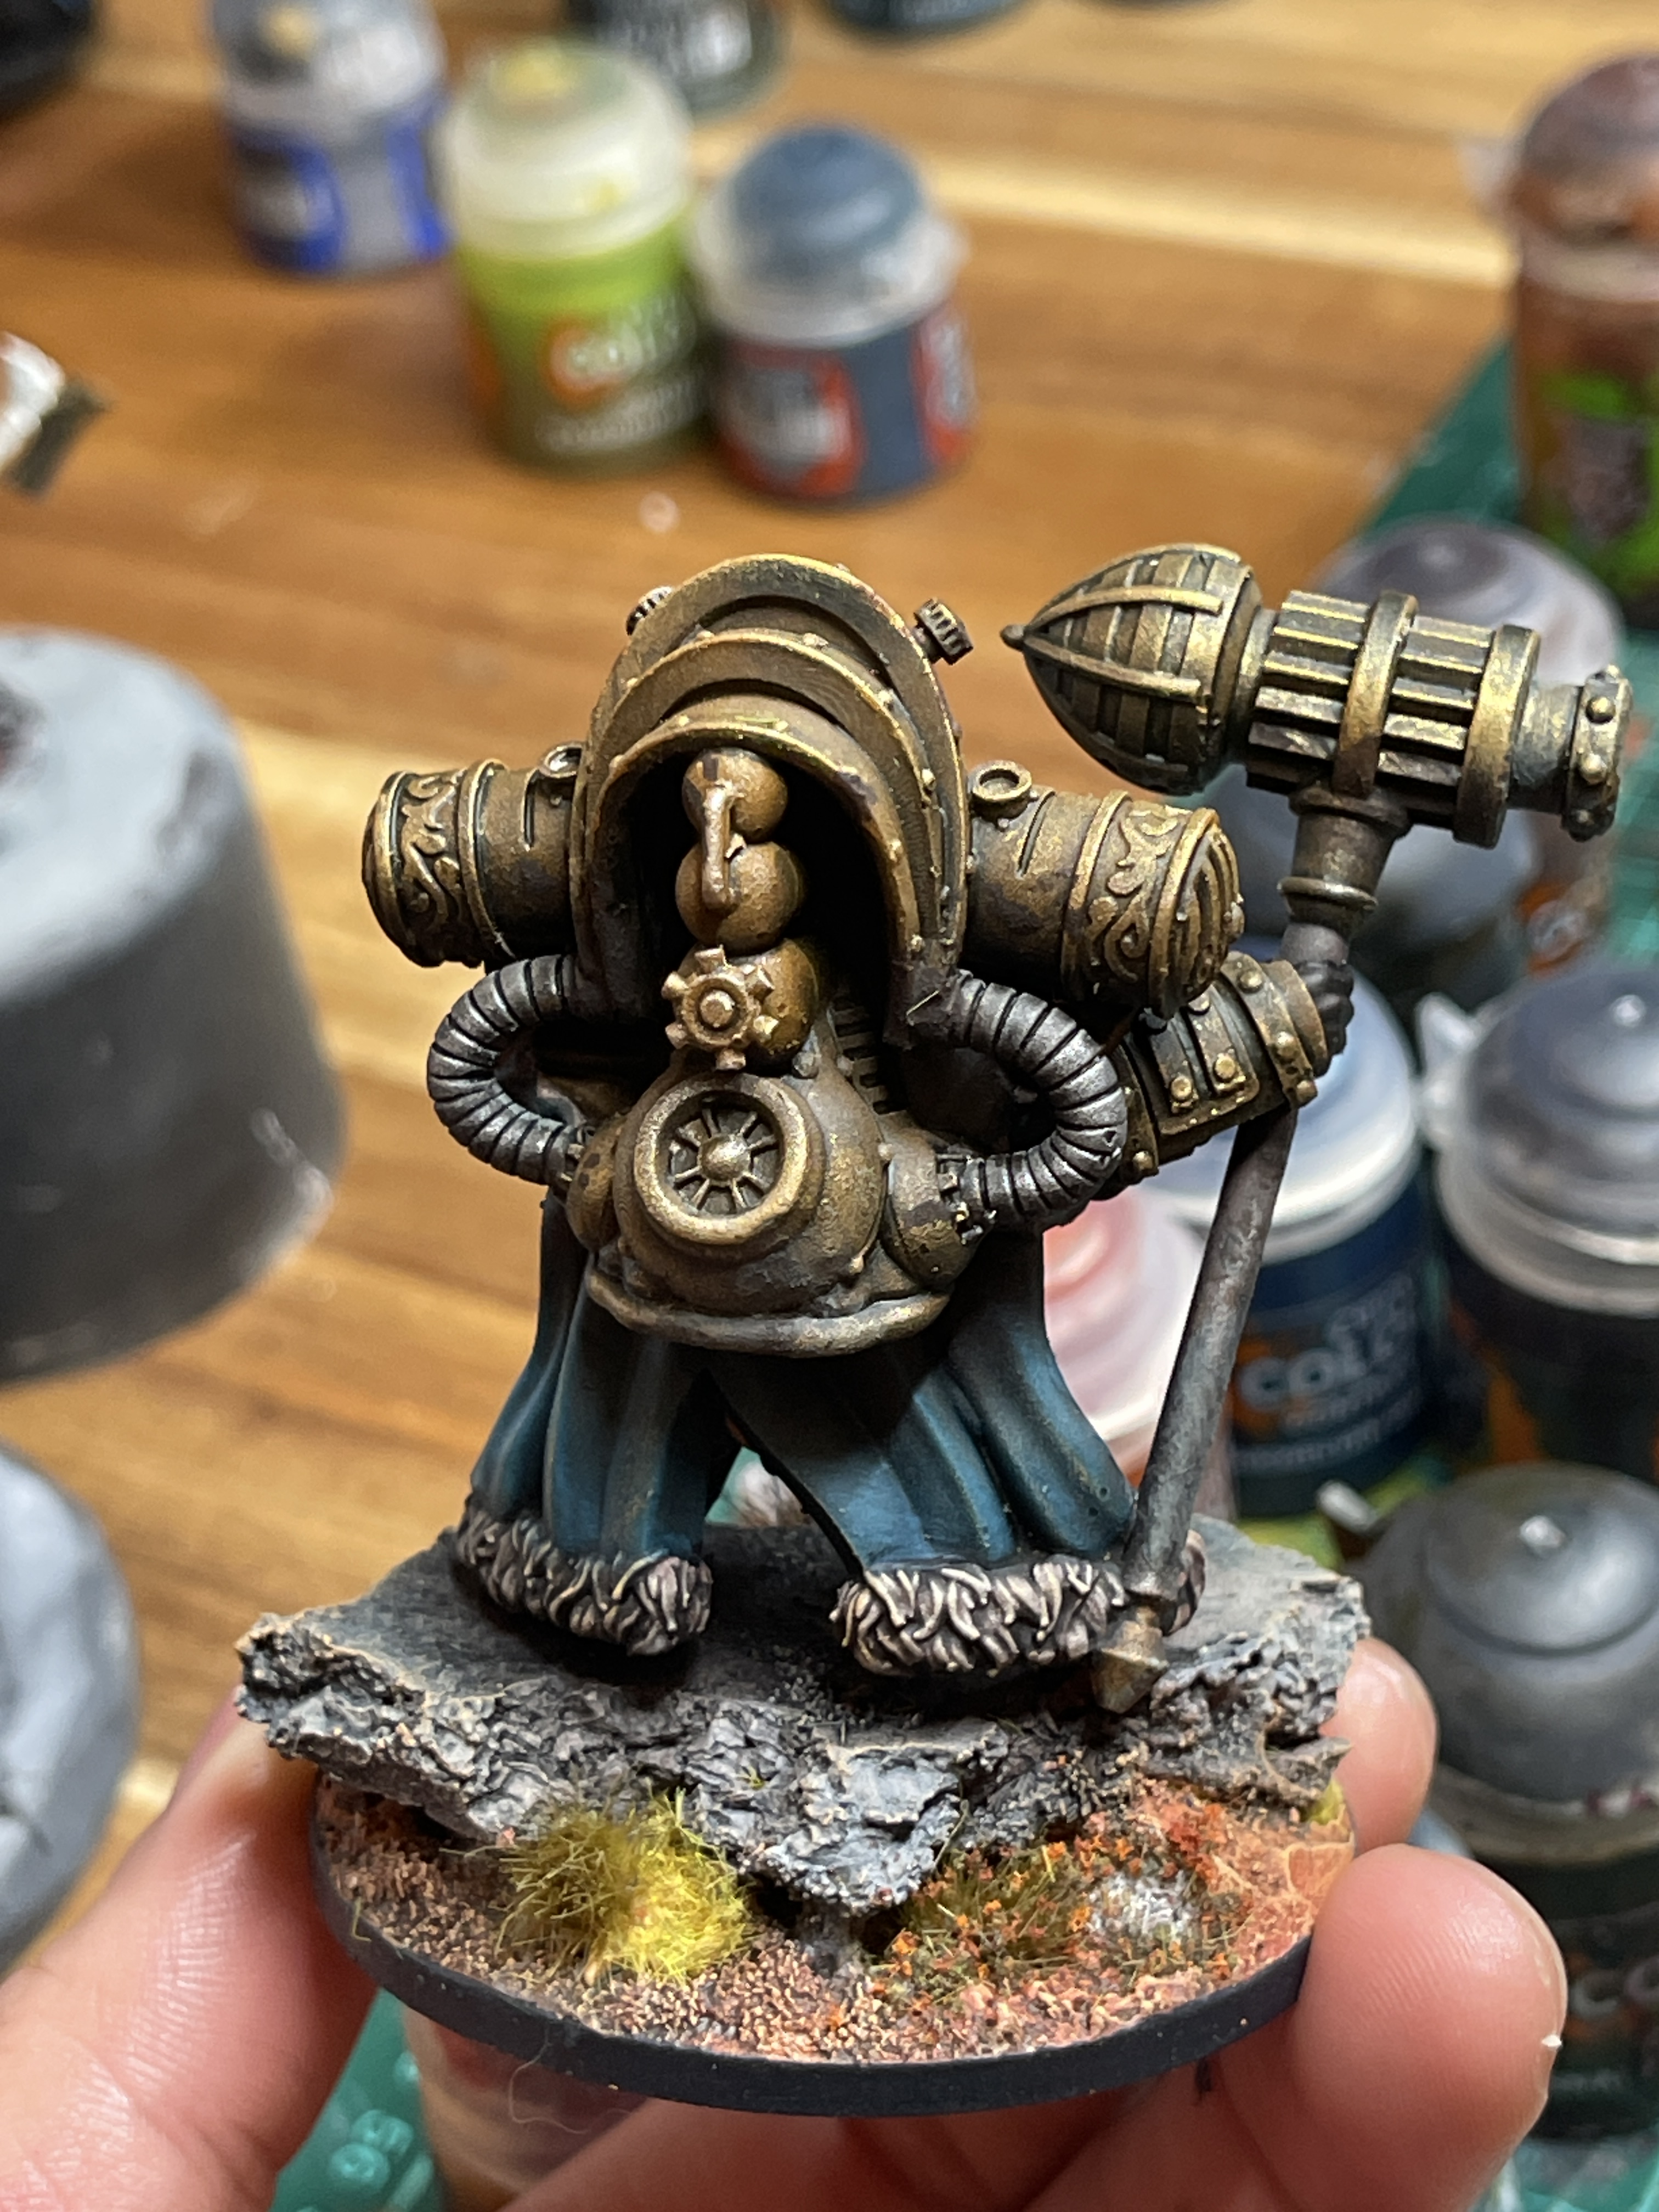
Blue / Orange / Brass Colour Scheme

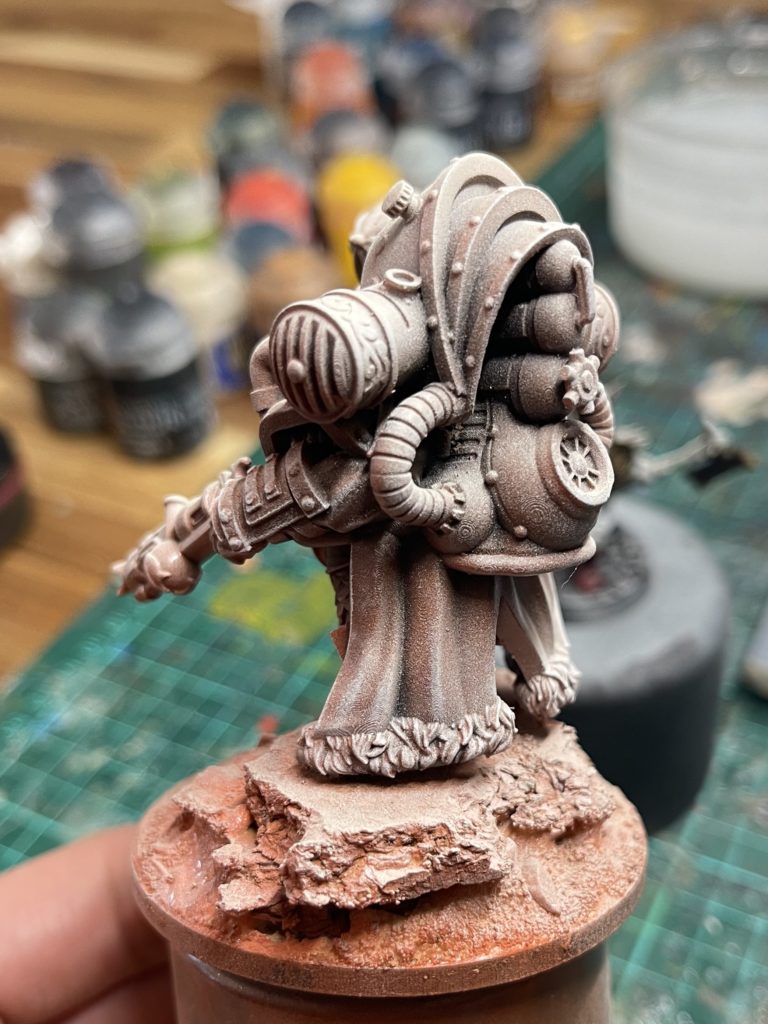
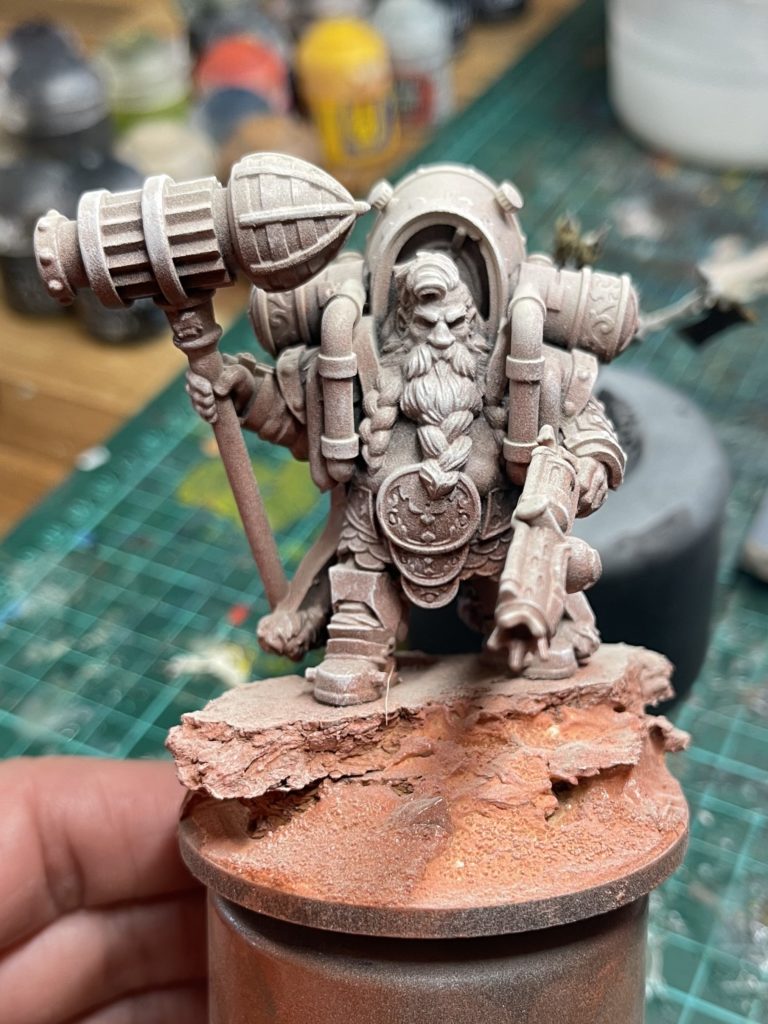
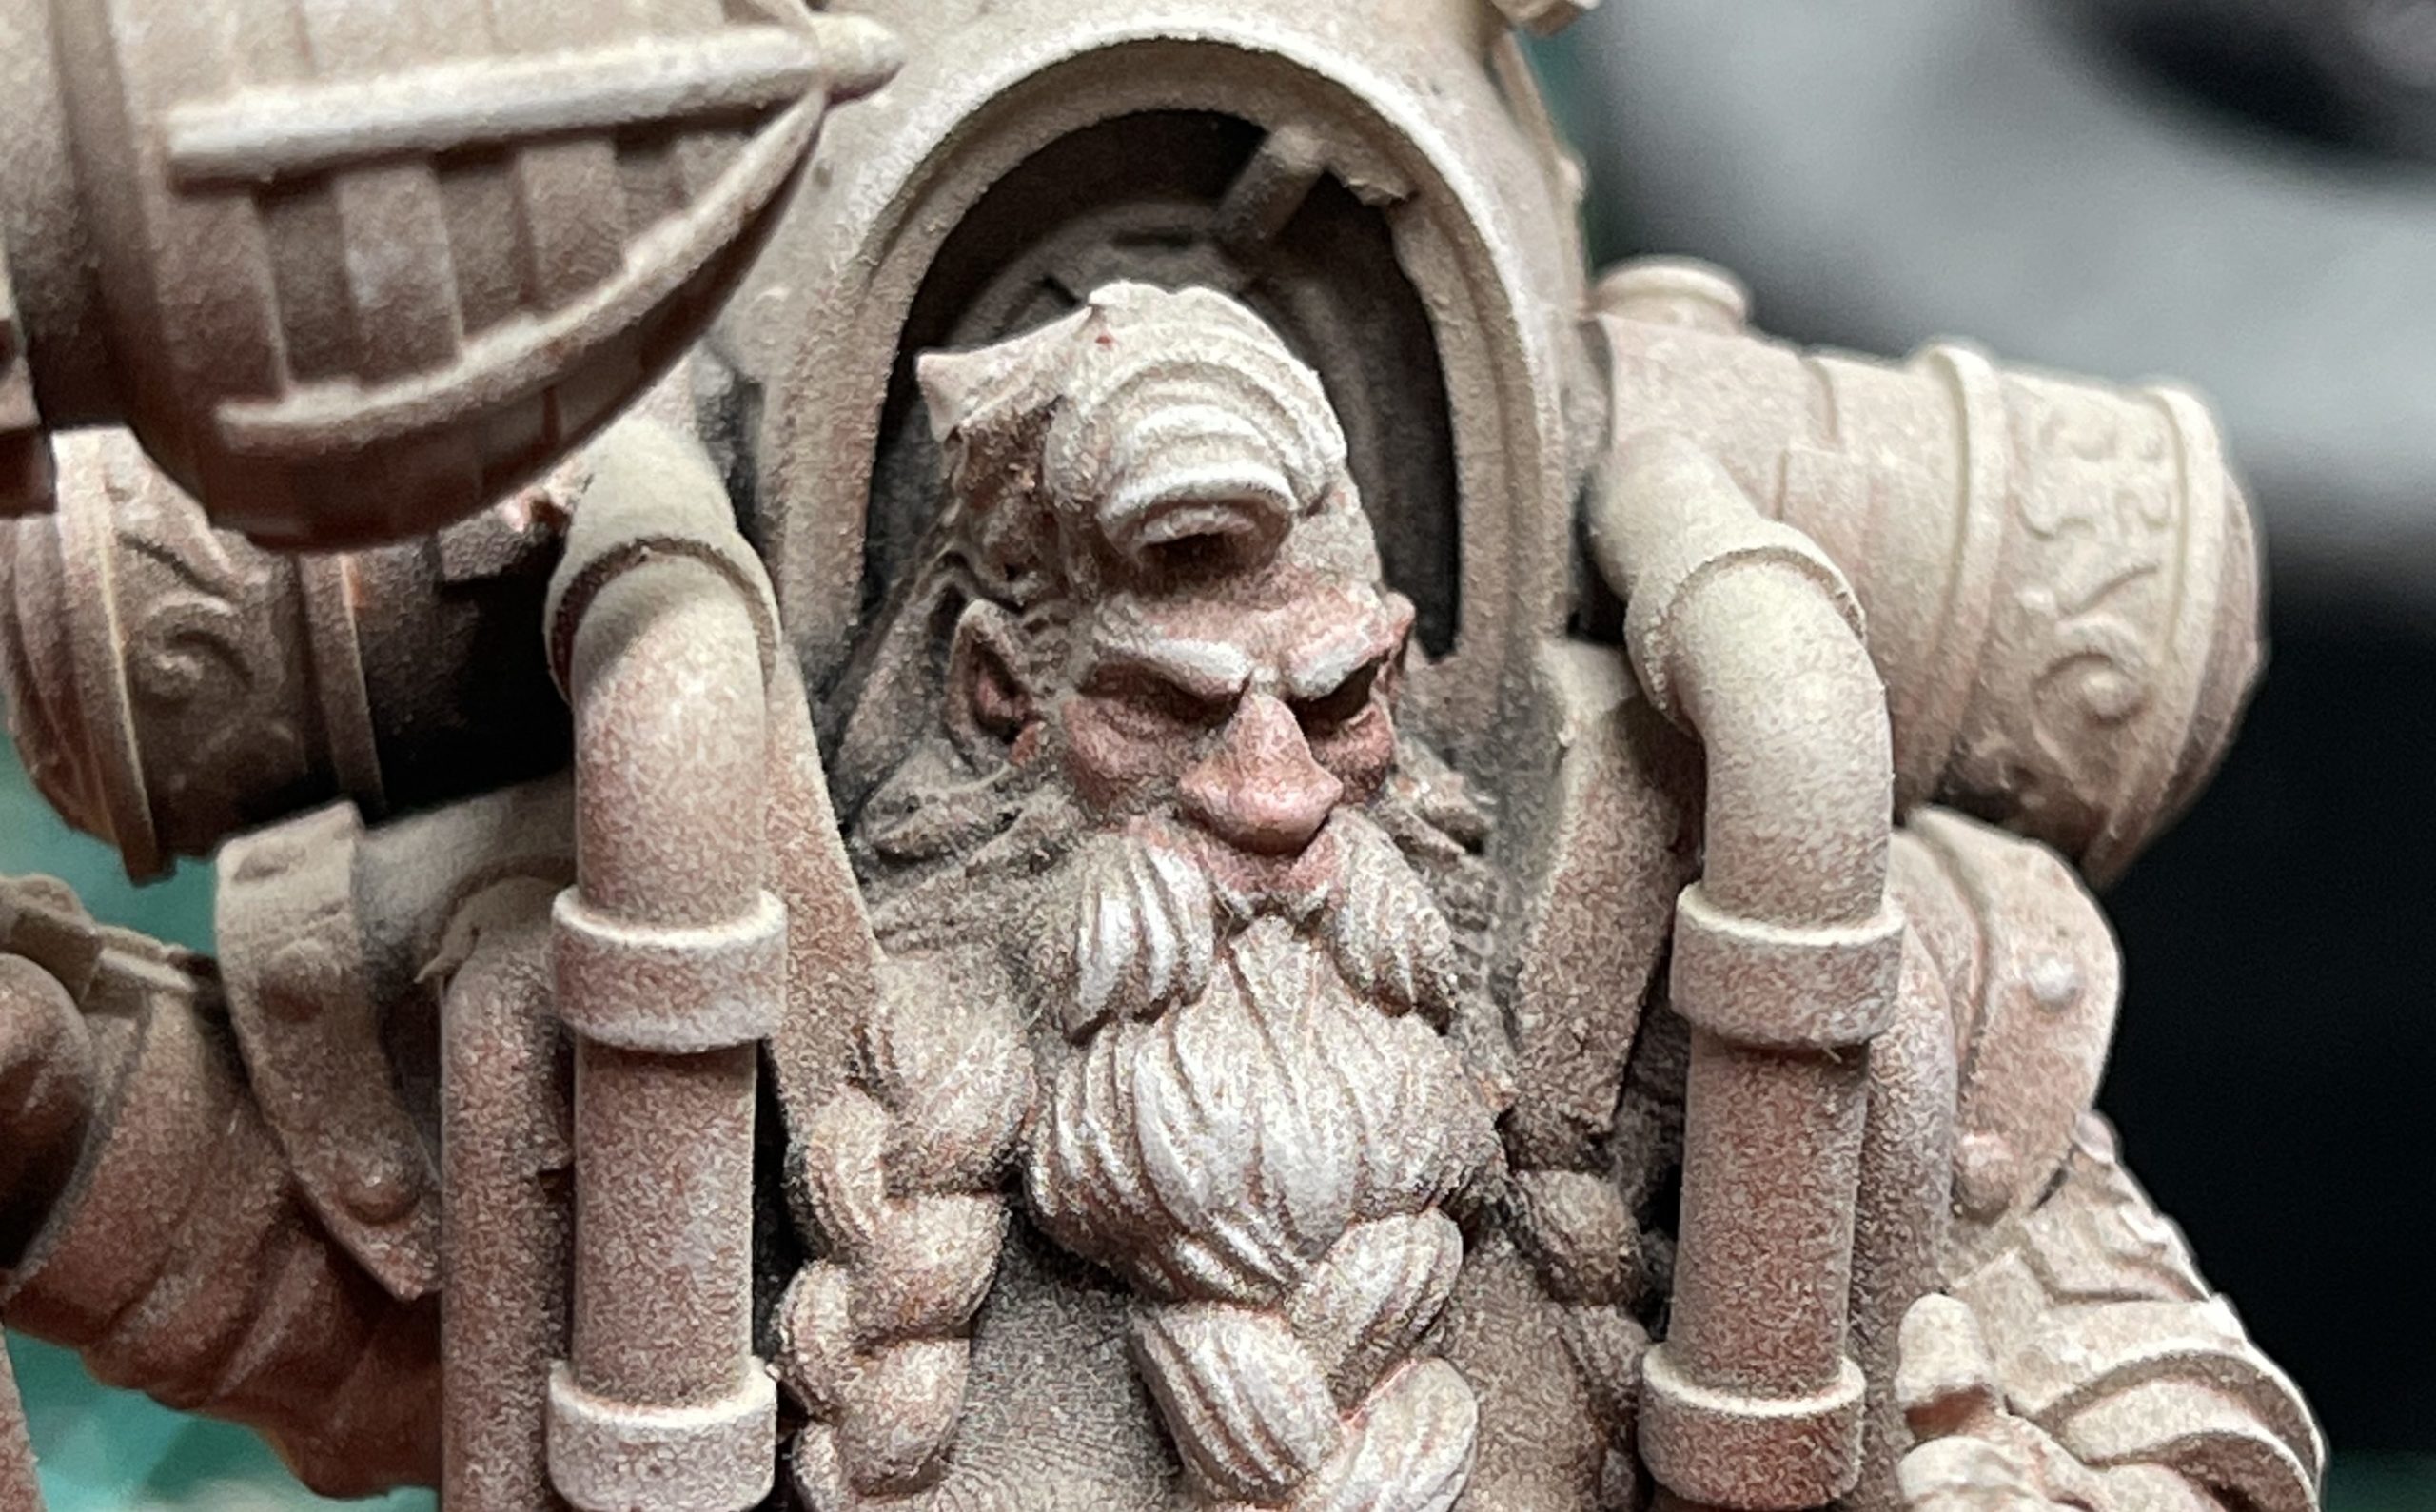
Josh walked me through a quick two hour paint job on a 3D printed resin model of Admiral Runestorm from MyMiniFactory. This post’s purpose is mainly to remind me of the process, and to serve as a reference in case anyone likes the colour scheme and wants to do something similar.
This mini was also printed at around 150% of its preset size, making it a little more time consuming to paint, but also makes it look a lot cooler to look at.

Paint List
| Paint | Brand | Type |
|---|---|---|
| Akhelian Green | Citadel | Contrast |
| Auric Armour Gold | Citadel | Layer |
| Citadel | Contrast | |
| Blood Angels Red | Citadel | Contrast |
| Cadian Flesh Tone | Citadel | Contrast |
| Celestra Grey | Citadel | Base |
| Citadel | Contrast | |
| Dark Oath Flesh | Citadel | Contrast |
| Dreadful Visage | Citadel | Contrast |
| Flash Gitz Yellow | Citadel | Layer |
| Flayed One Flesh | Citadel | Contrast |
| Citadel | Contrast | |
| German Grey 995 (Substitute with Mechanicus Standard Grey) | Vallejo | Pigment |
| Gryph-Hound Orange | Citadel | Contrast |
| Gryph Charger Grey | Citadel | Contrast |
| Guilliman Flesh | Citadel | Contrast |
| Nihilak Oxide | Citadel | Technical |
| Nuln Oil | Citadel | Shade |
| Reikland Flesh Shade | Citadel | Shade |
| Retributor Gold | Citadel | Base |
| Citadel | Contrast | |
| Sotek Green | Citadel | Layer |
| Stormhost Silver | Citadel | Layer |
| Vallejo | Pigment | |
| Typhus Corrosion | Citadel | Technical |
| Wild Rider Red | Citadel | Layer |
Step-by-Step Process
1. Prime and undercoat
Prime the base with black paint, then spray on a layer of red undercoat, before lightly spraying white onto the areas that light would hit.
2. Dry brush highlights
Dry brush the hard edges and raised areas.
- ⬢ Titanium White (Vallejo — Pigment) (Substitute with Corax White)
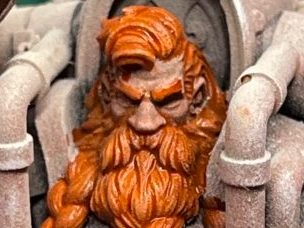
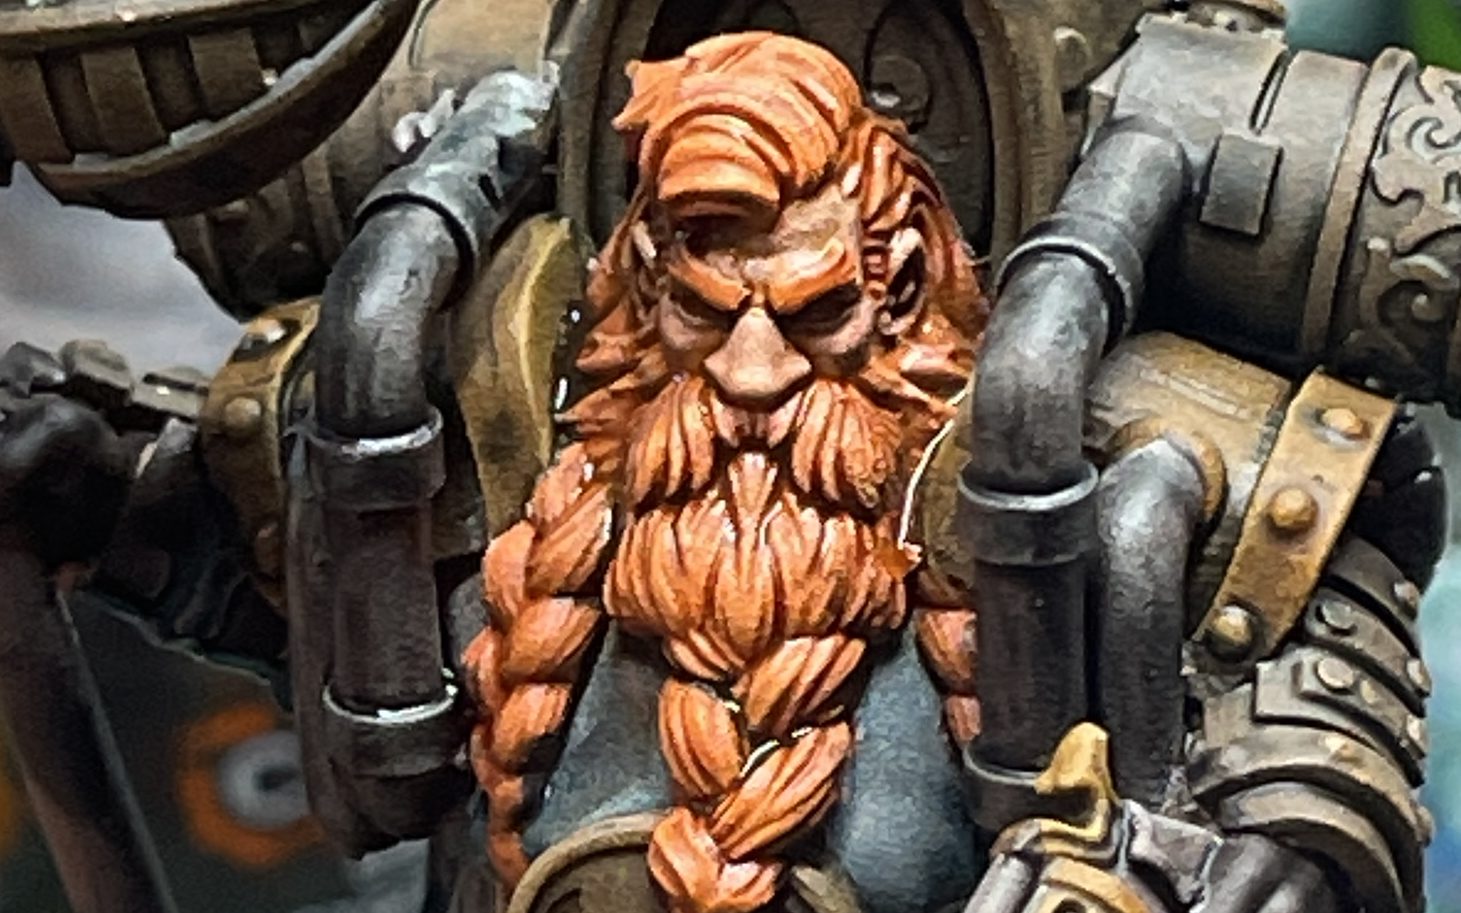
3. Apply translucent glaze to face
Water down each colour paint to a thin glaze and layer on the skin.
- Blood Angels Red (Citadel — Contrast)
- Guilliman Flesh (Citadel — Contrast)
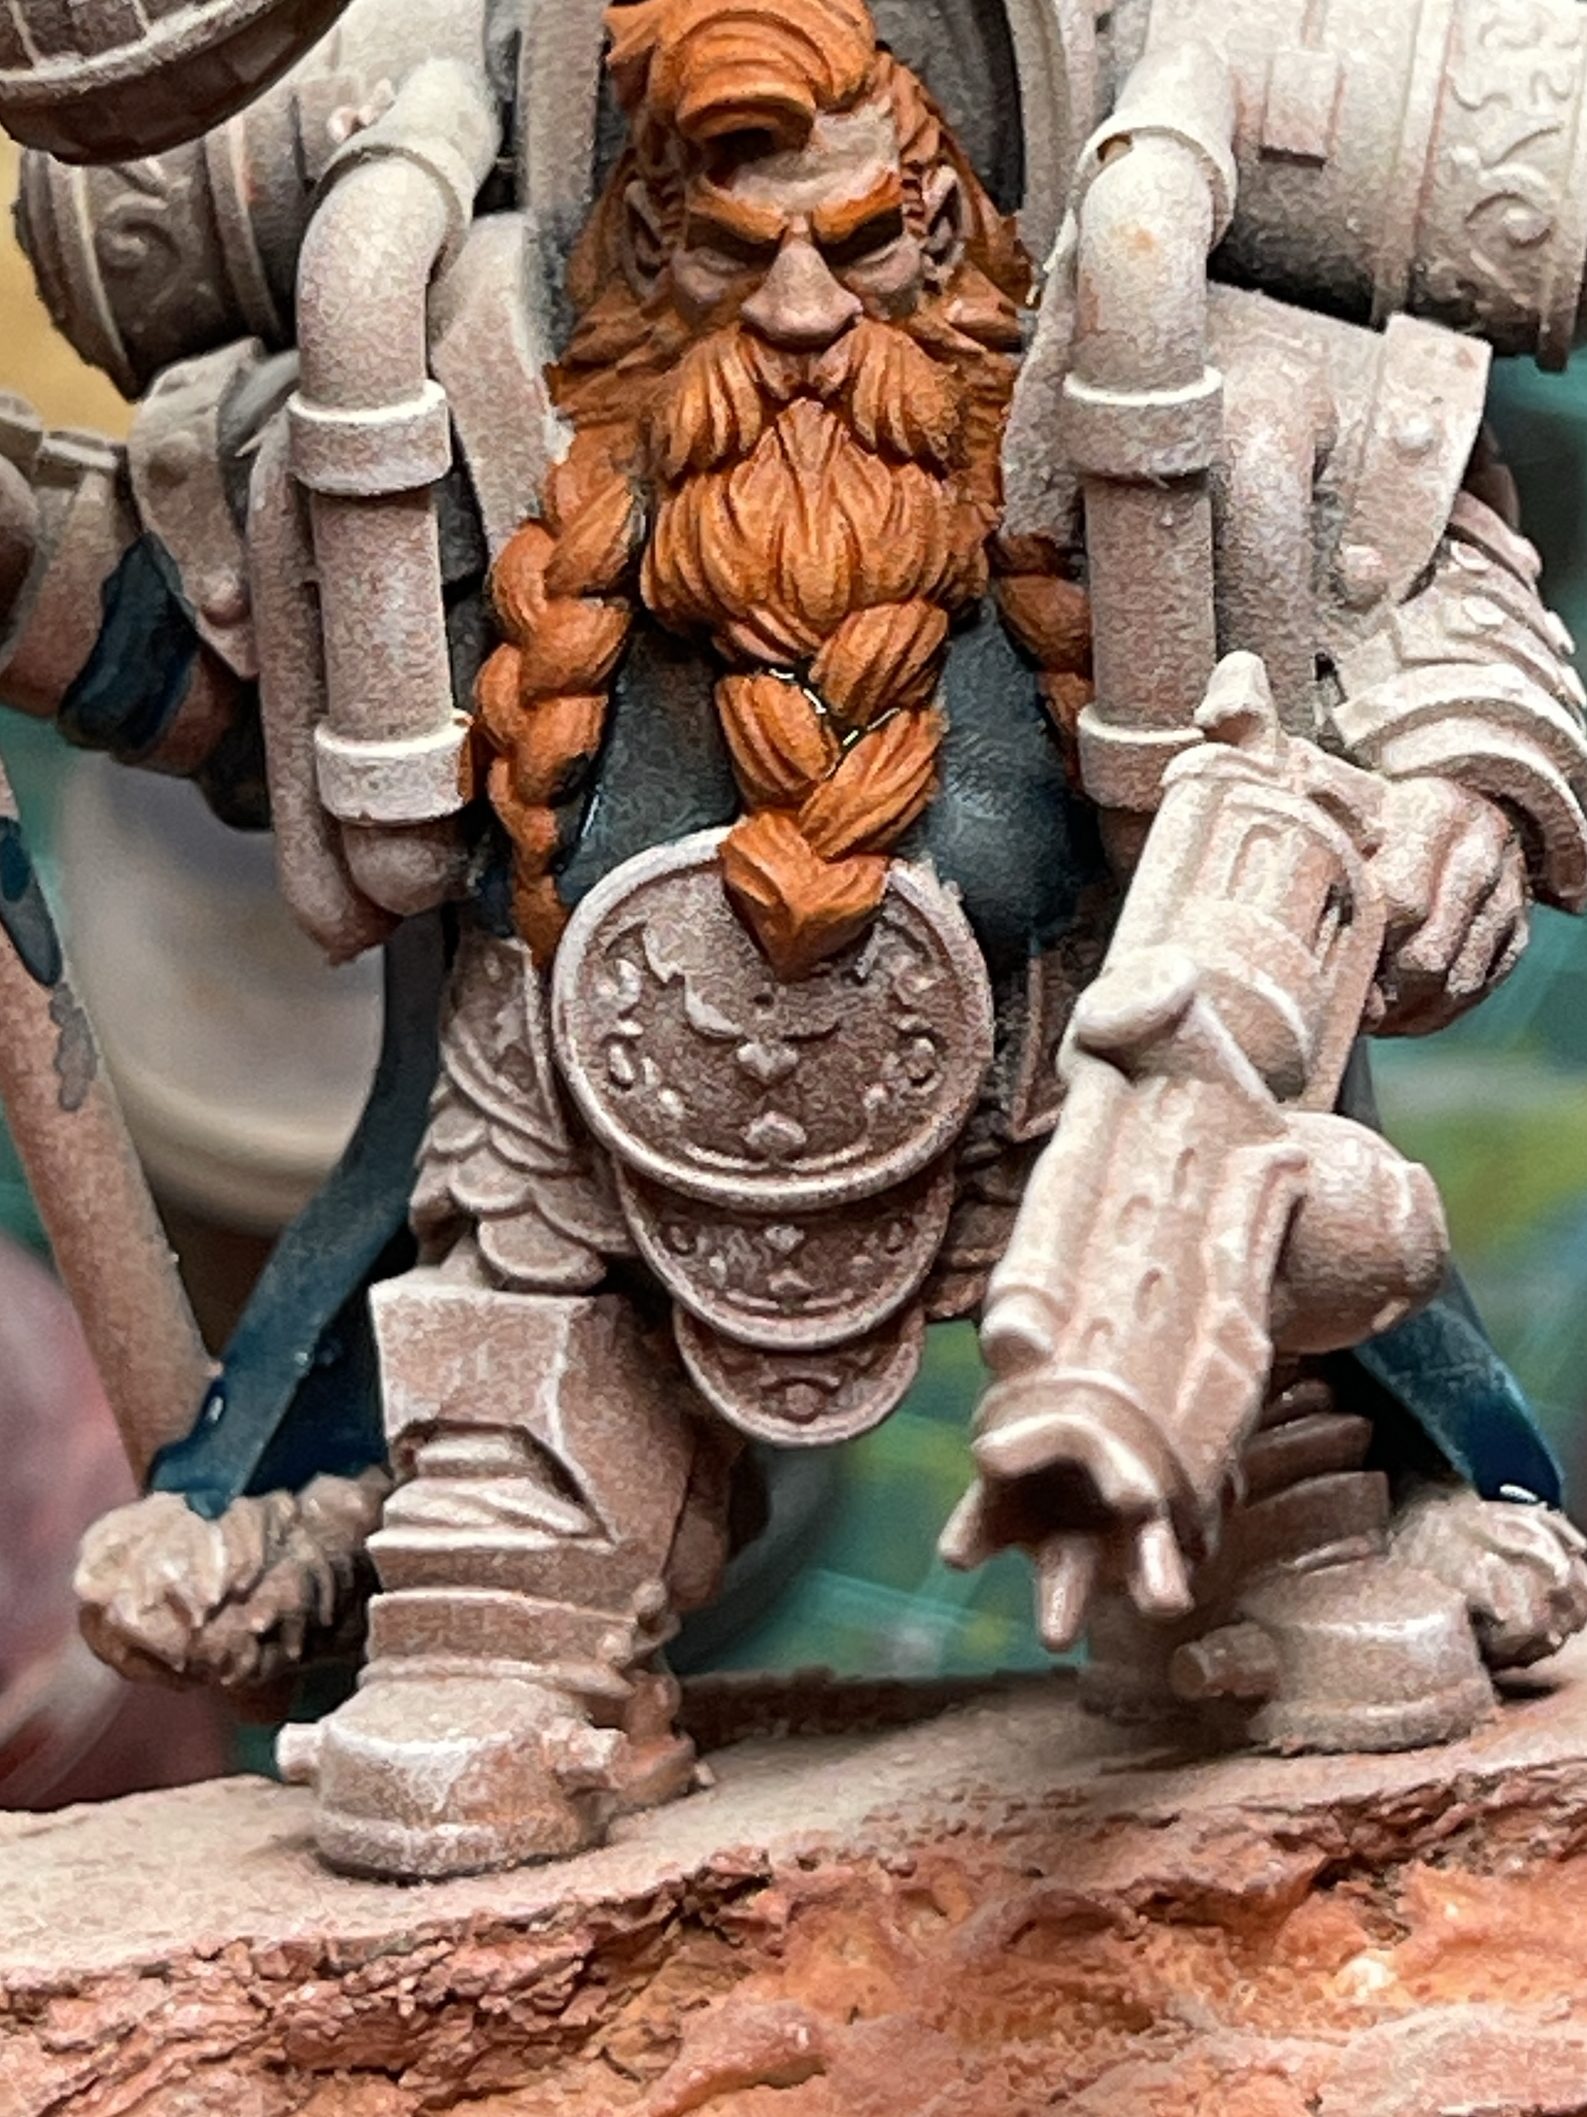
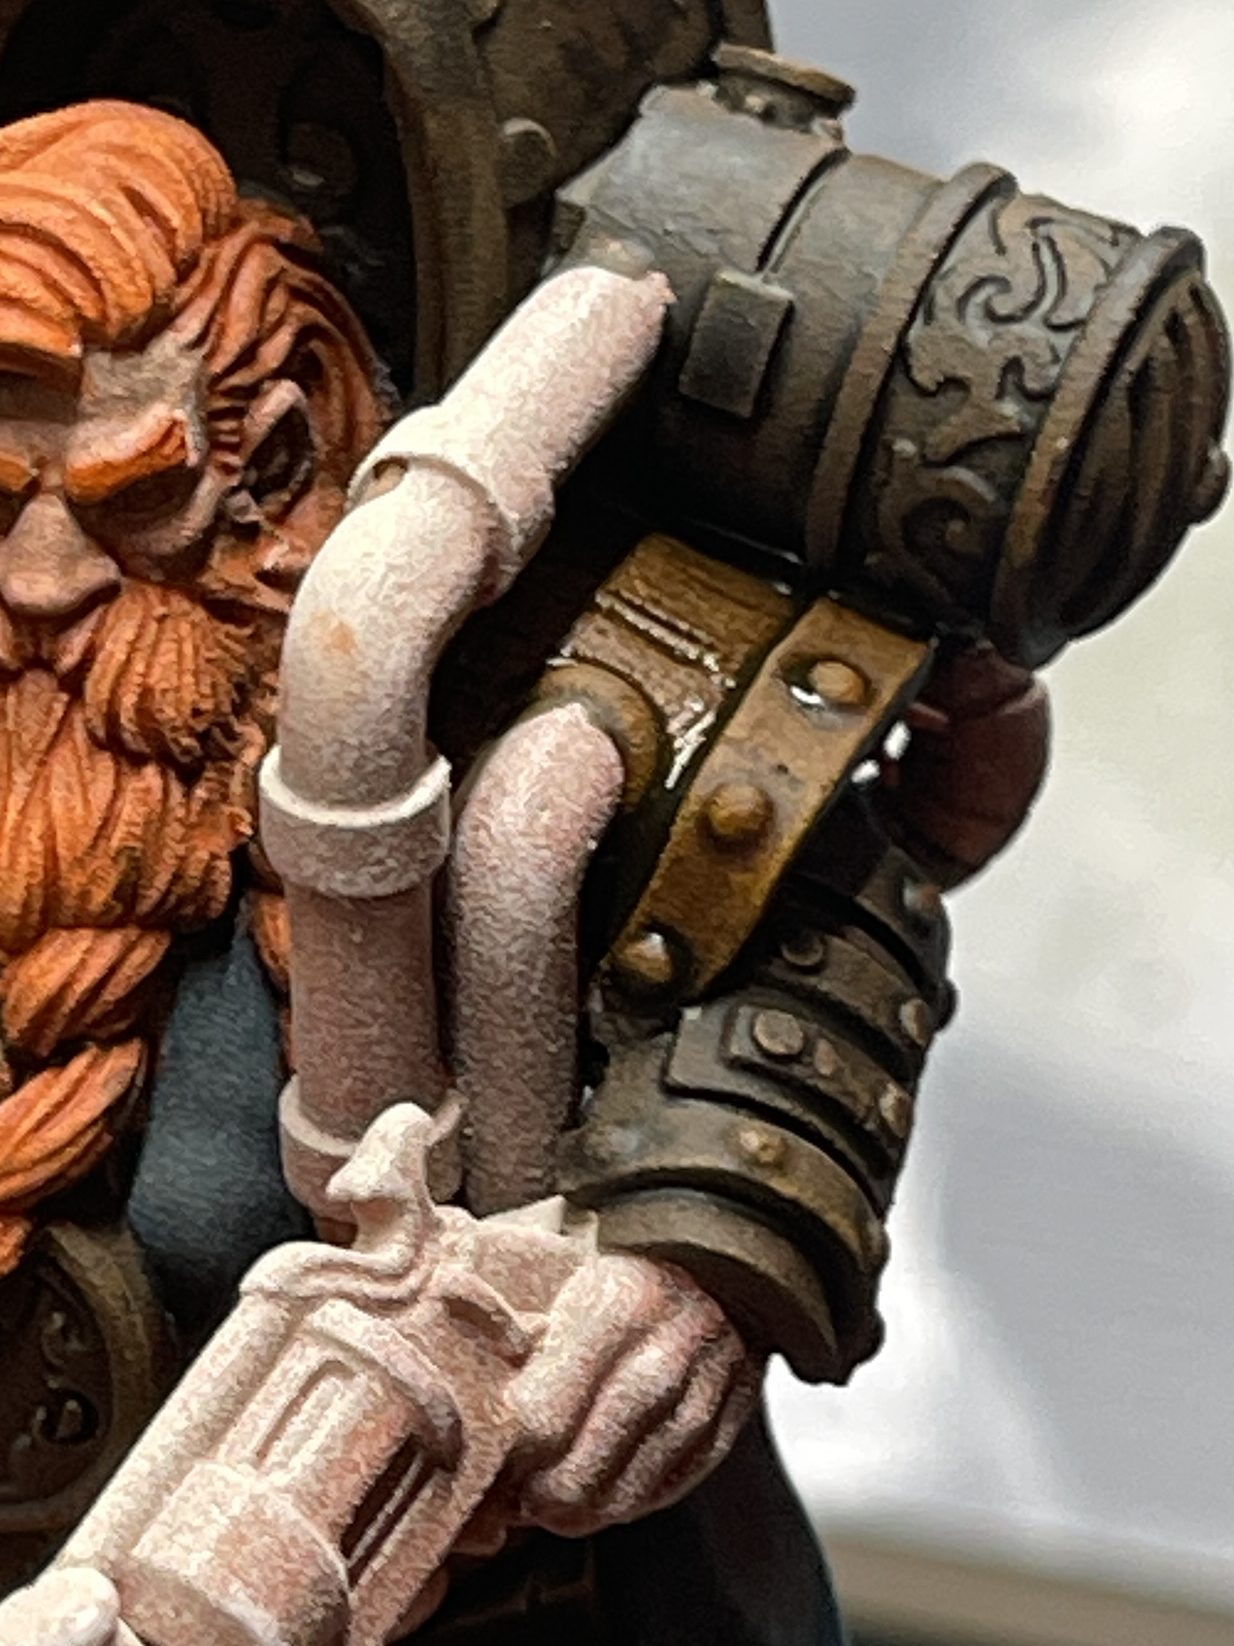
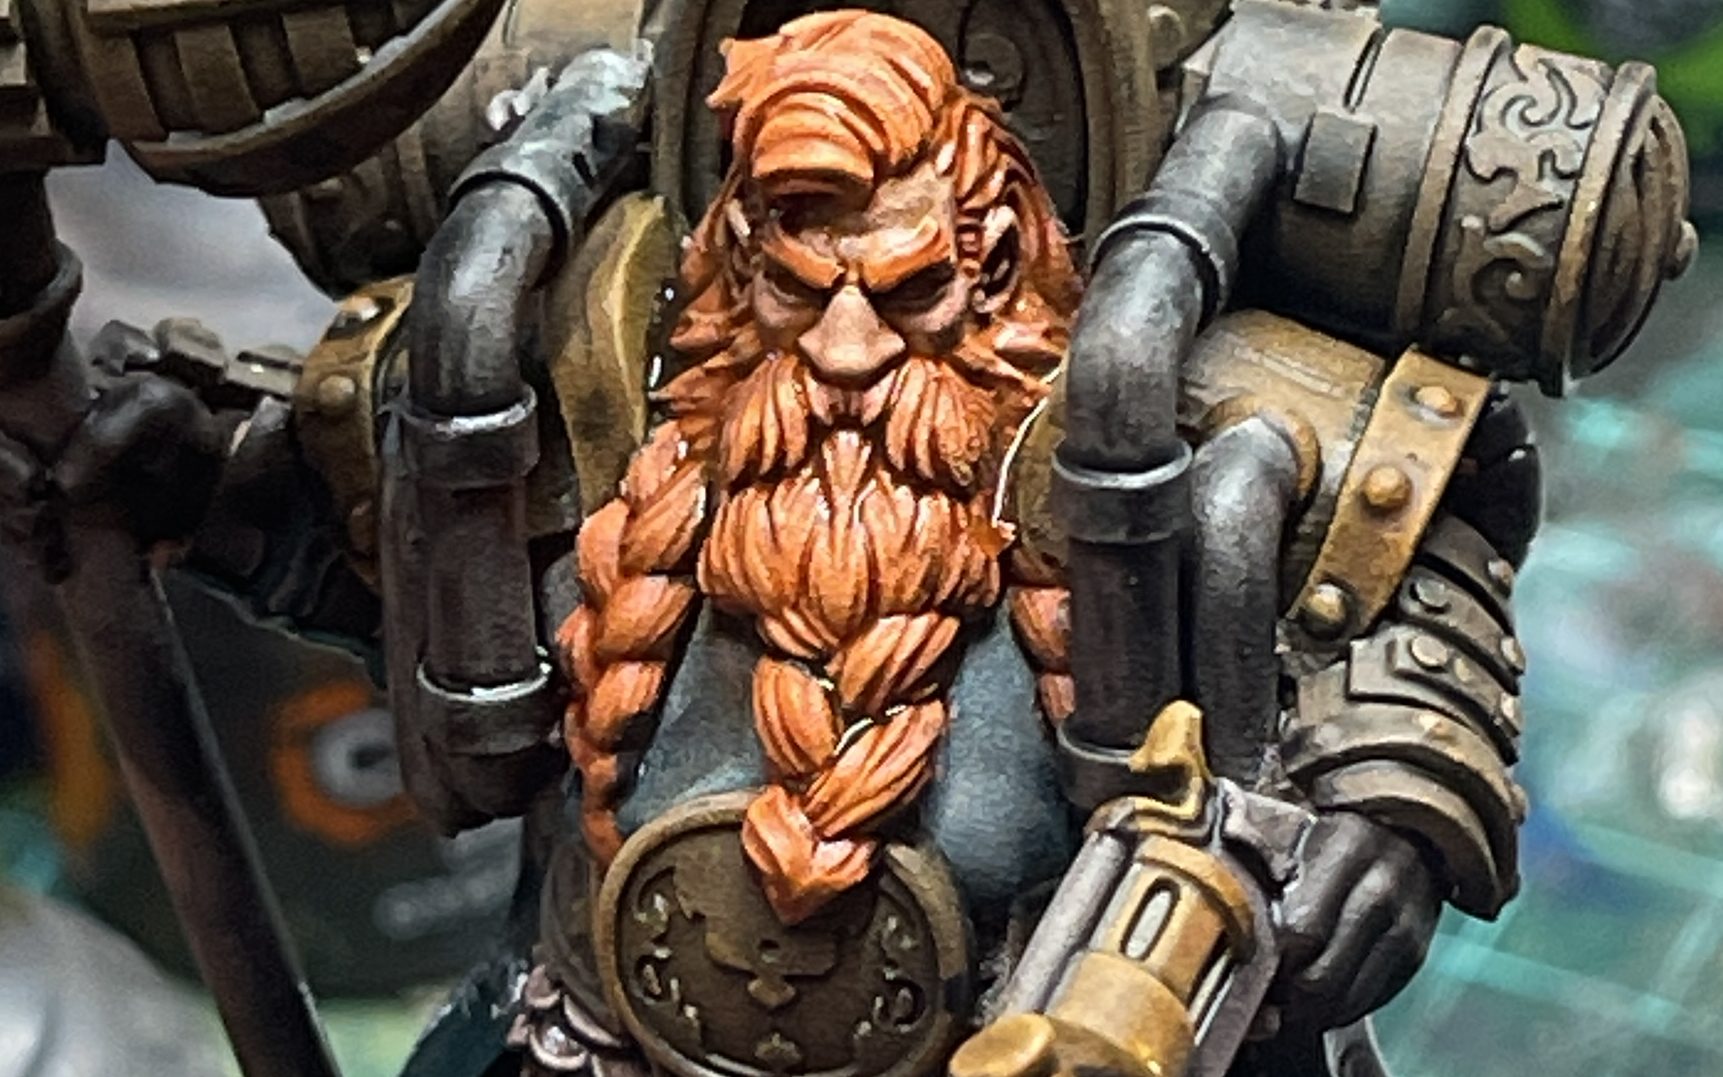
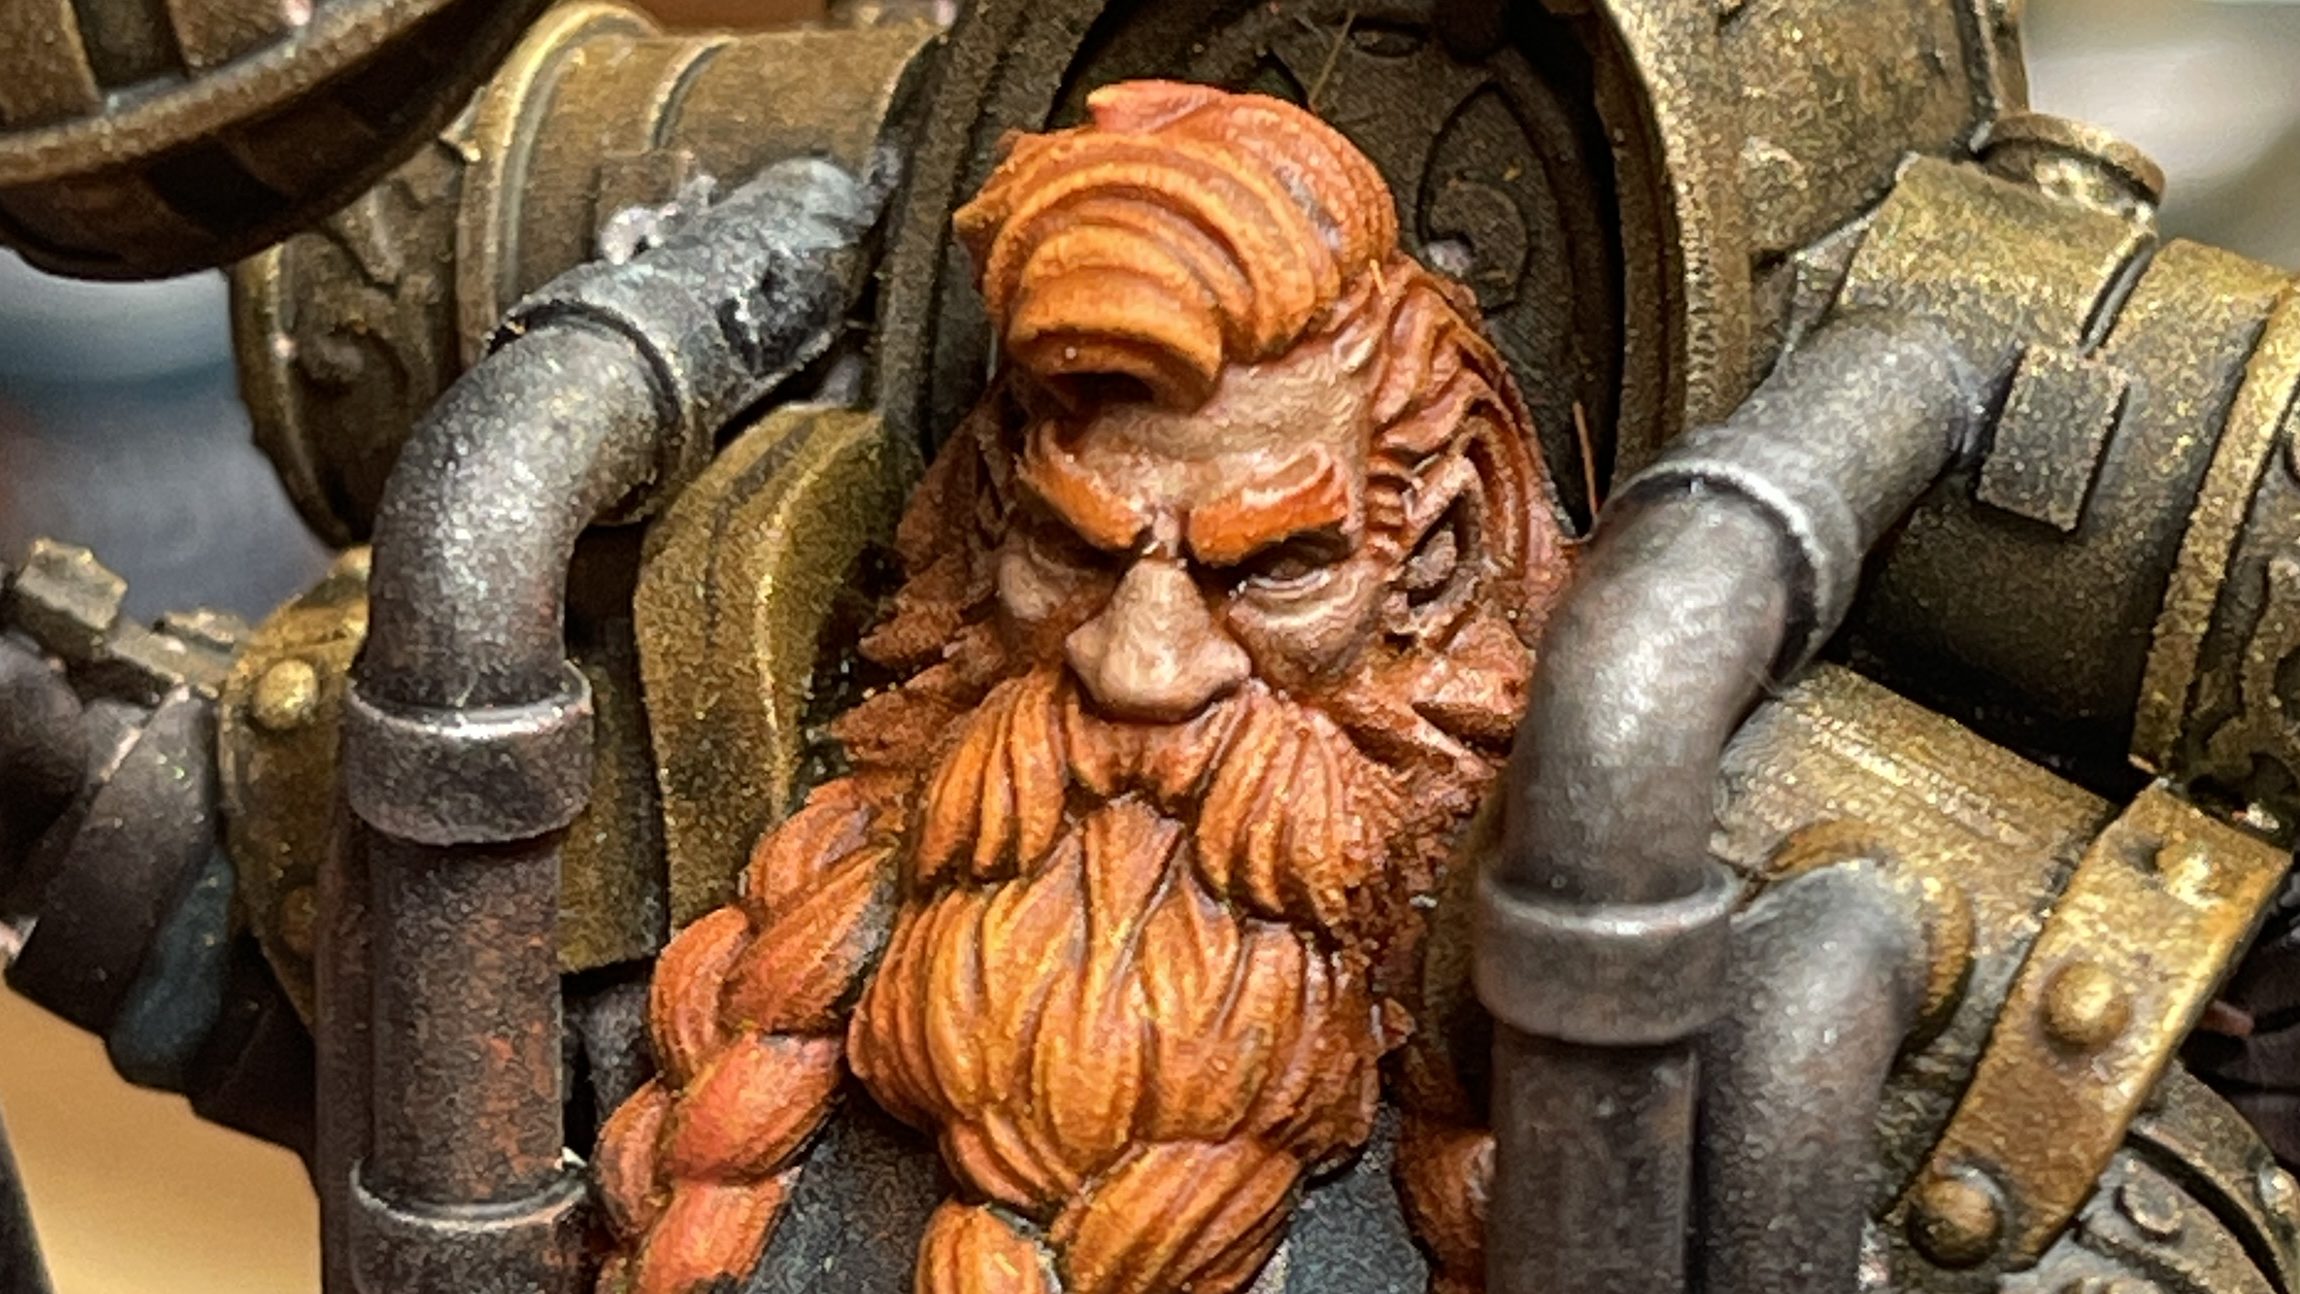
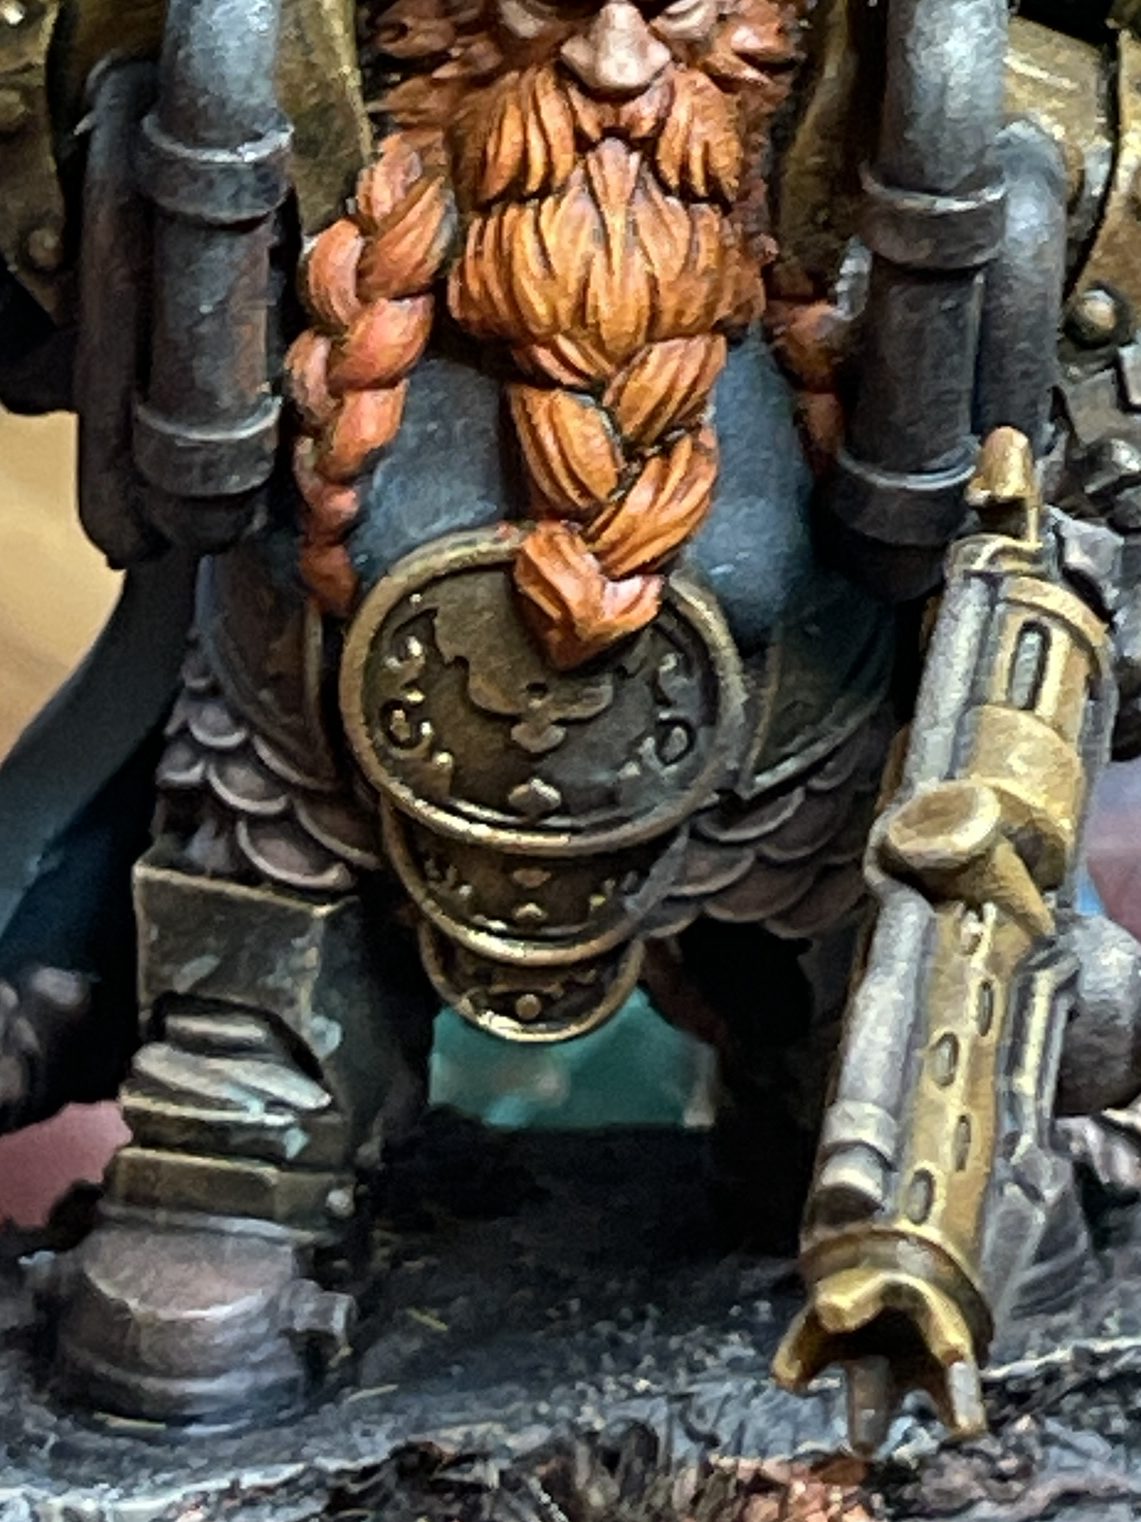
4. Apply base colour to hair and beard
- Gryph-Hound Orange (Citadel — Contrast)
5. Paint shirt & cloak
Combine the two colours and apply to fabric areas.
- Akhelian Green (Citadel — Contrast)
- ⬢ Basilicanum Grey (Citadel — Contrast)
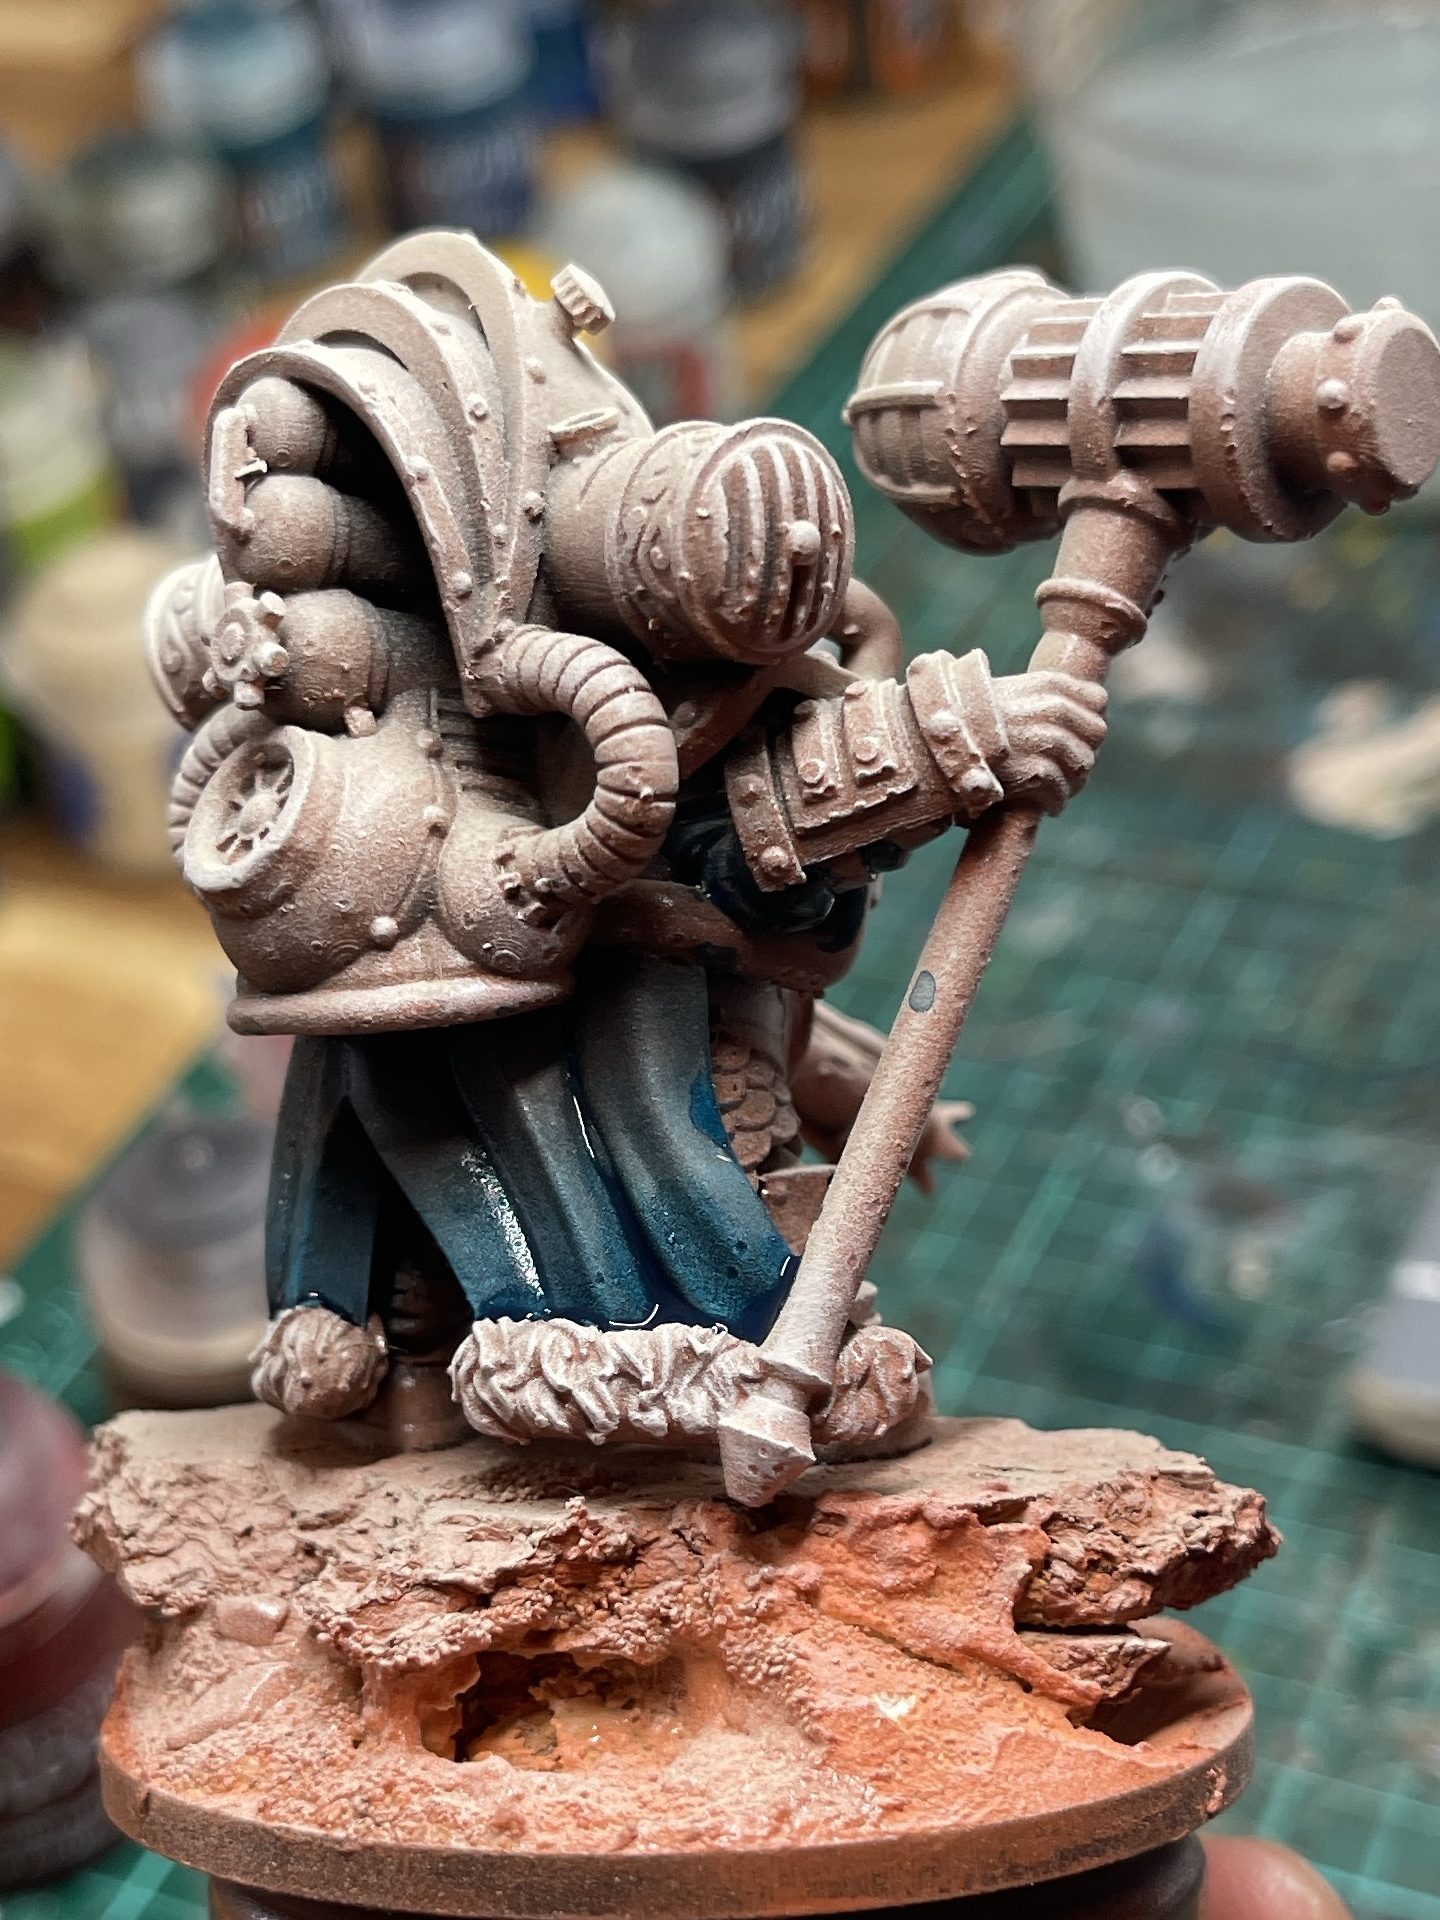
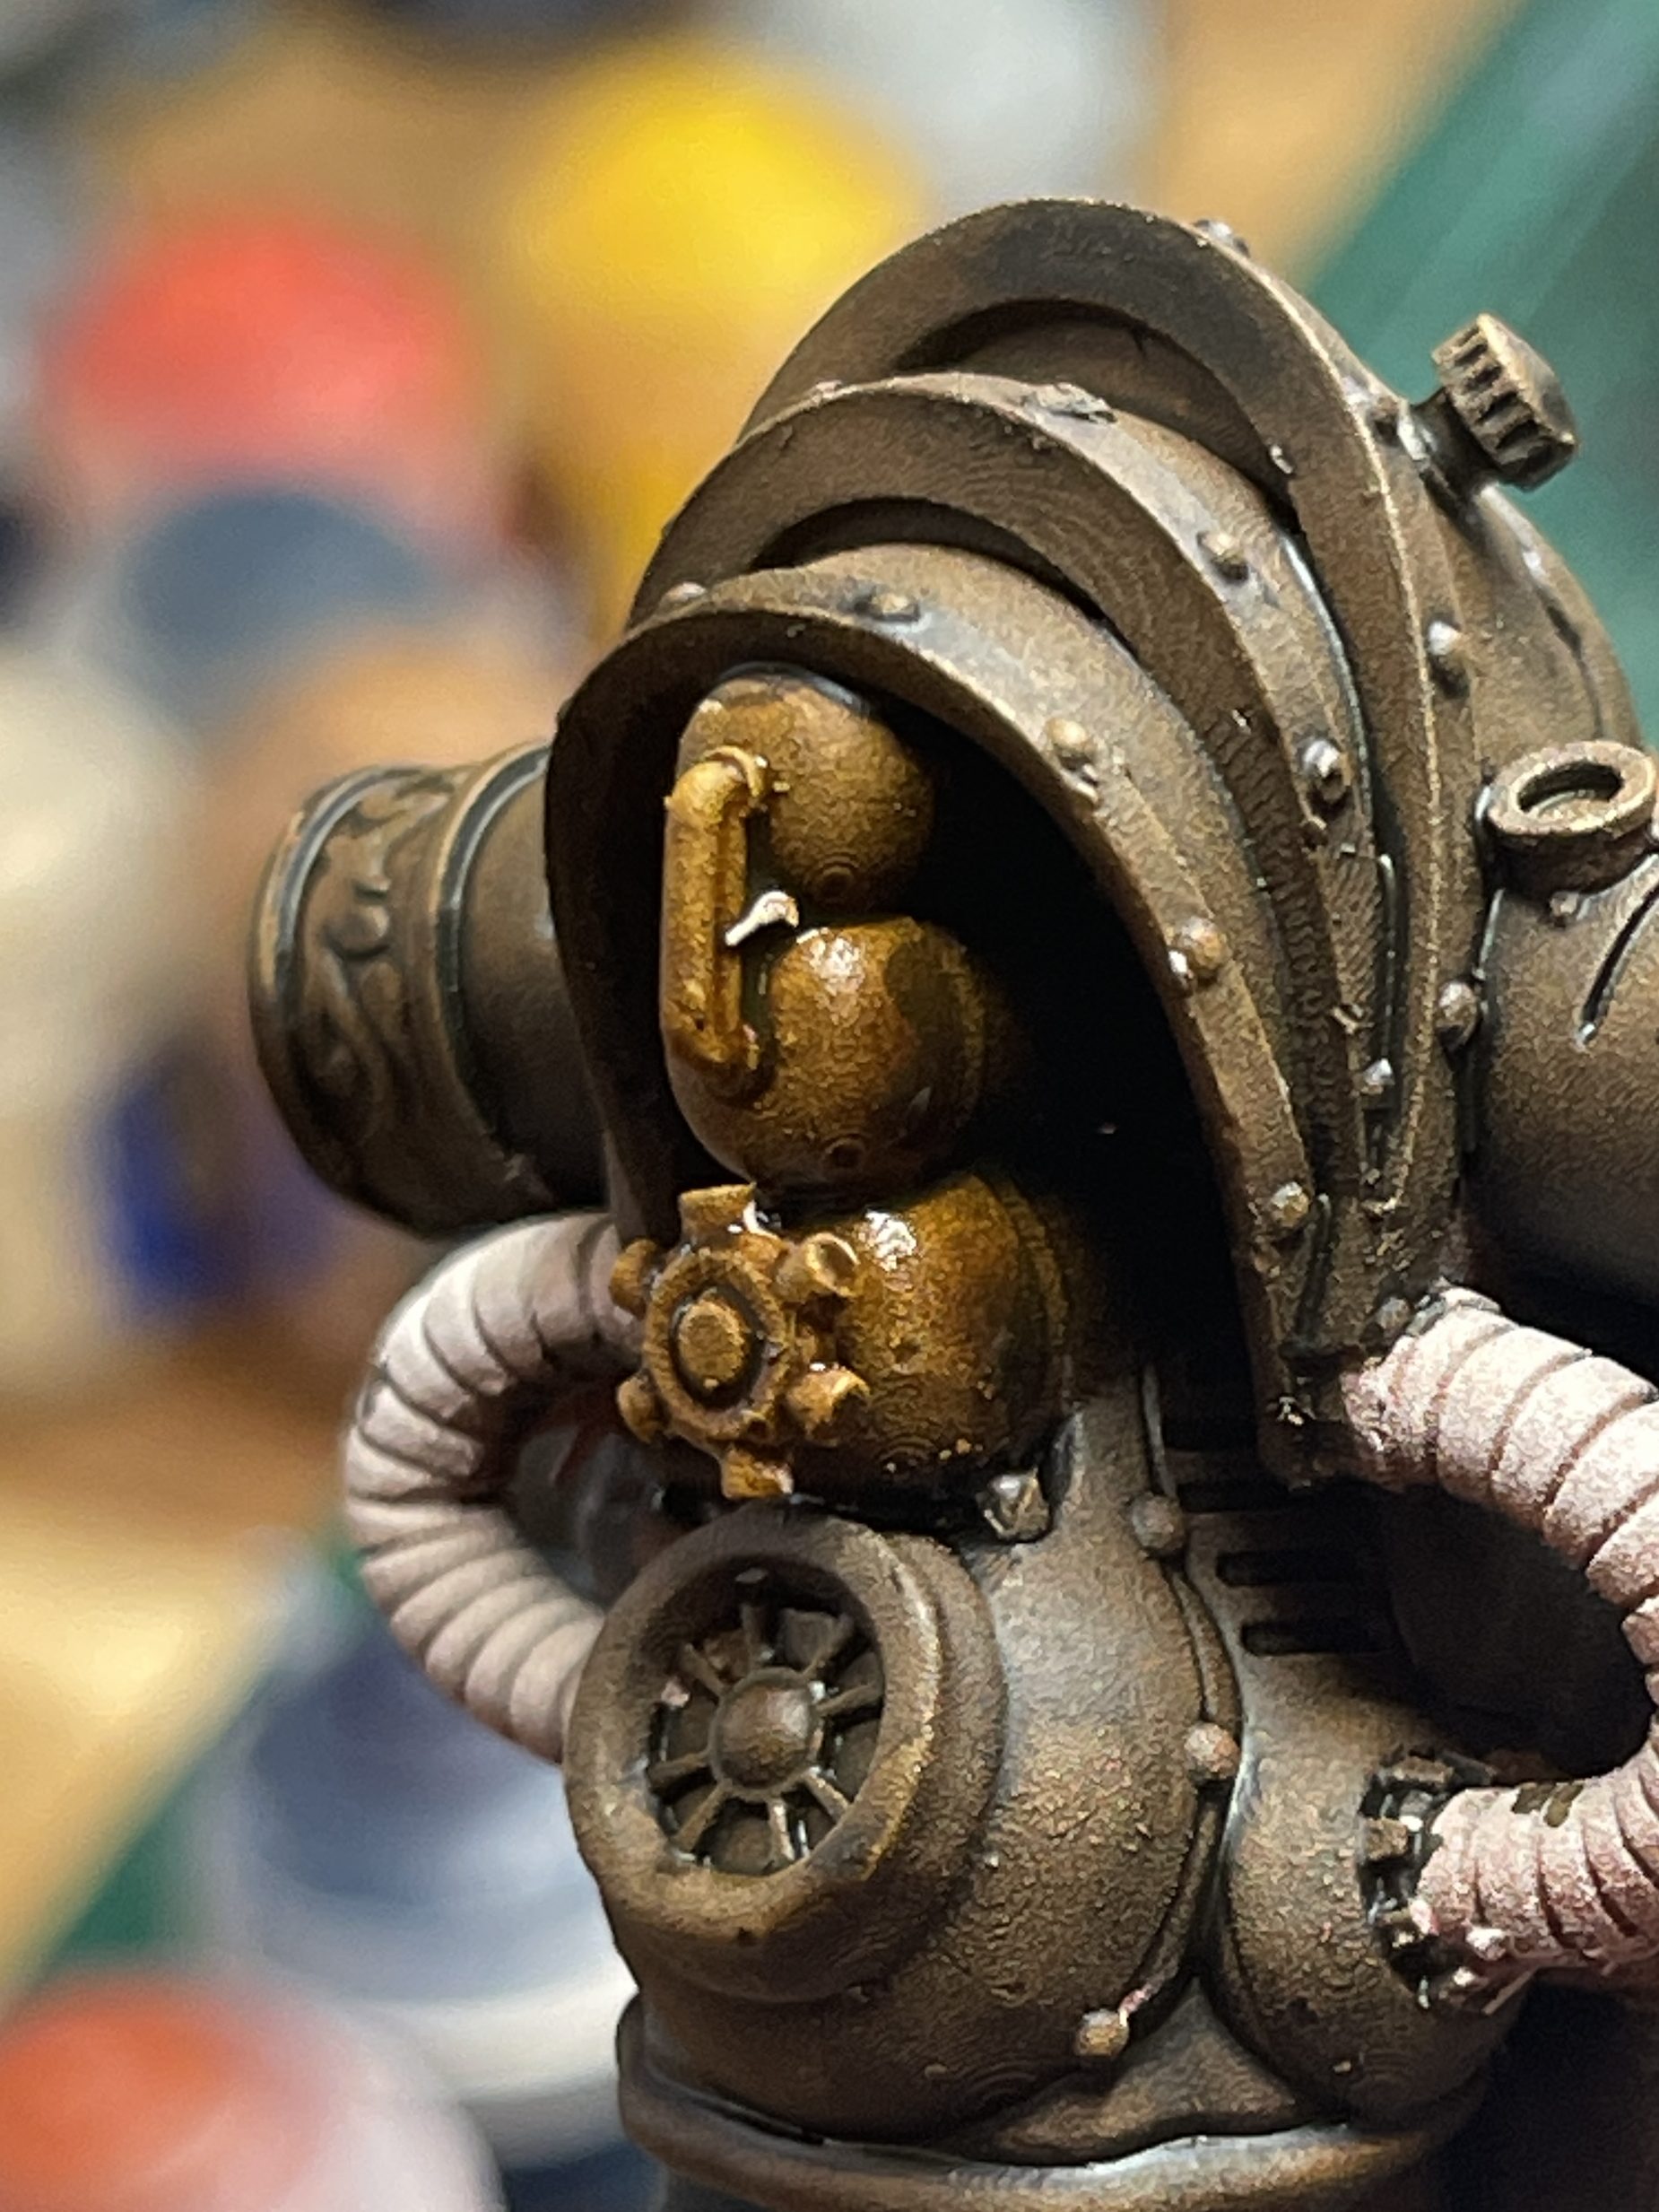
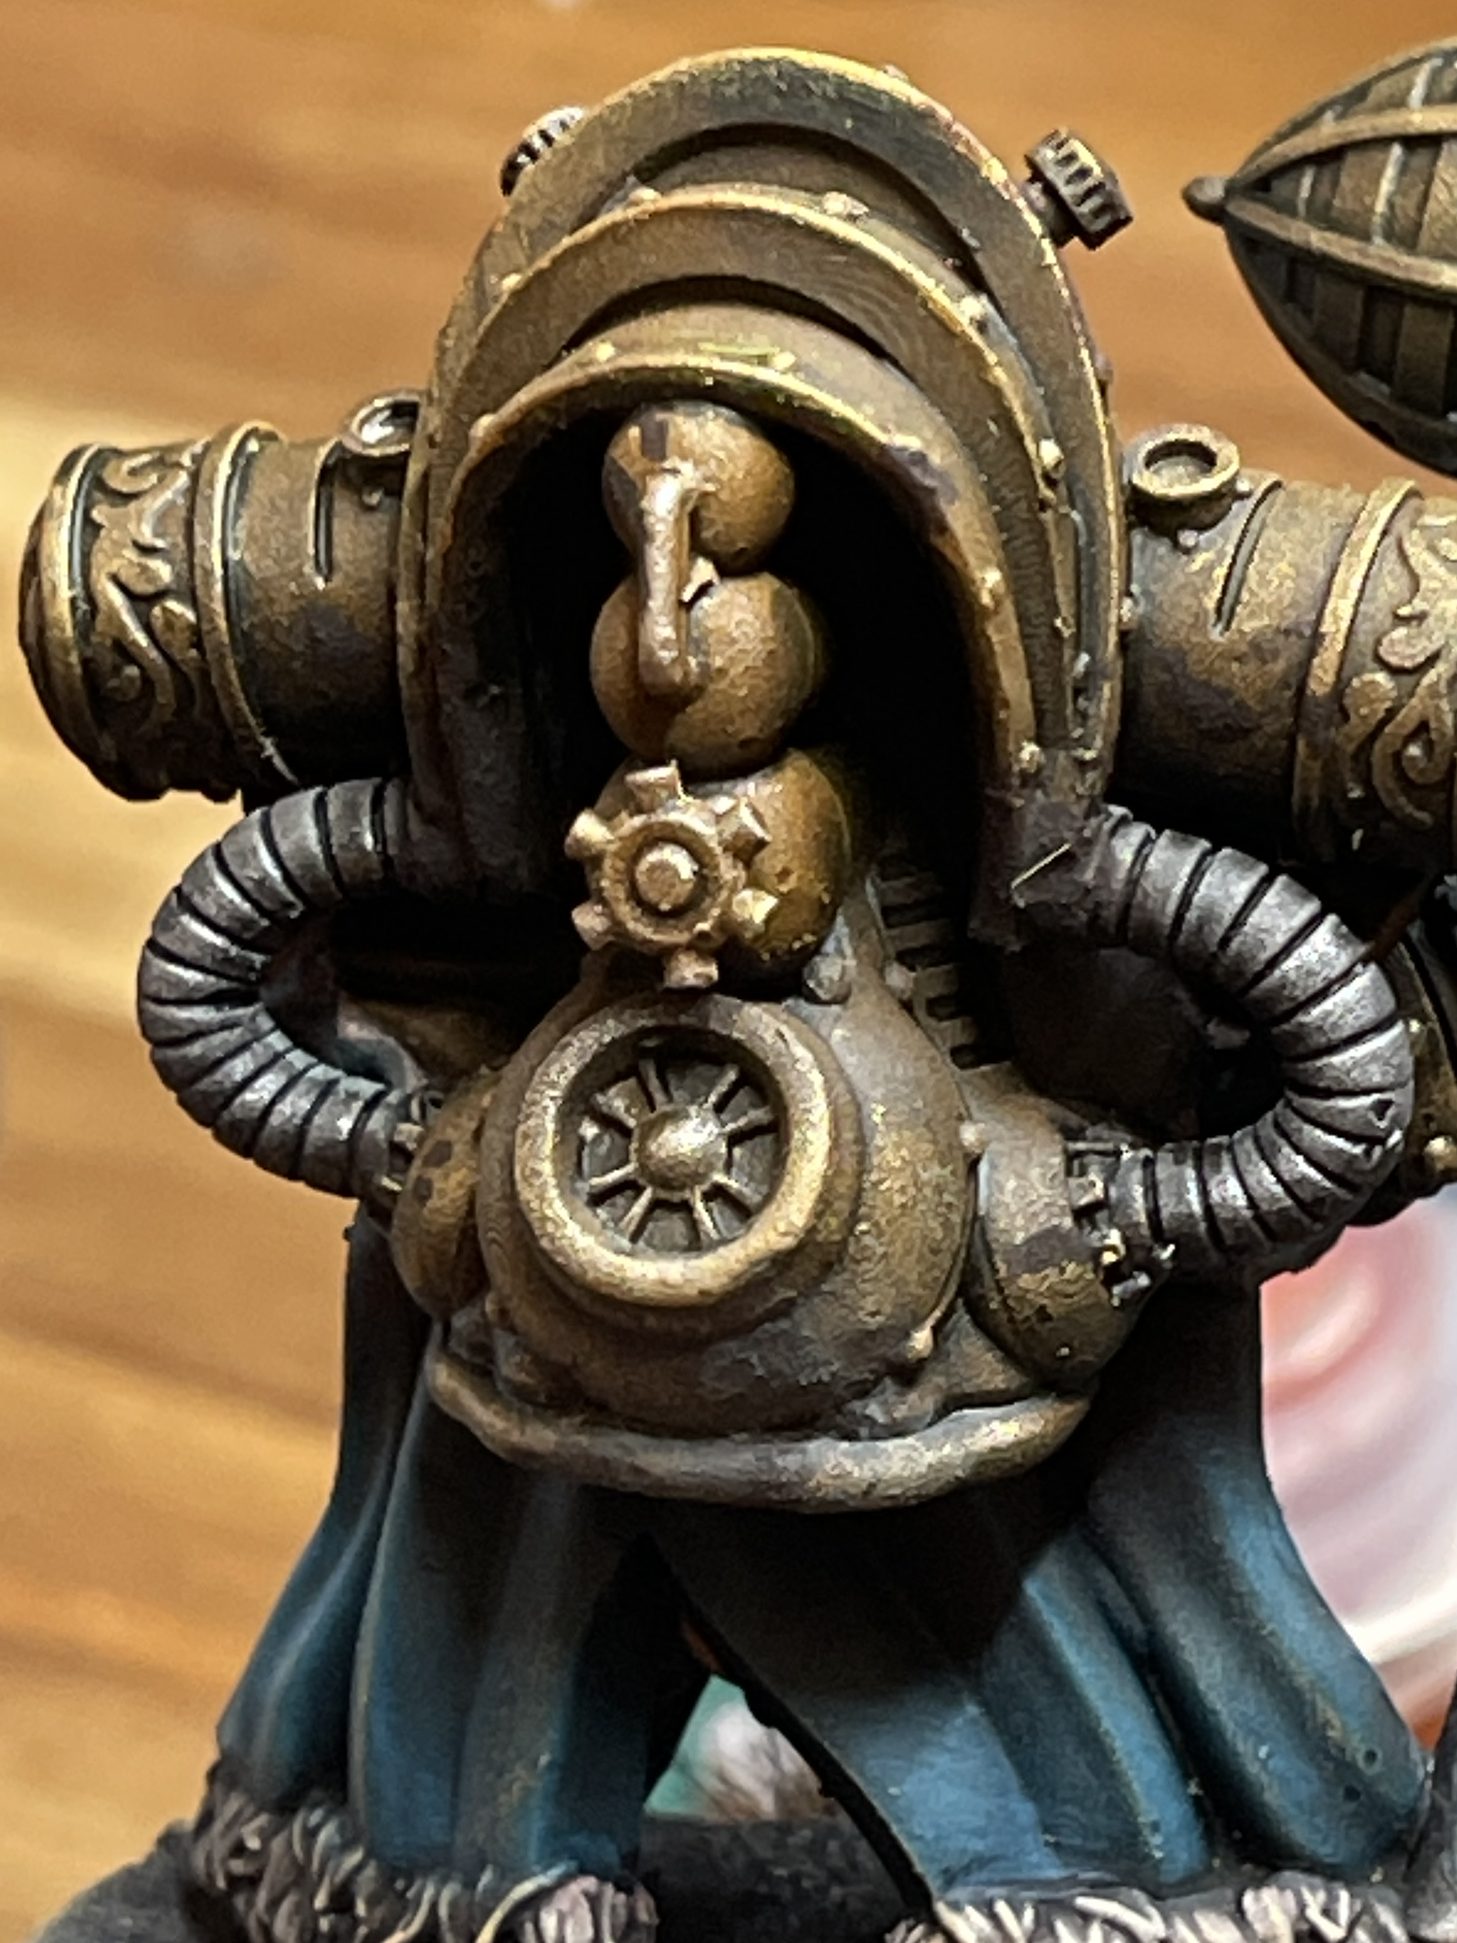
6. Apply base colour to armour and hammer head
- ⬢ Garaghak’s Sewer (Citadel — Contrast)
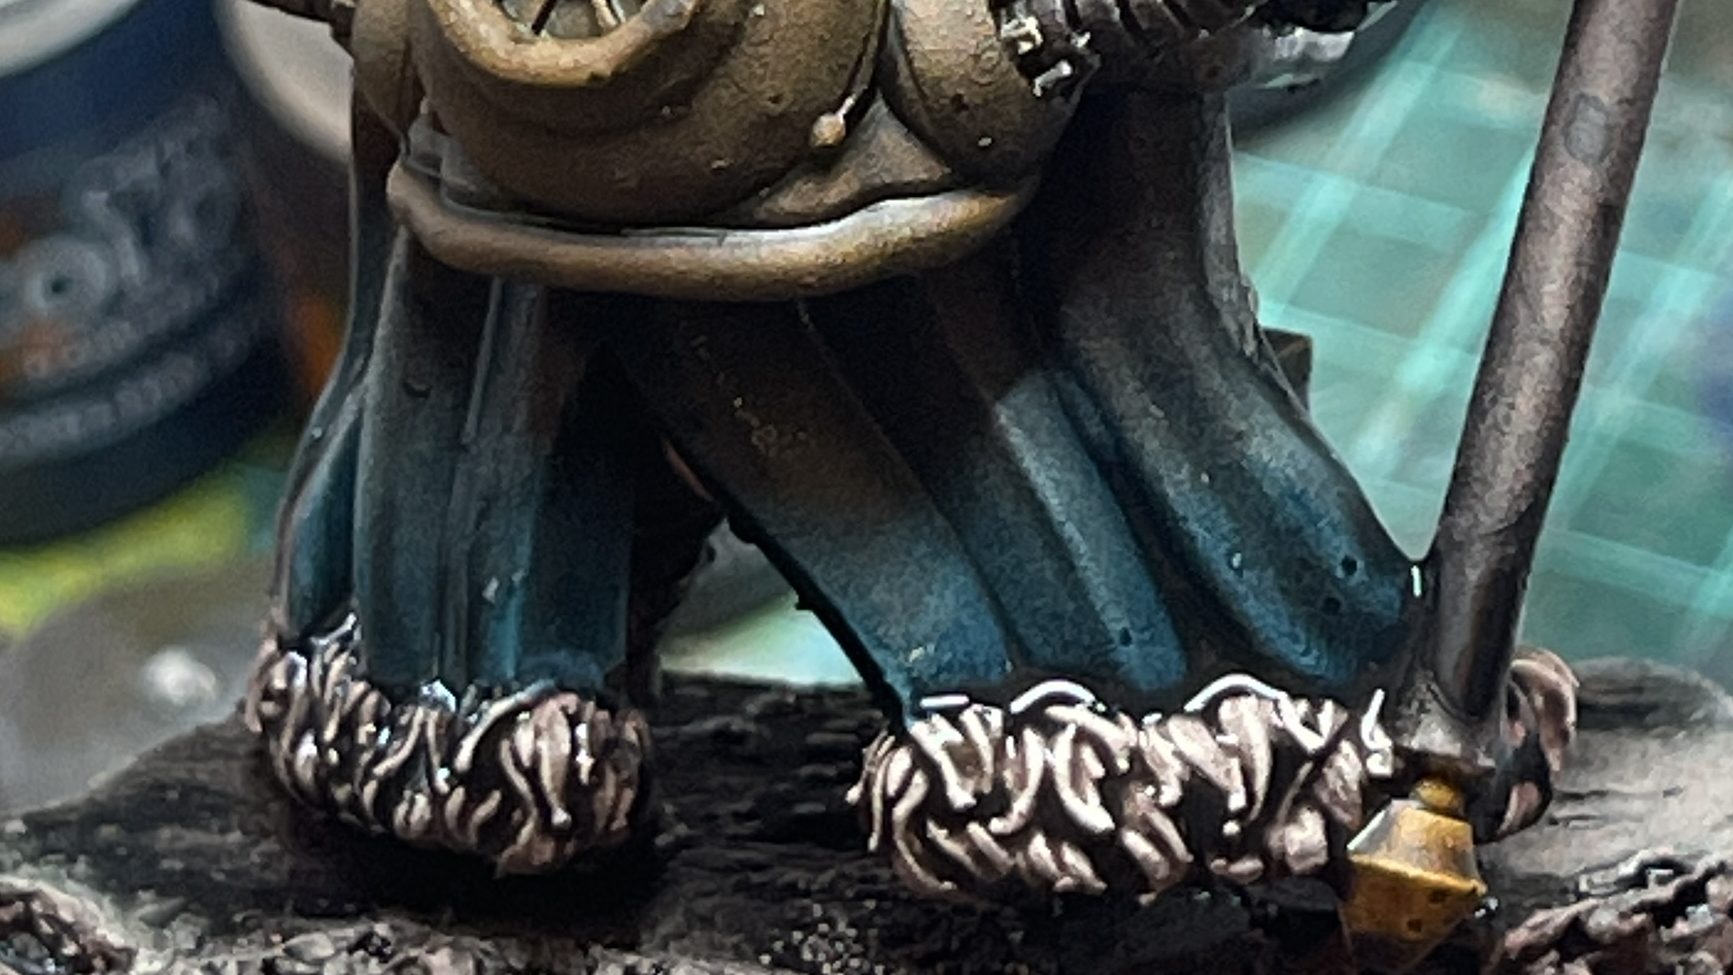
7. Paint pants fabric
- ⬢ Basilicanum Grey (Citadel — Contrast)
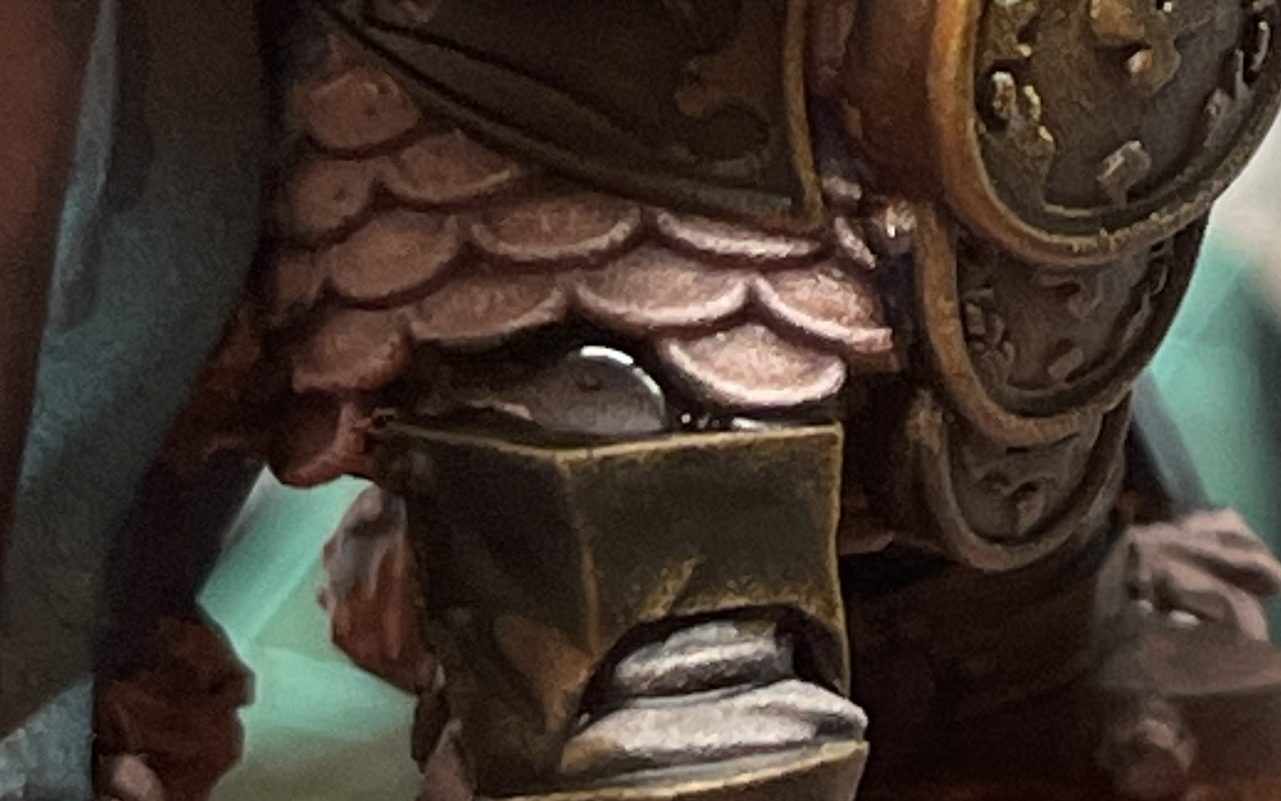
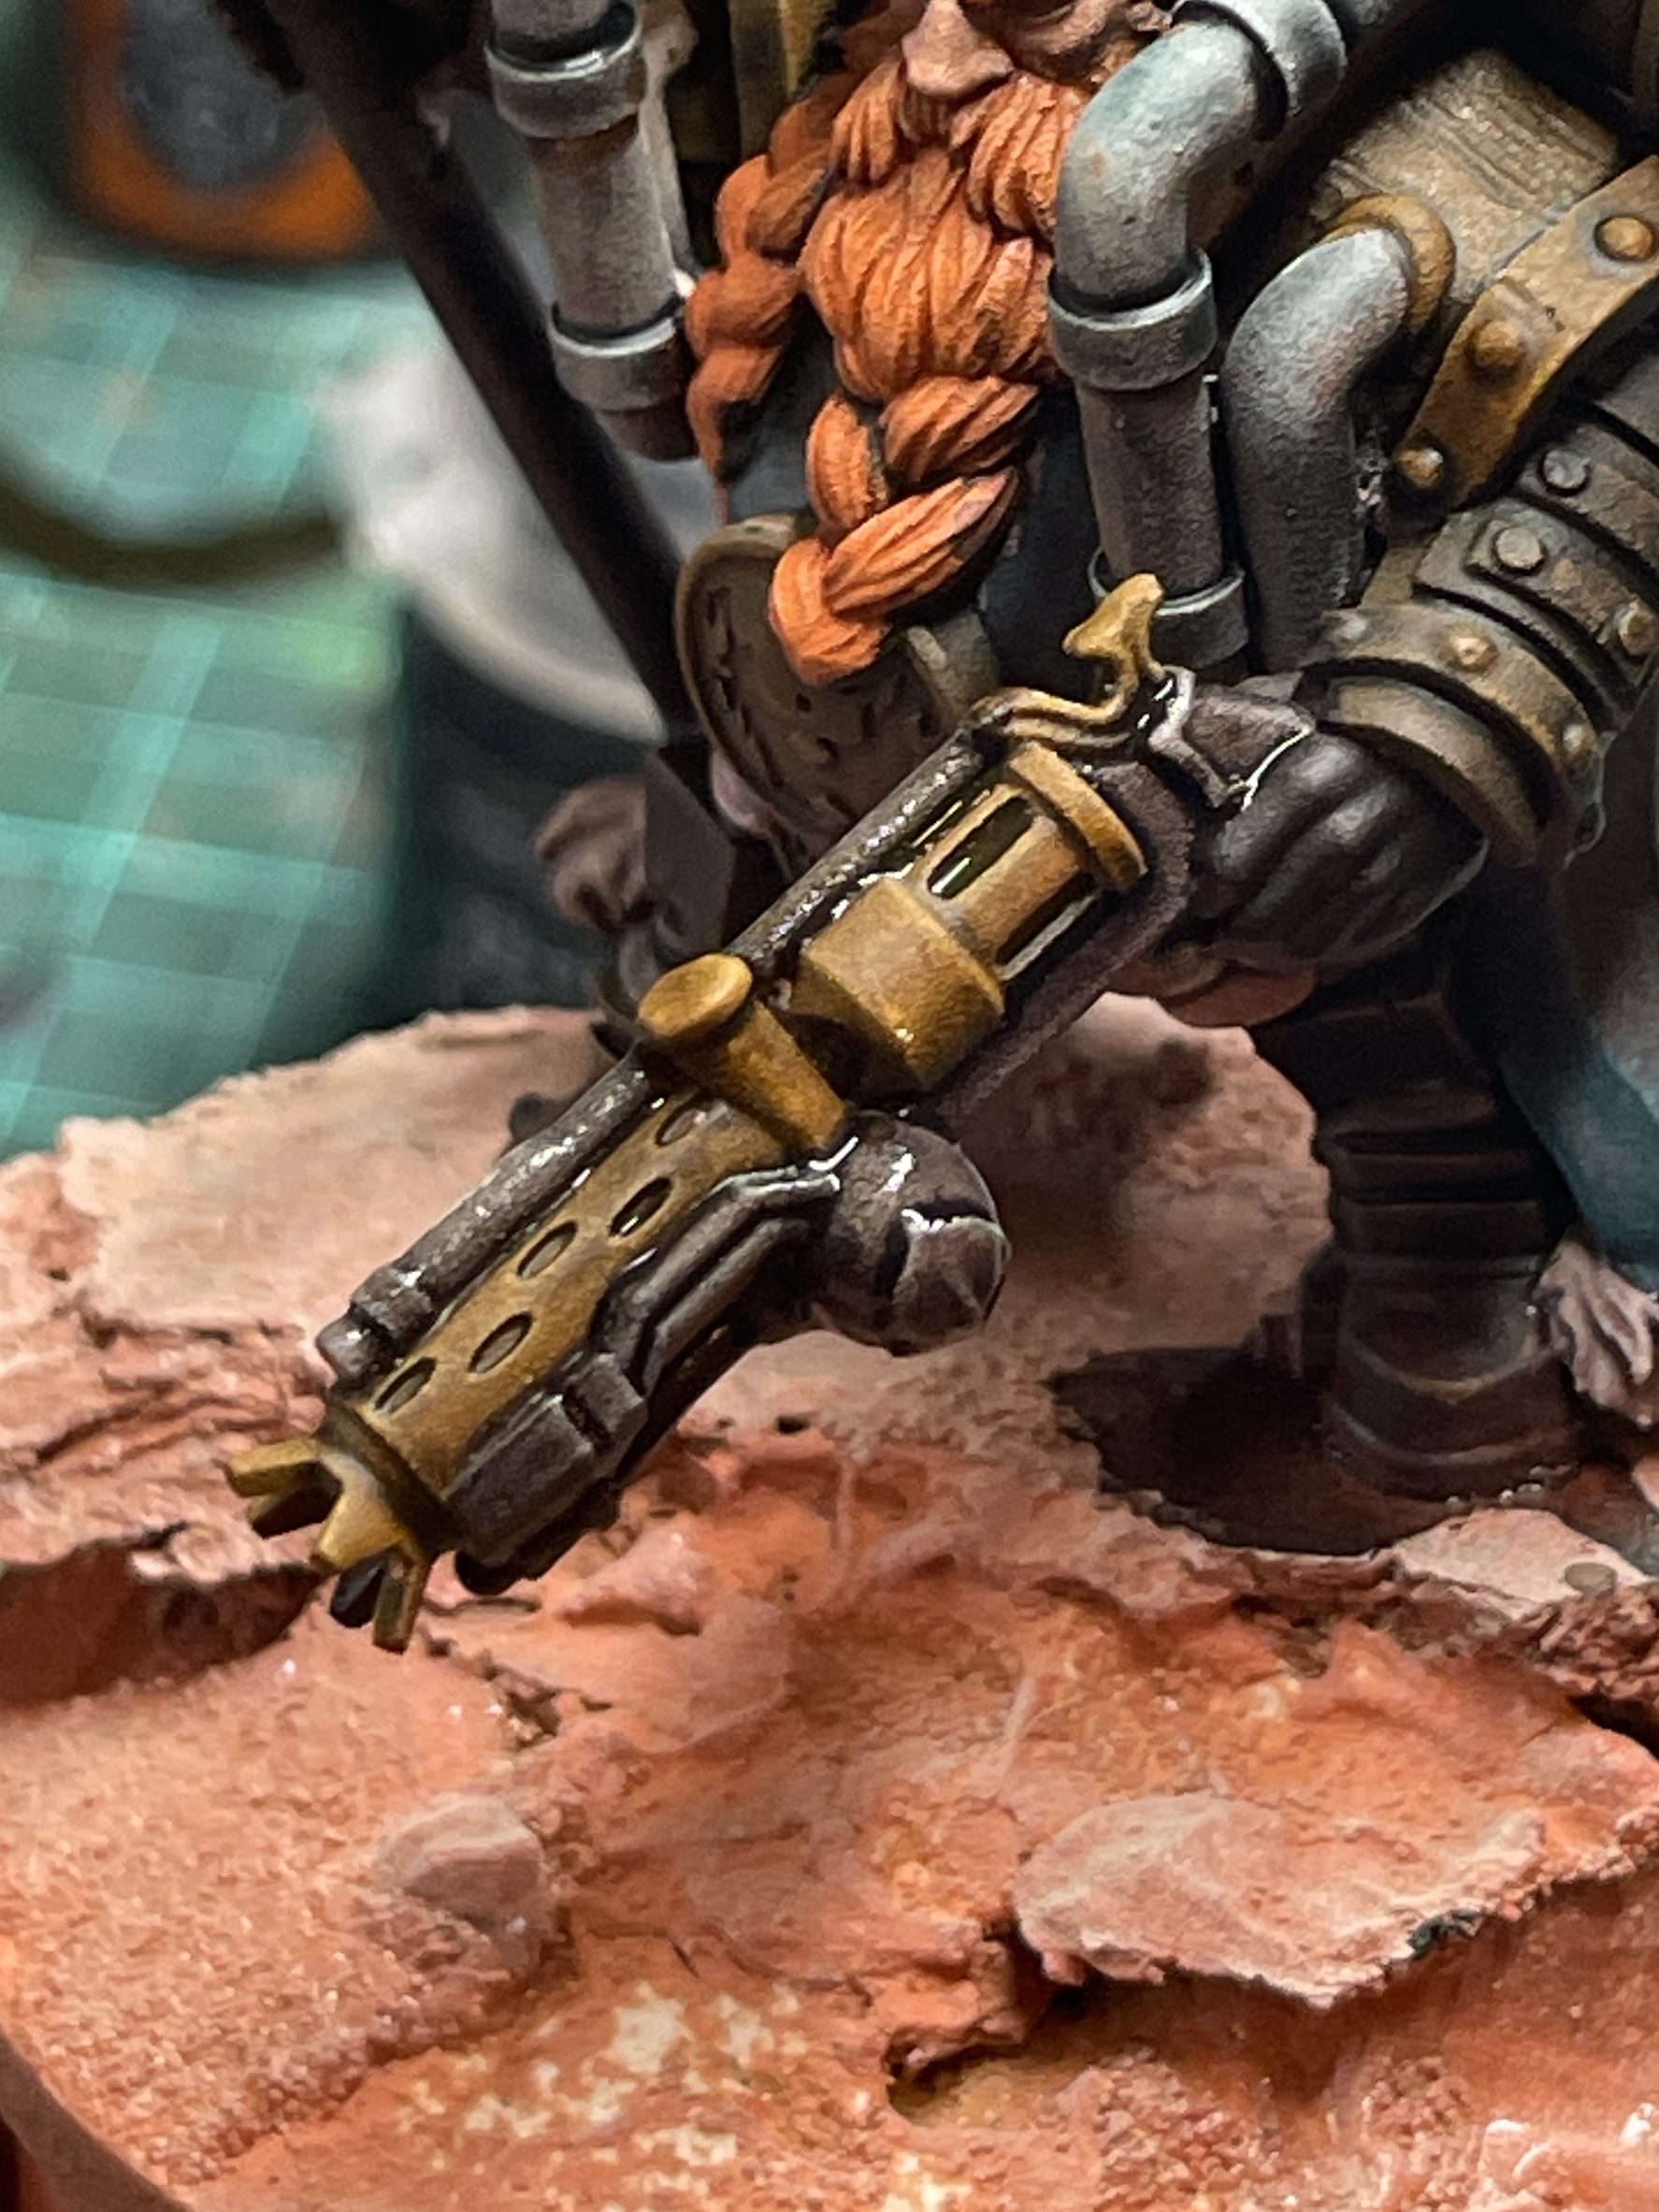
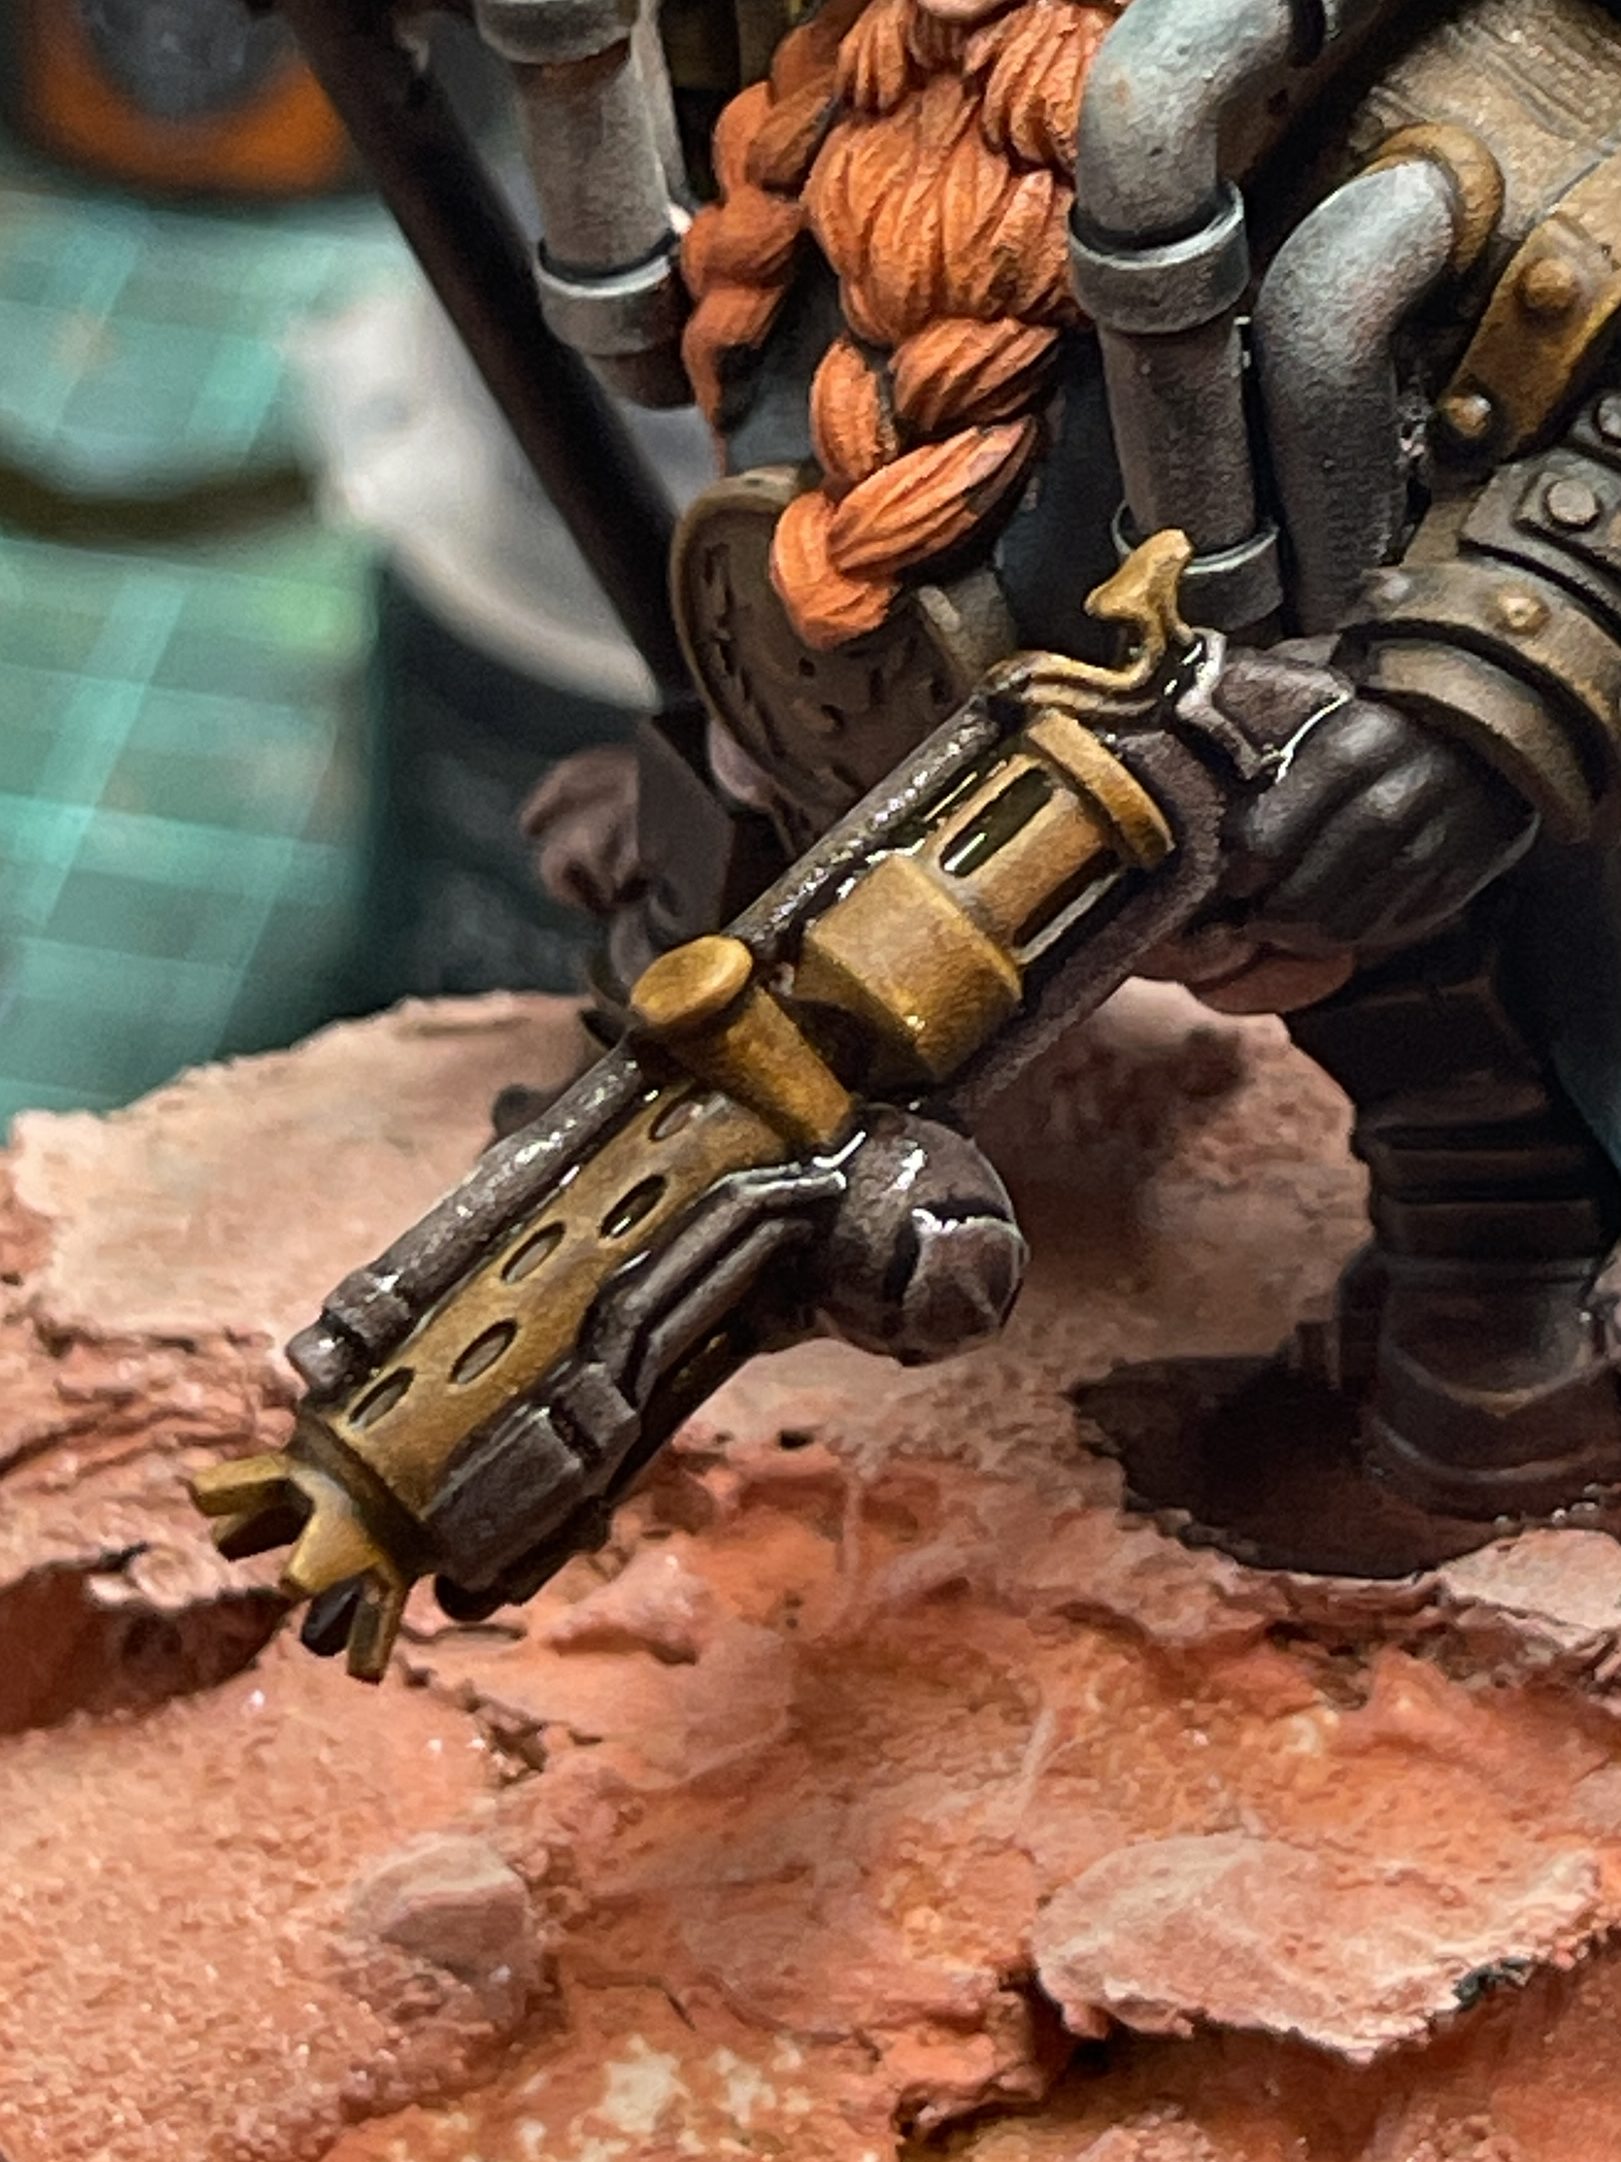
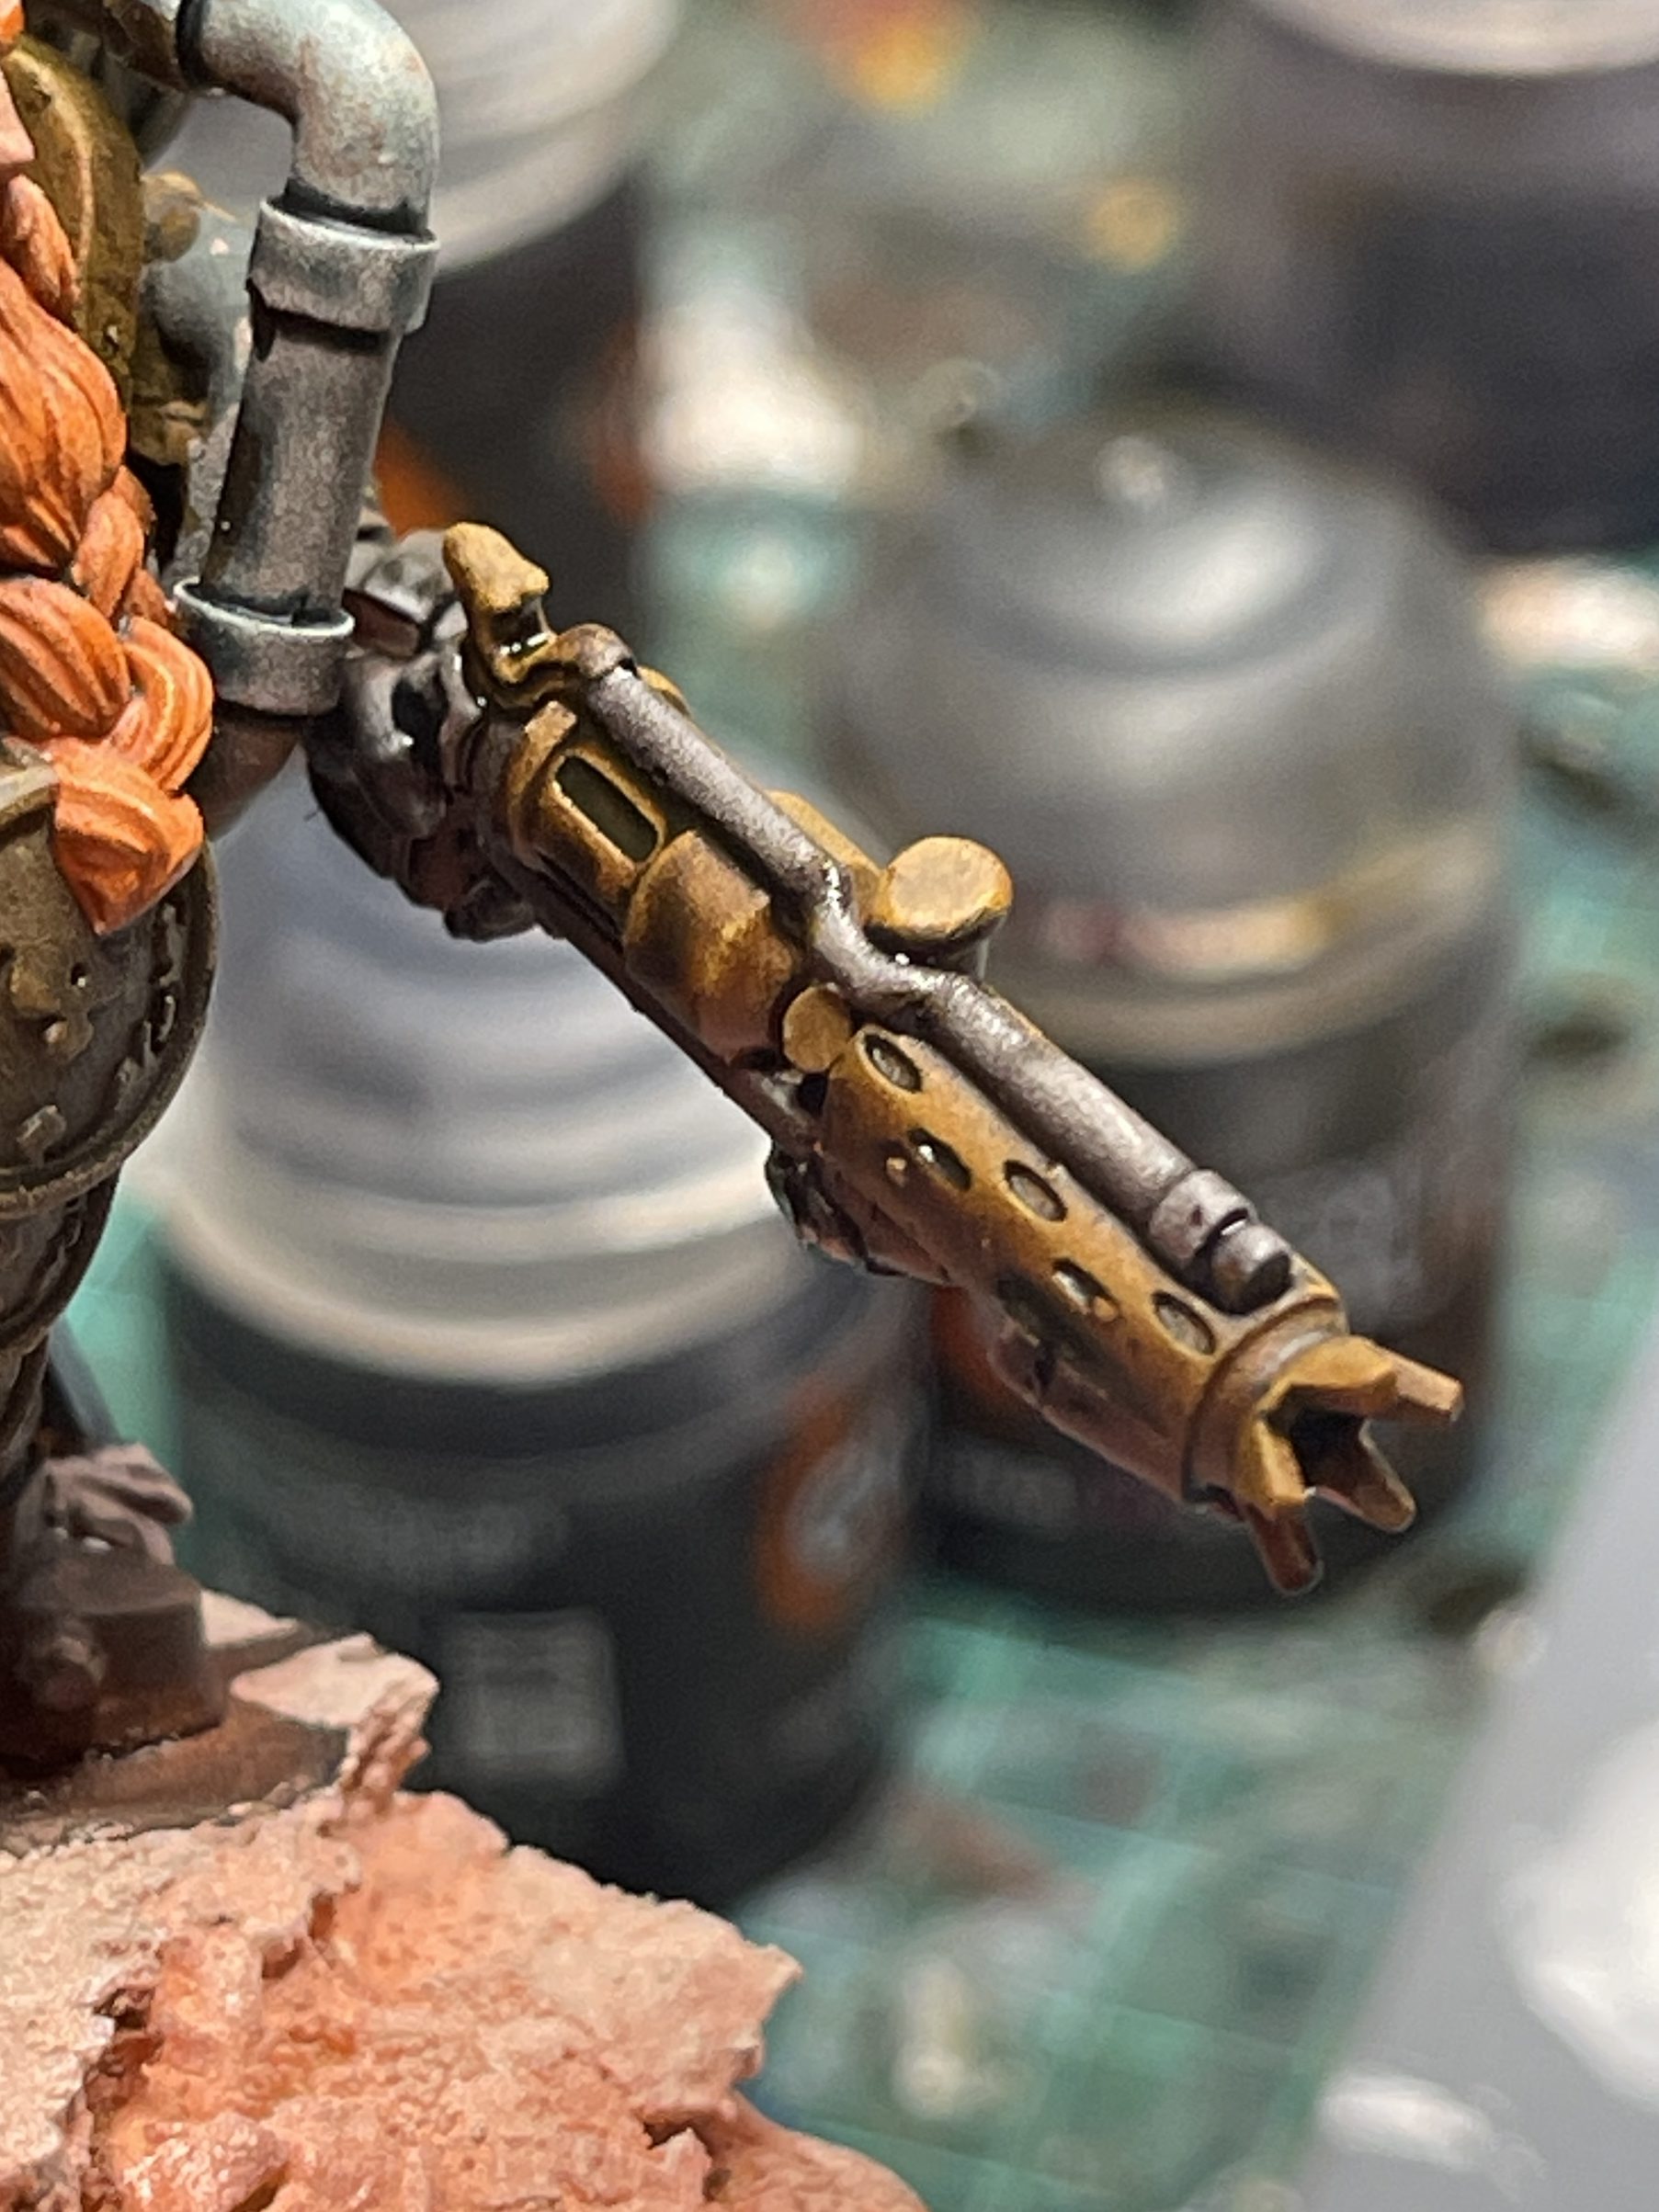
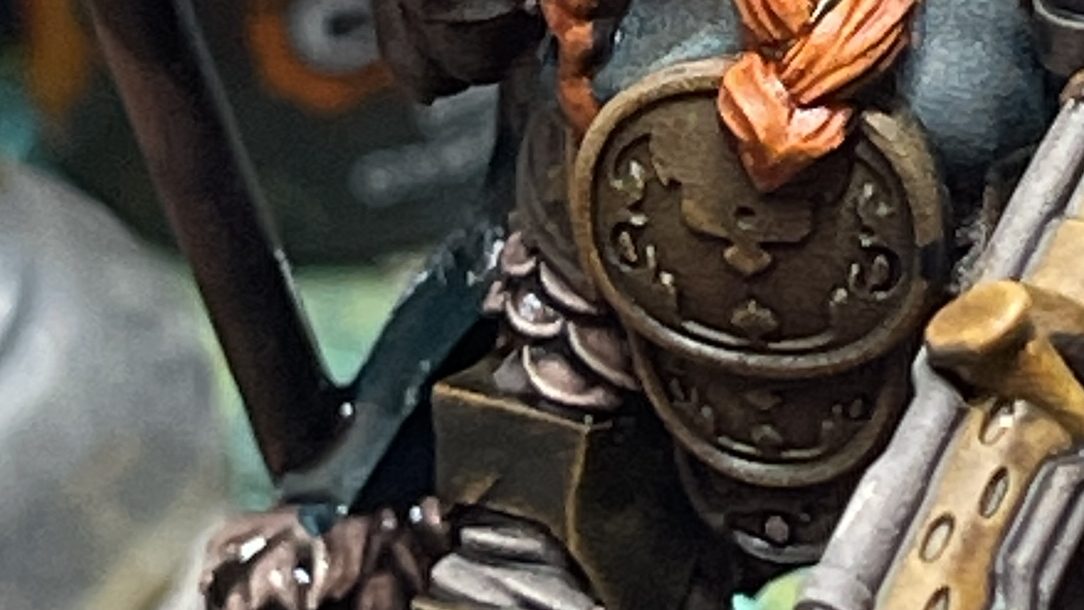
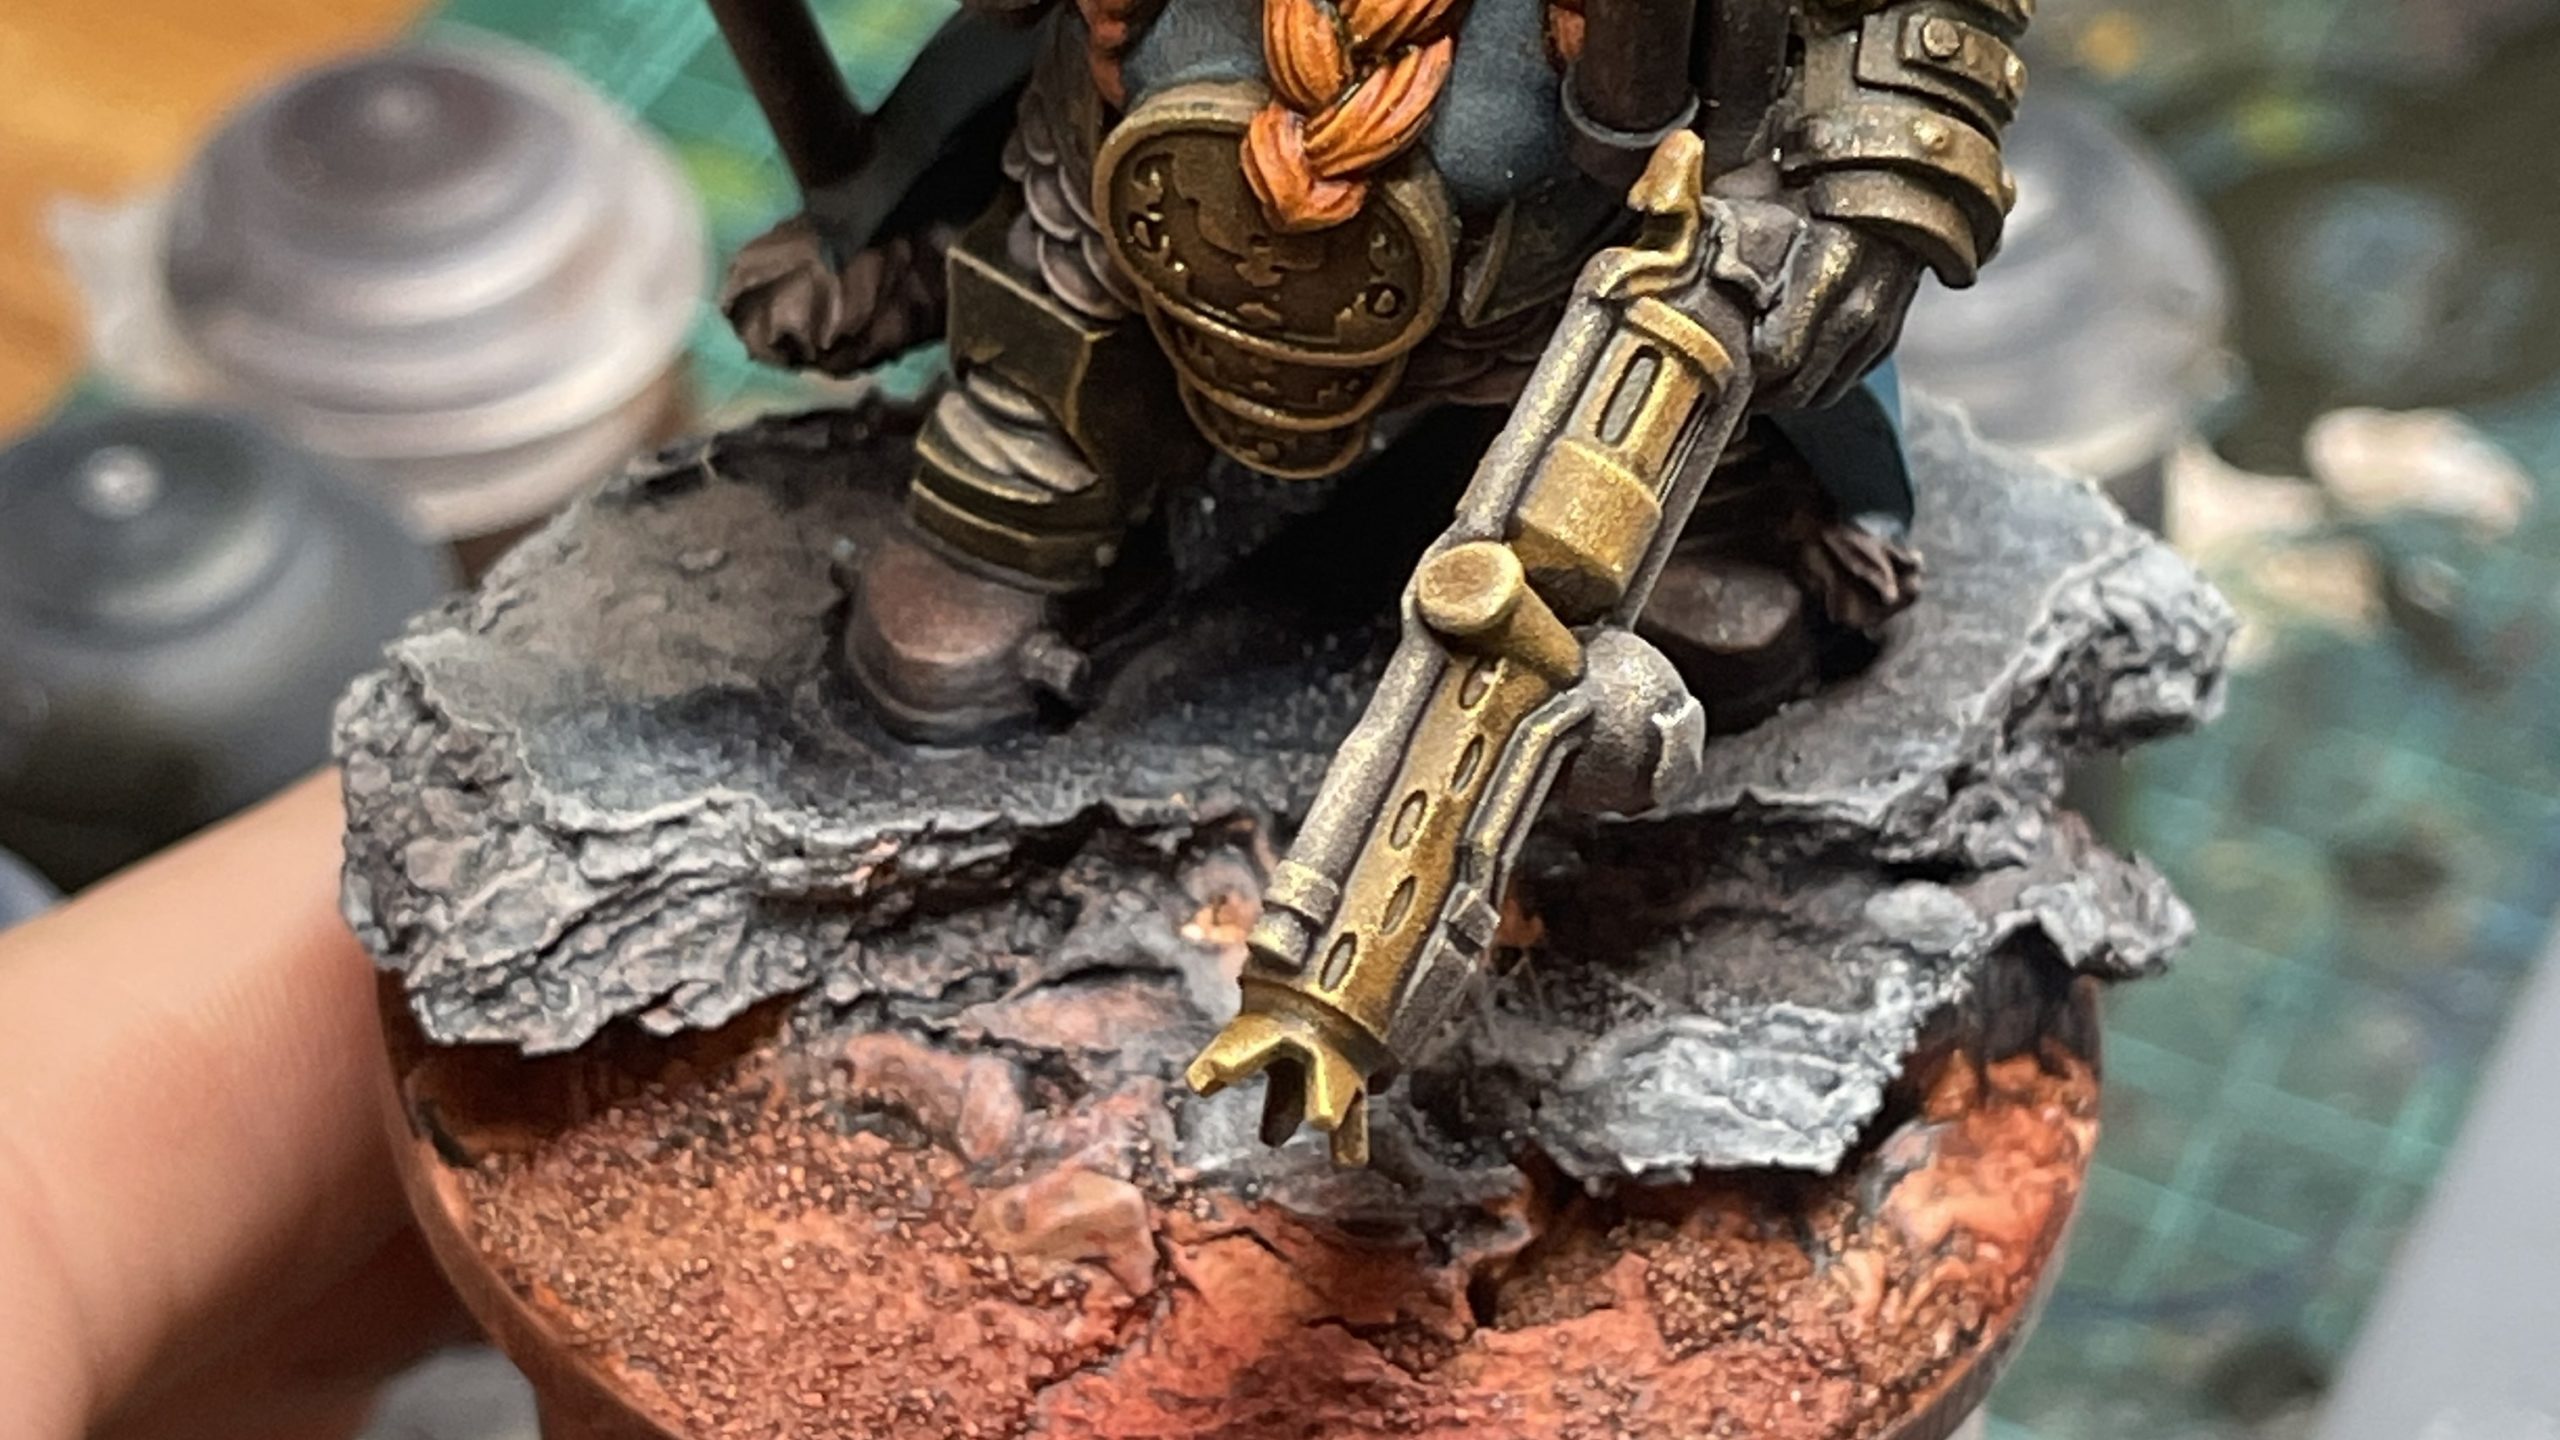
8. Paint pauldrons, gun barrels and tank
- ⬢ Snakebite Leather (Citadel — Contrast)
9. Paint pauldron straps and leather boots
- ⬢ Cygor Brown (Citadel — Contrast)

10. Paint hammer shaft and gun details
- ⬢ Basilicanum Grey (Citadel — Contrast)
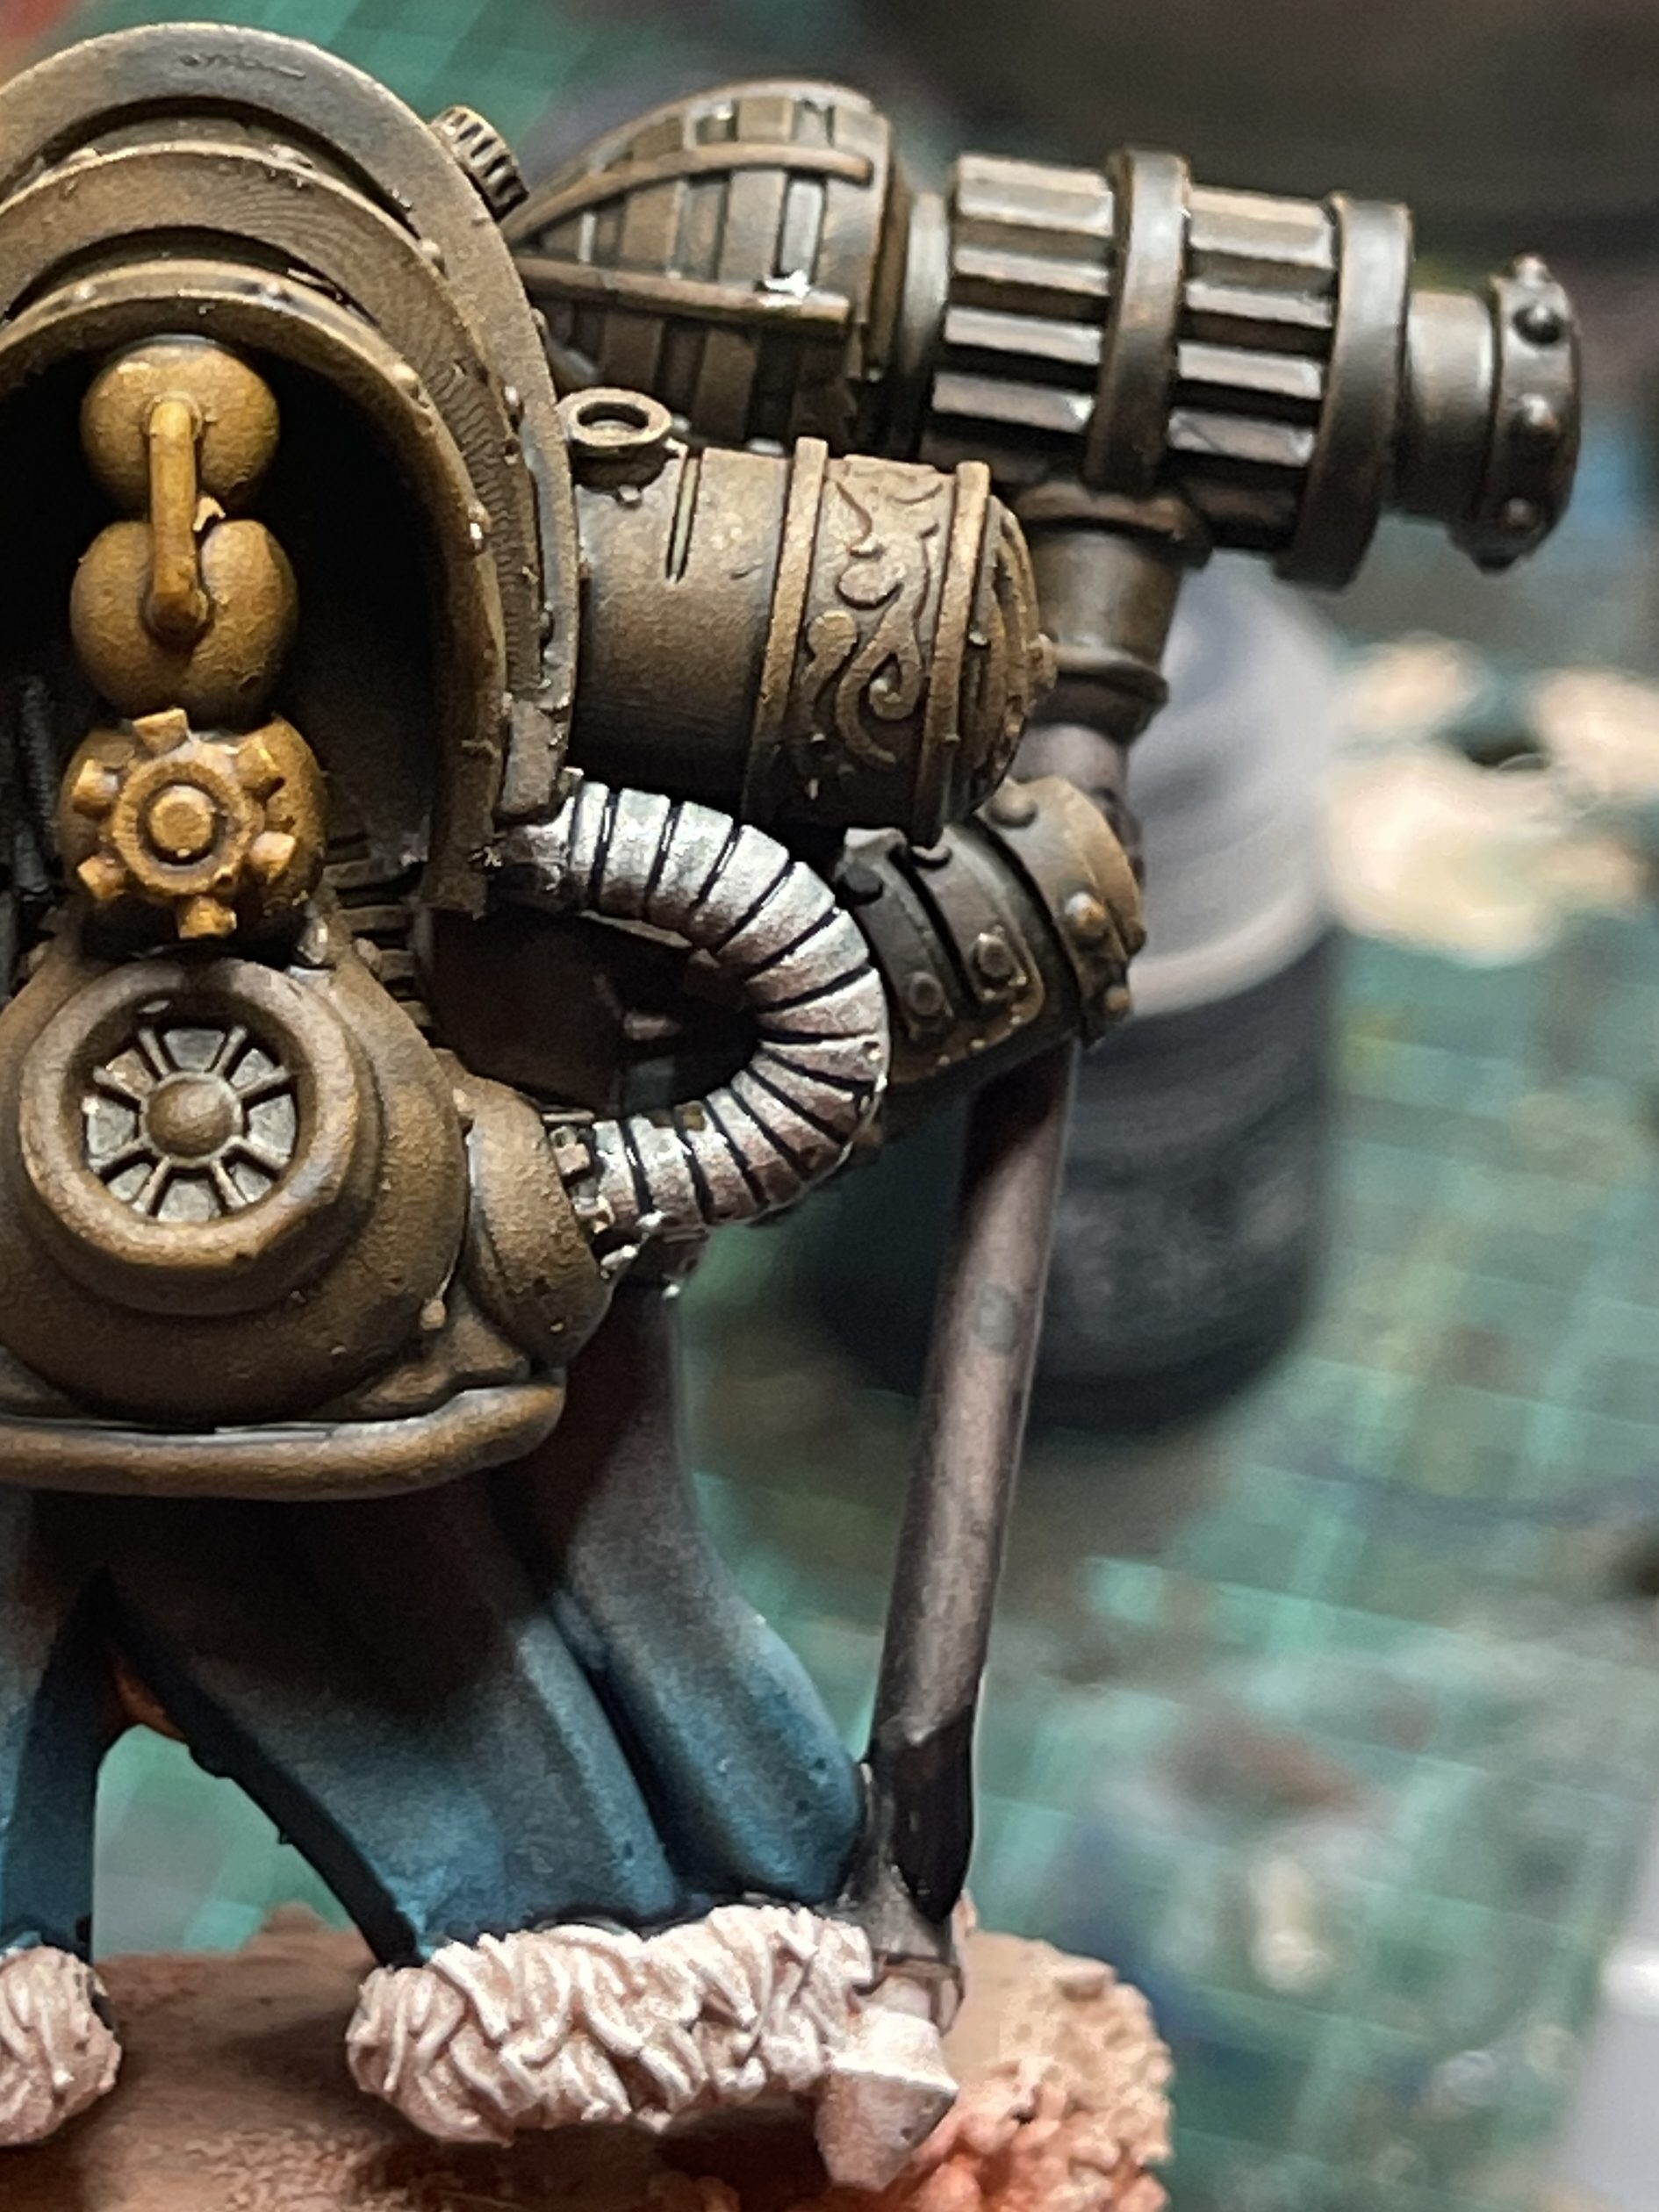
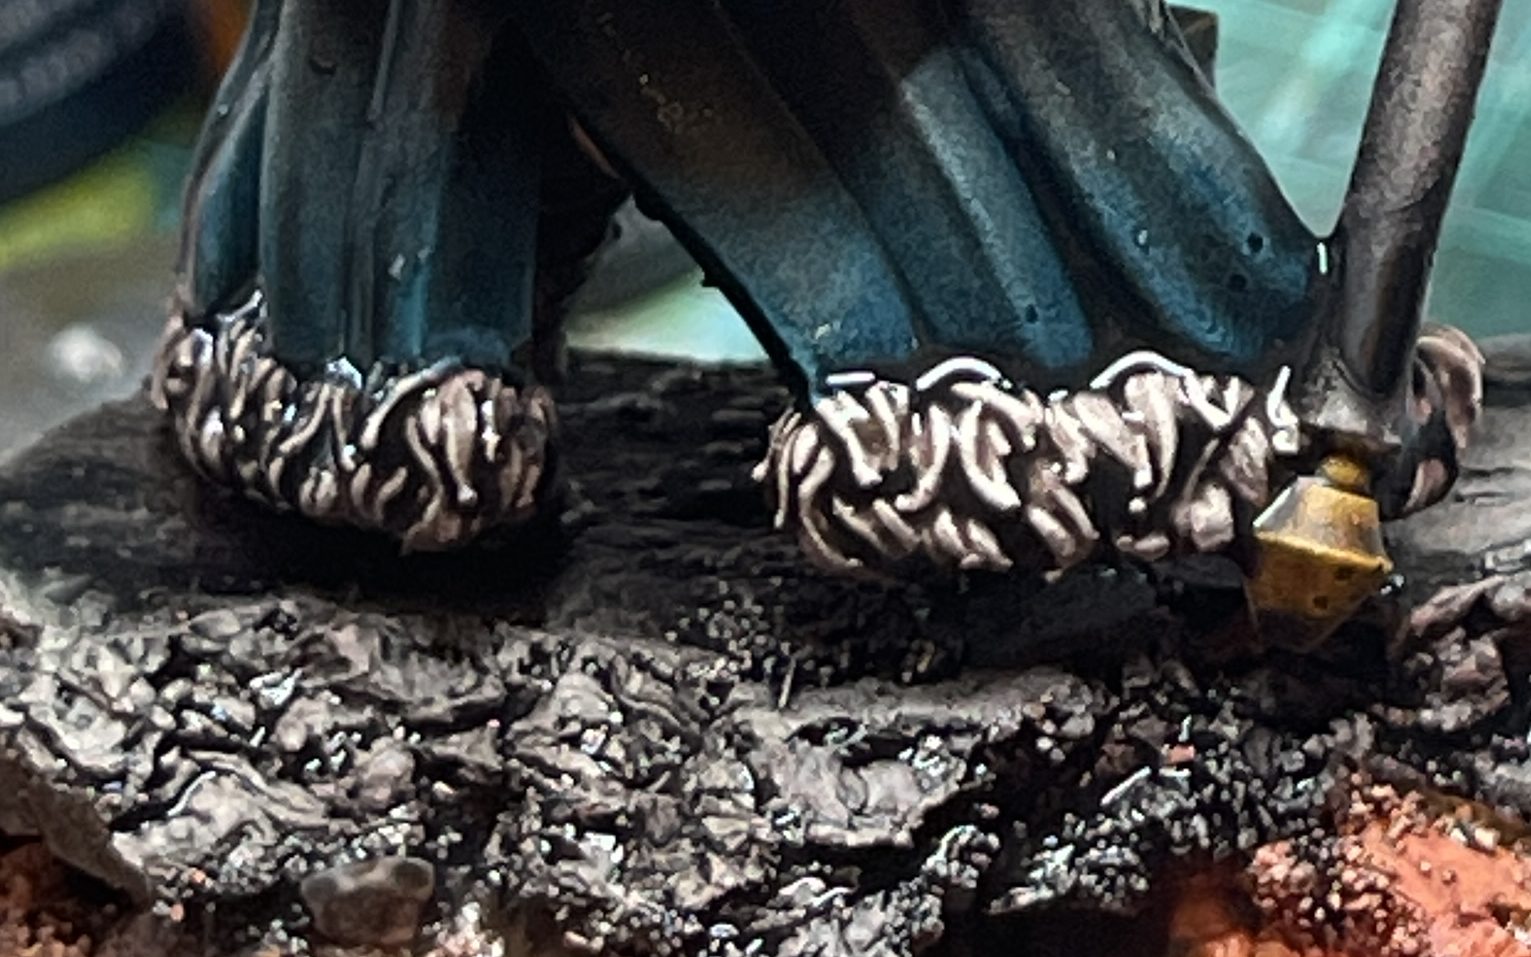
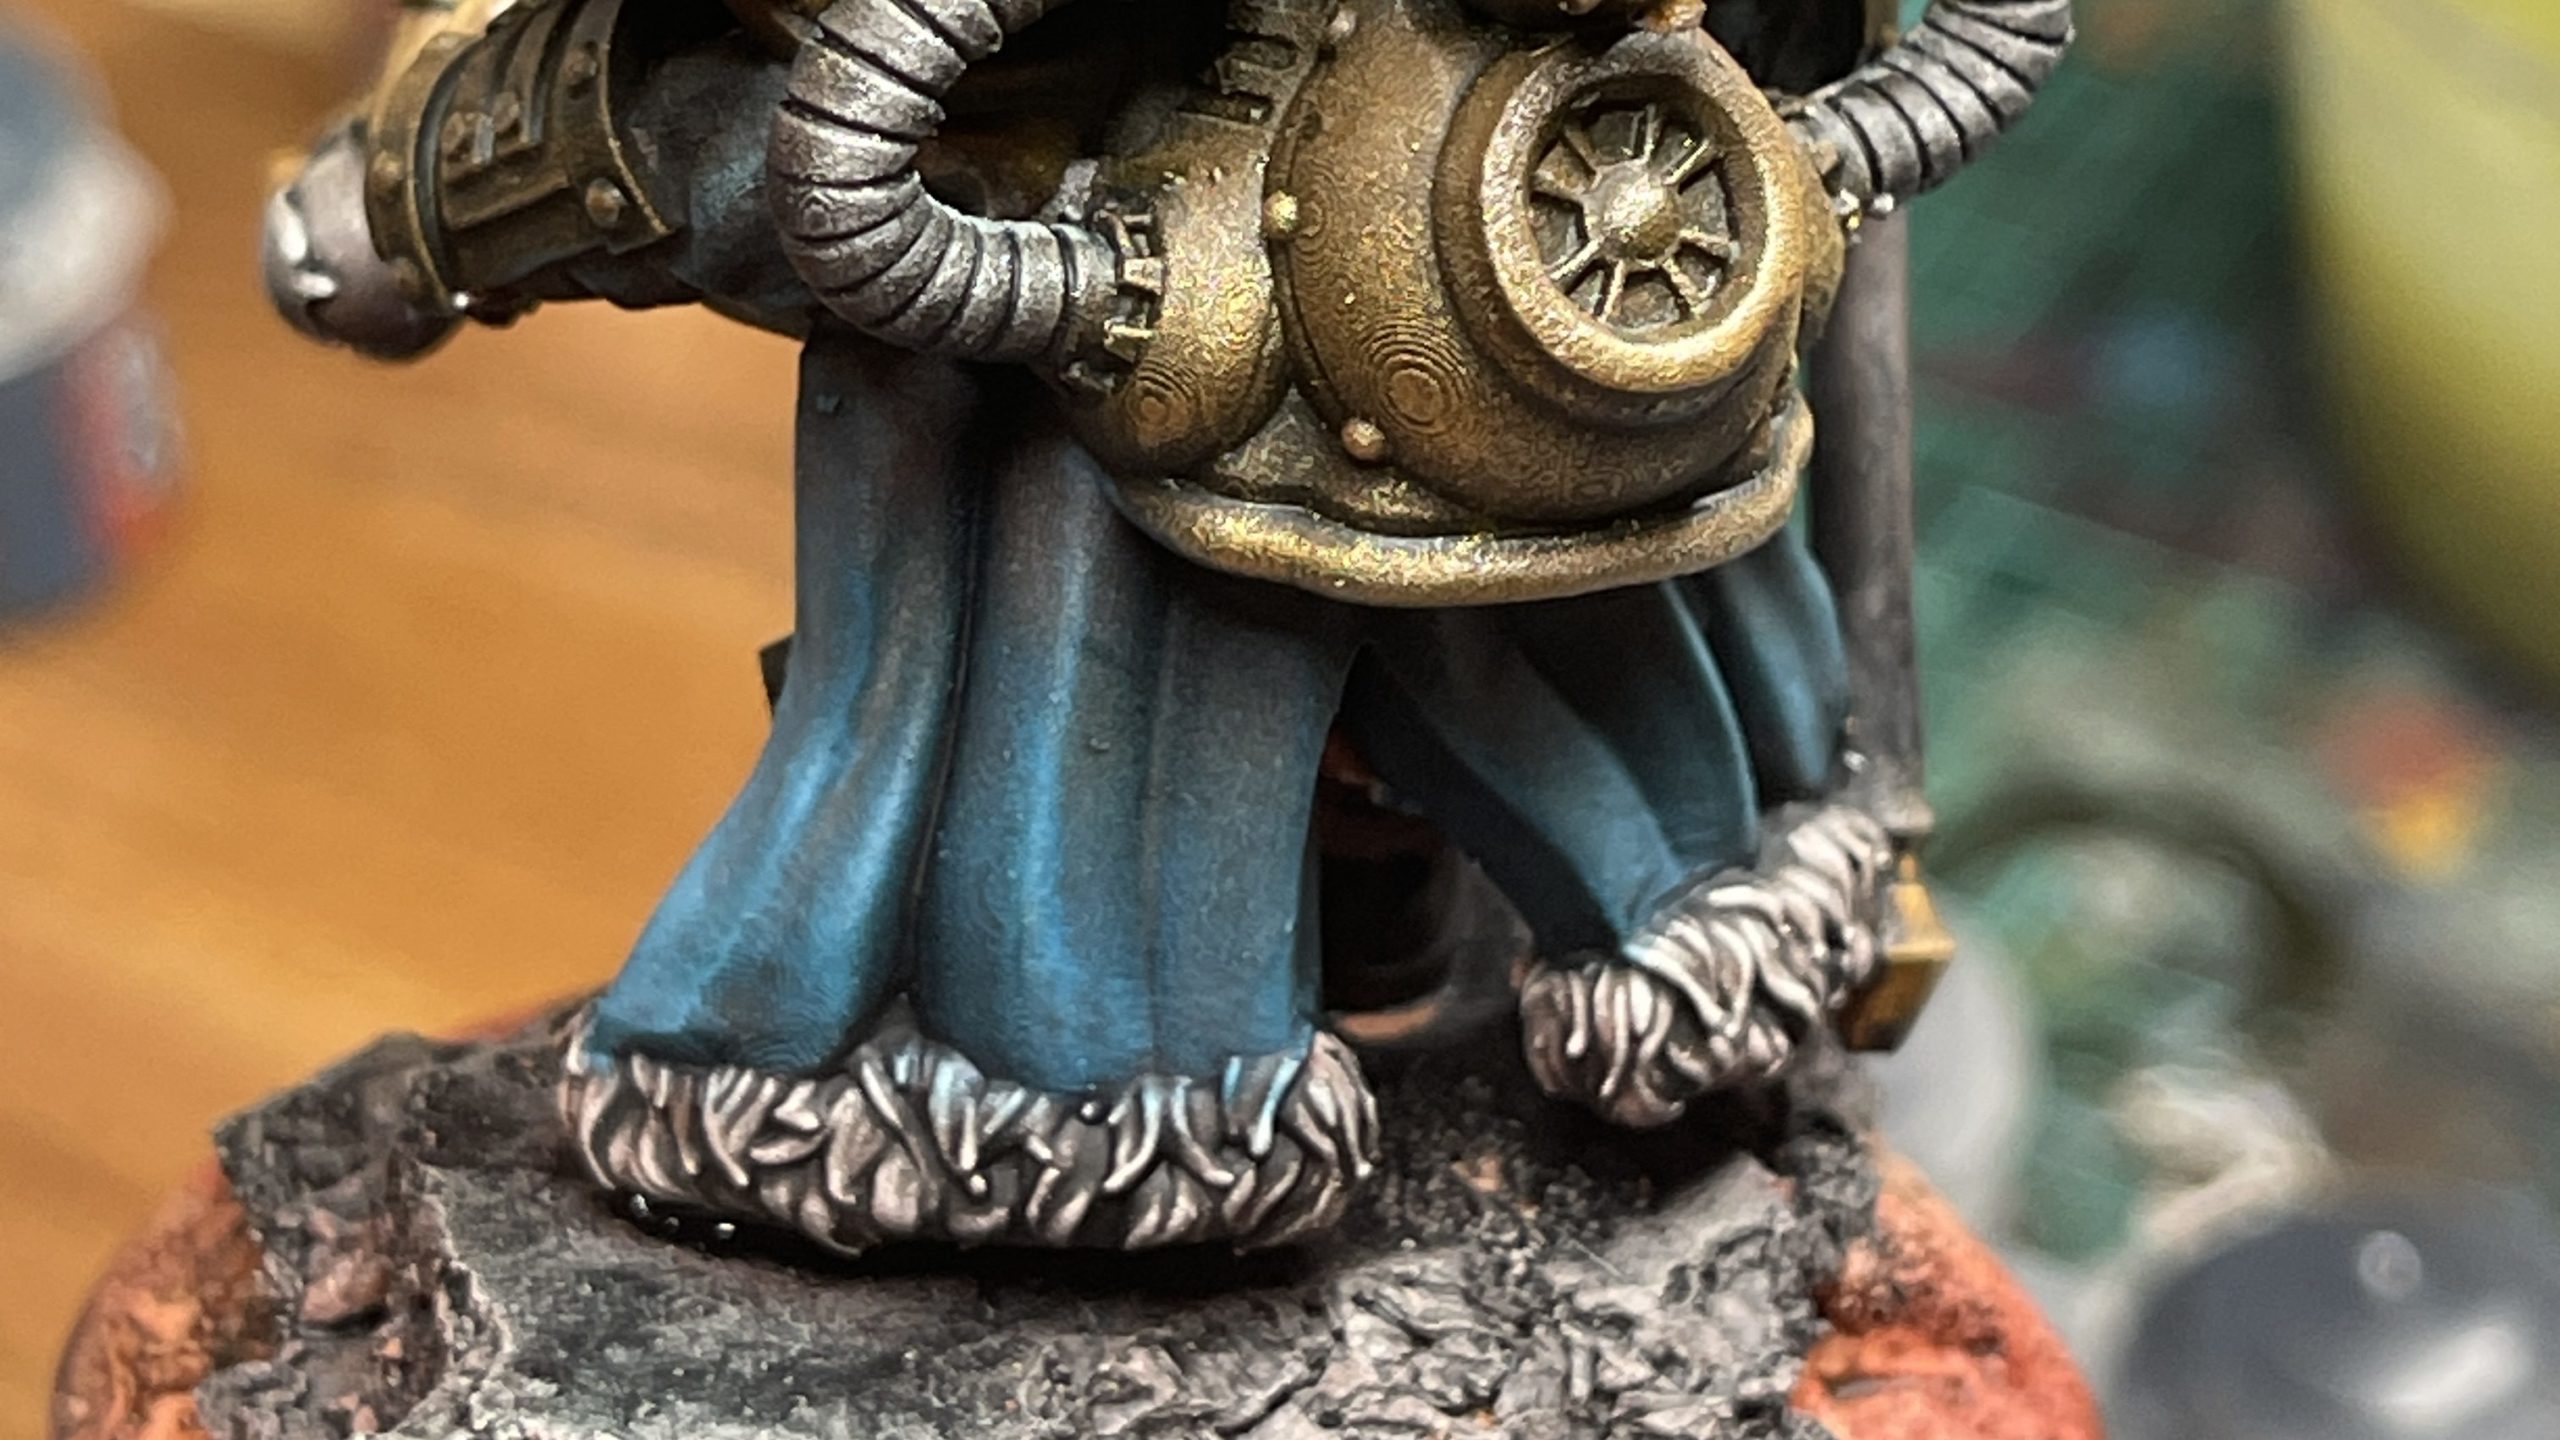
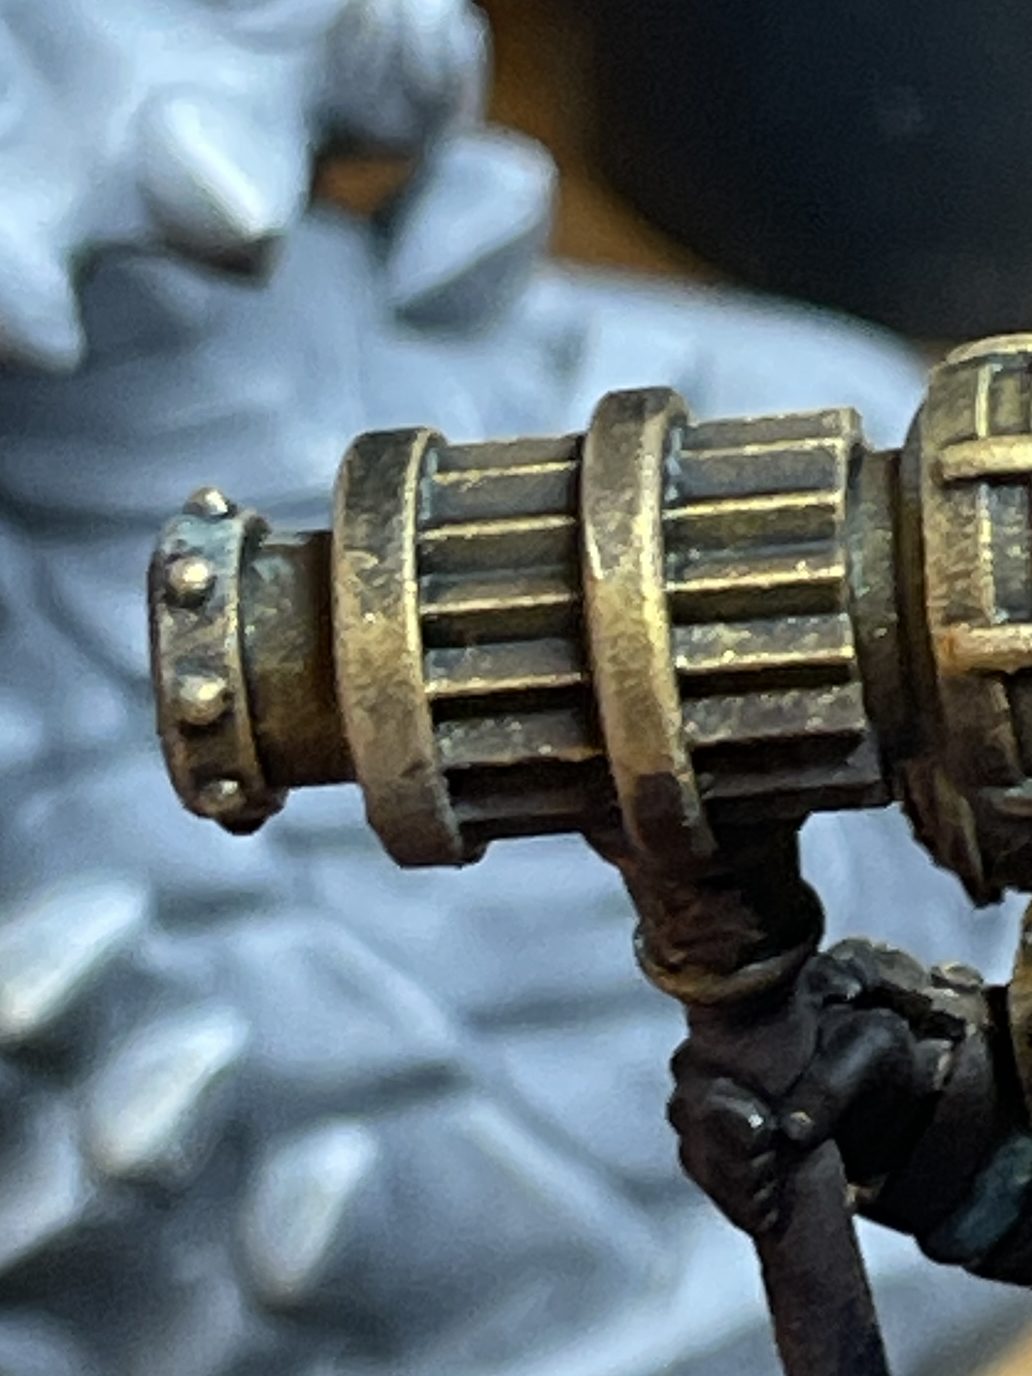
11. Paint pipes and chain mail
- Gryph Charger Grey (Citadel — Contrast)
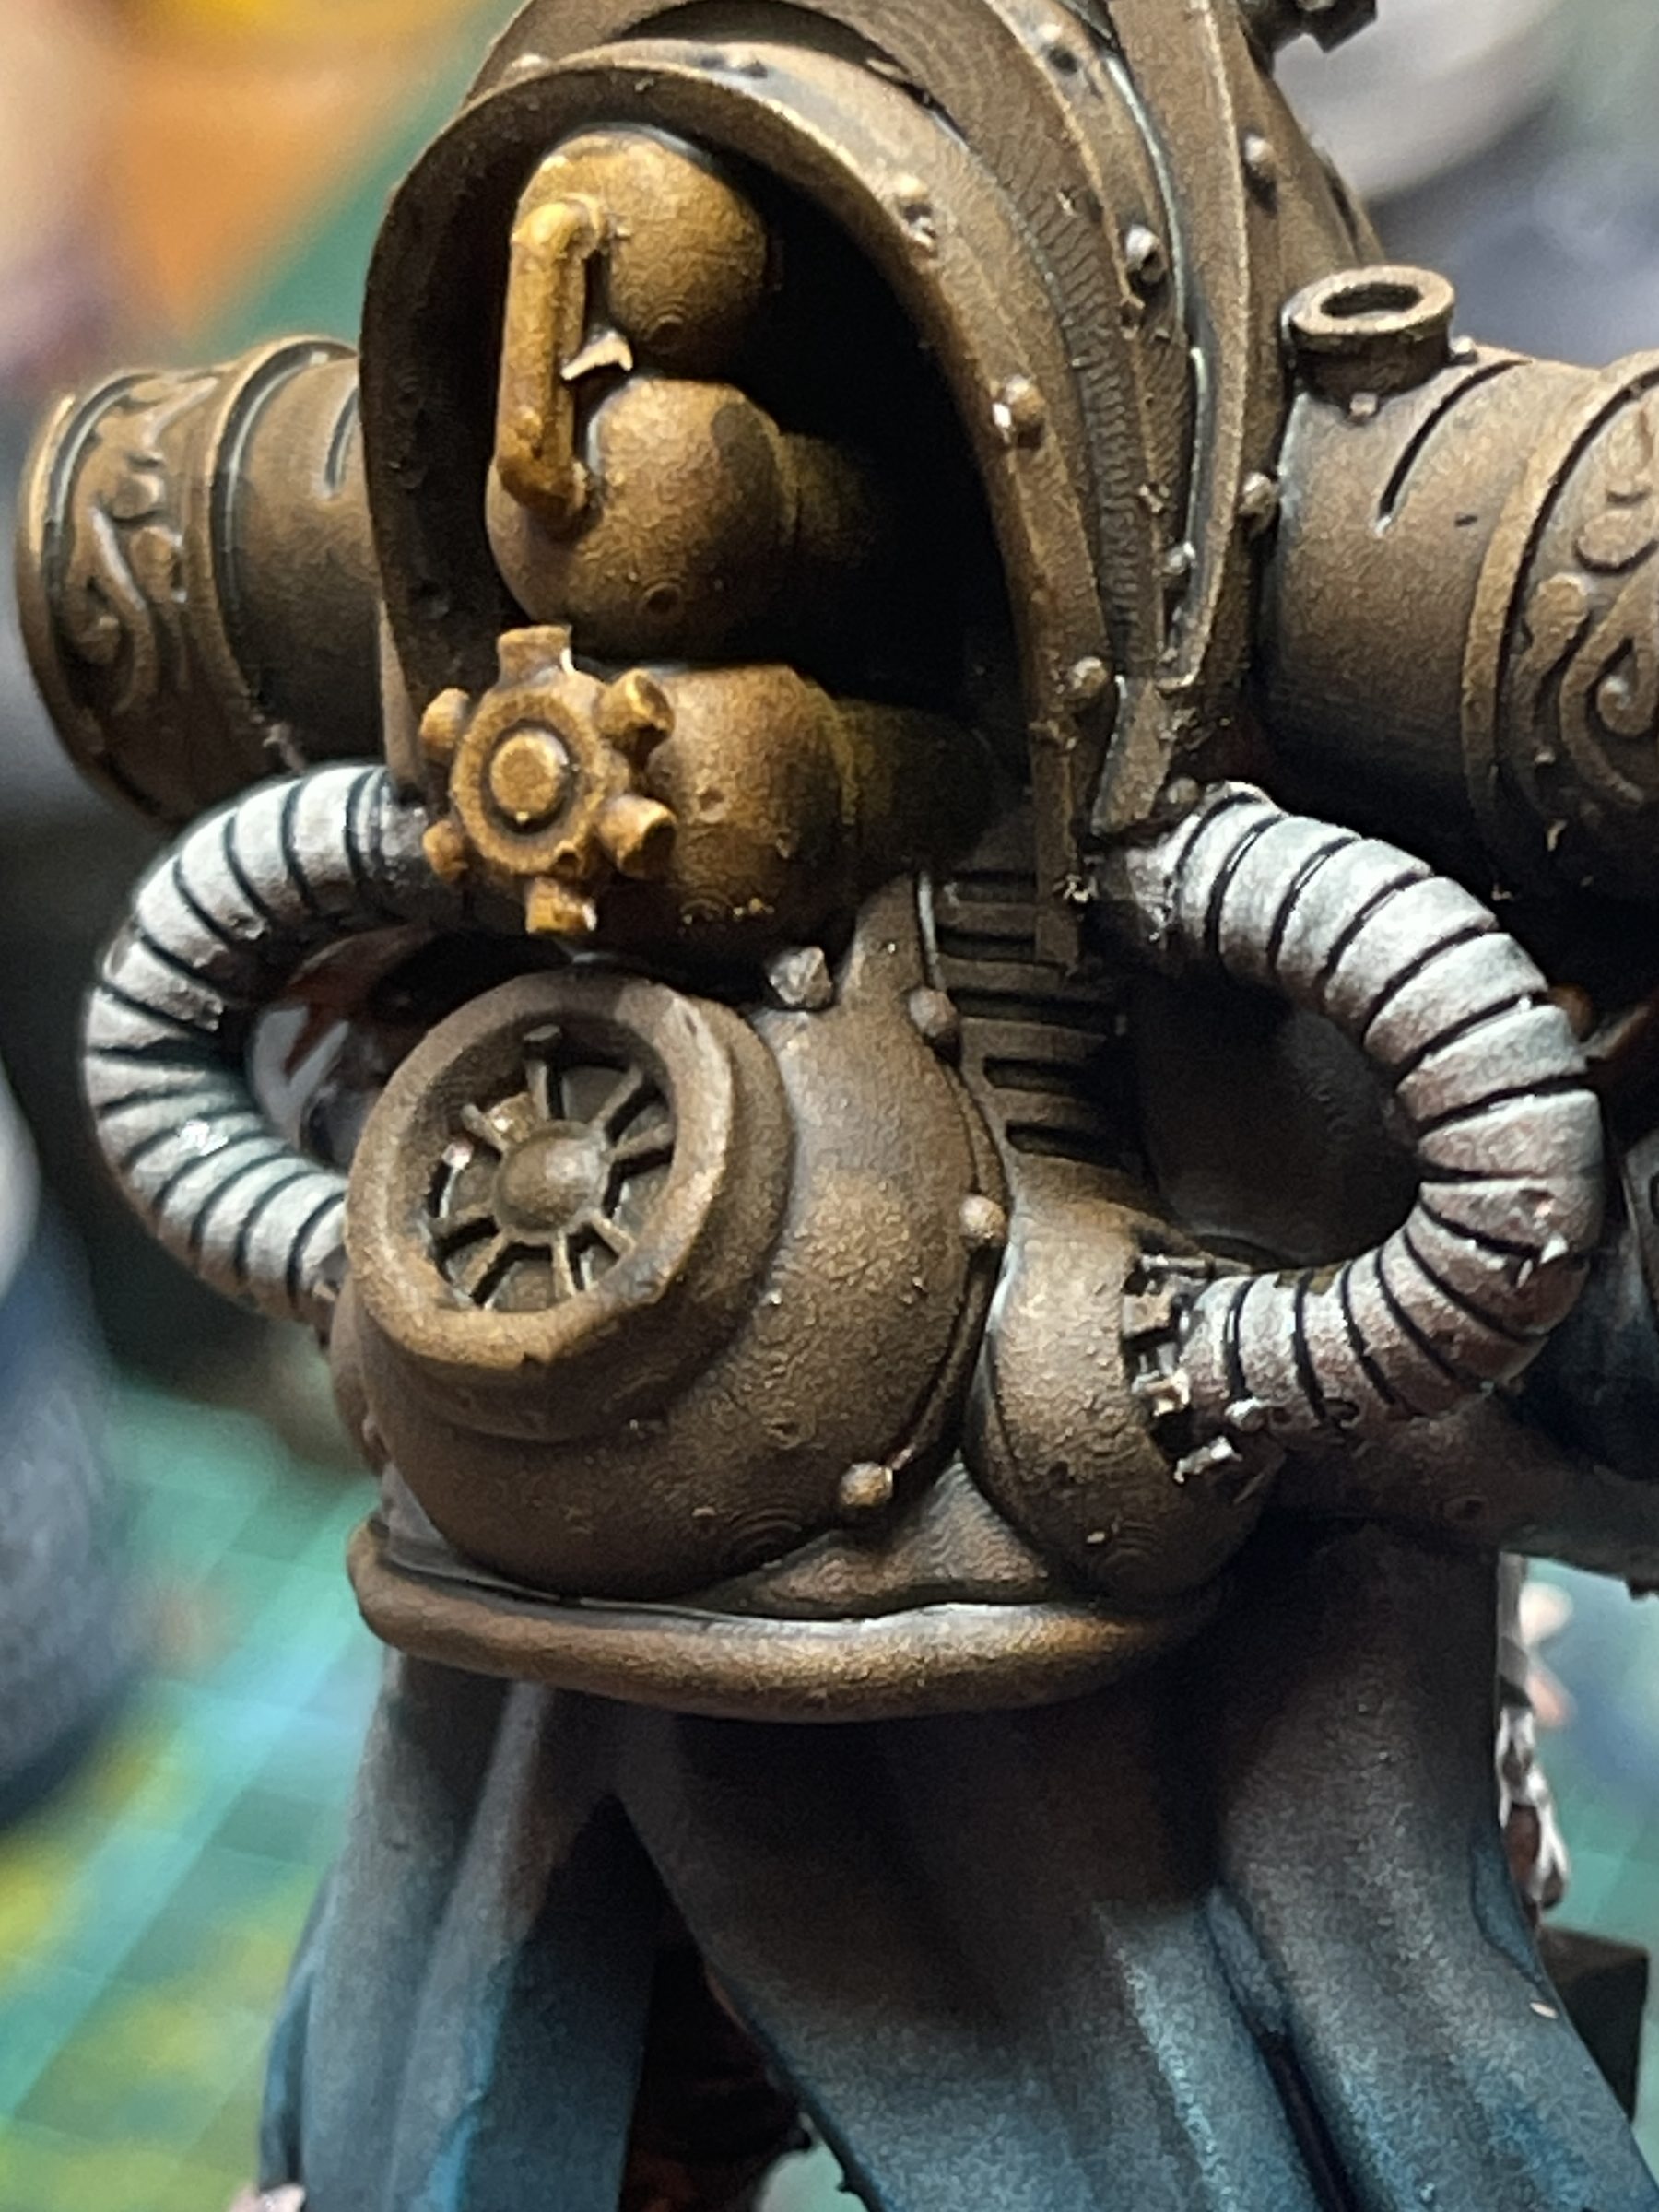
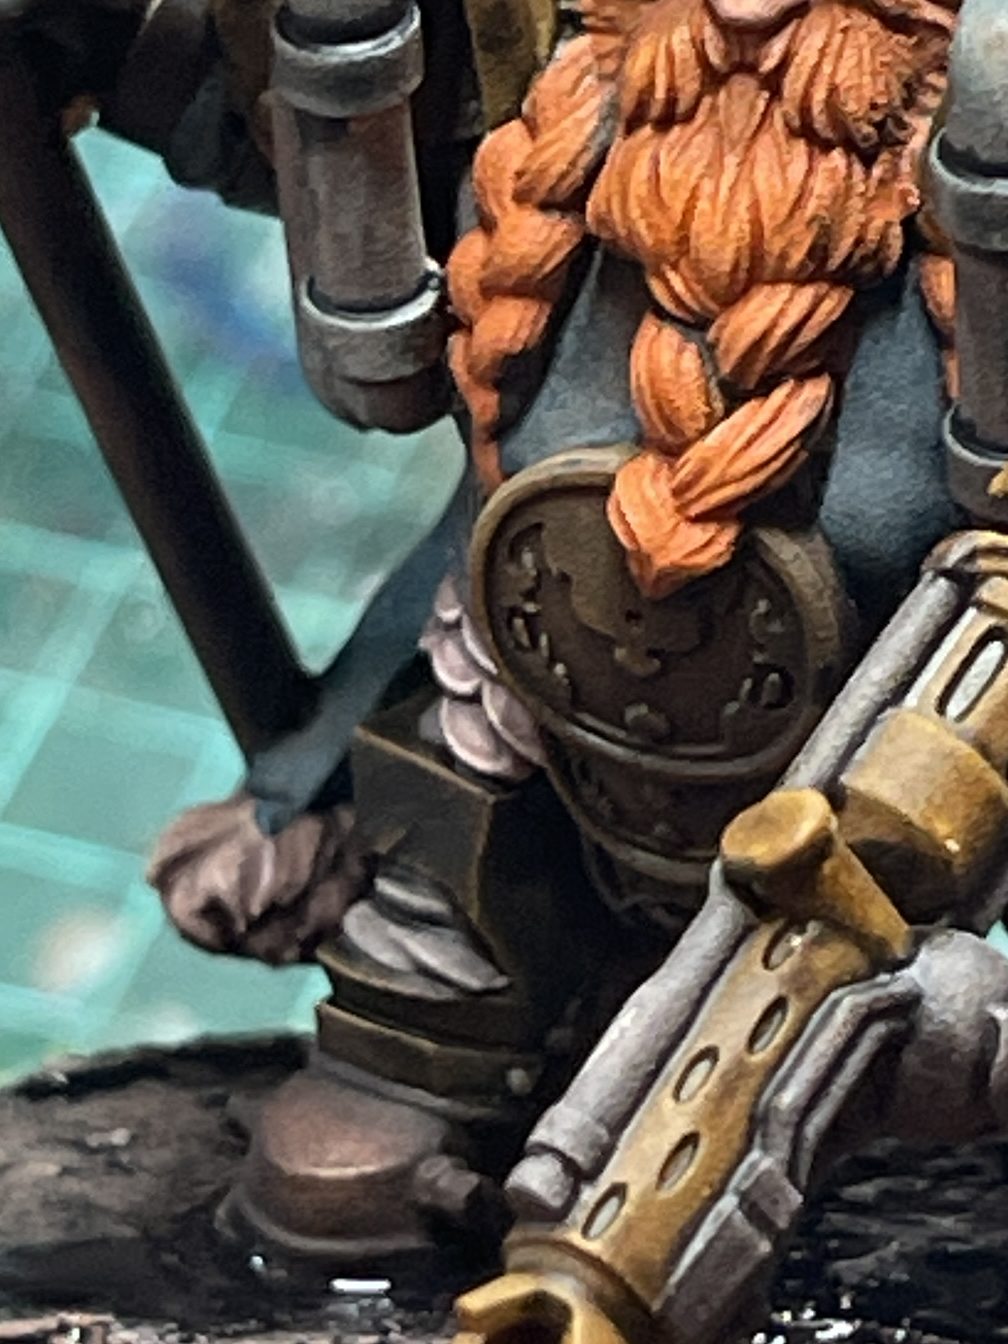
12. Apply wash to cloak trimming & pipes
- Dreadful Visage (Citadel — Contrast)
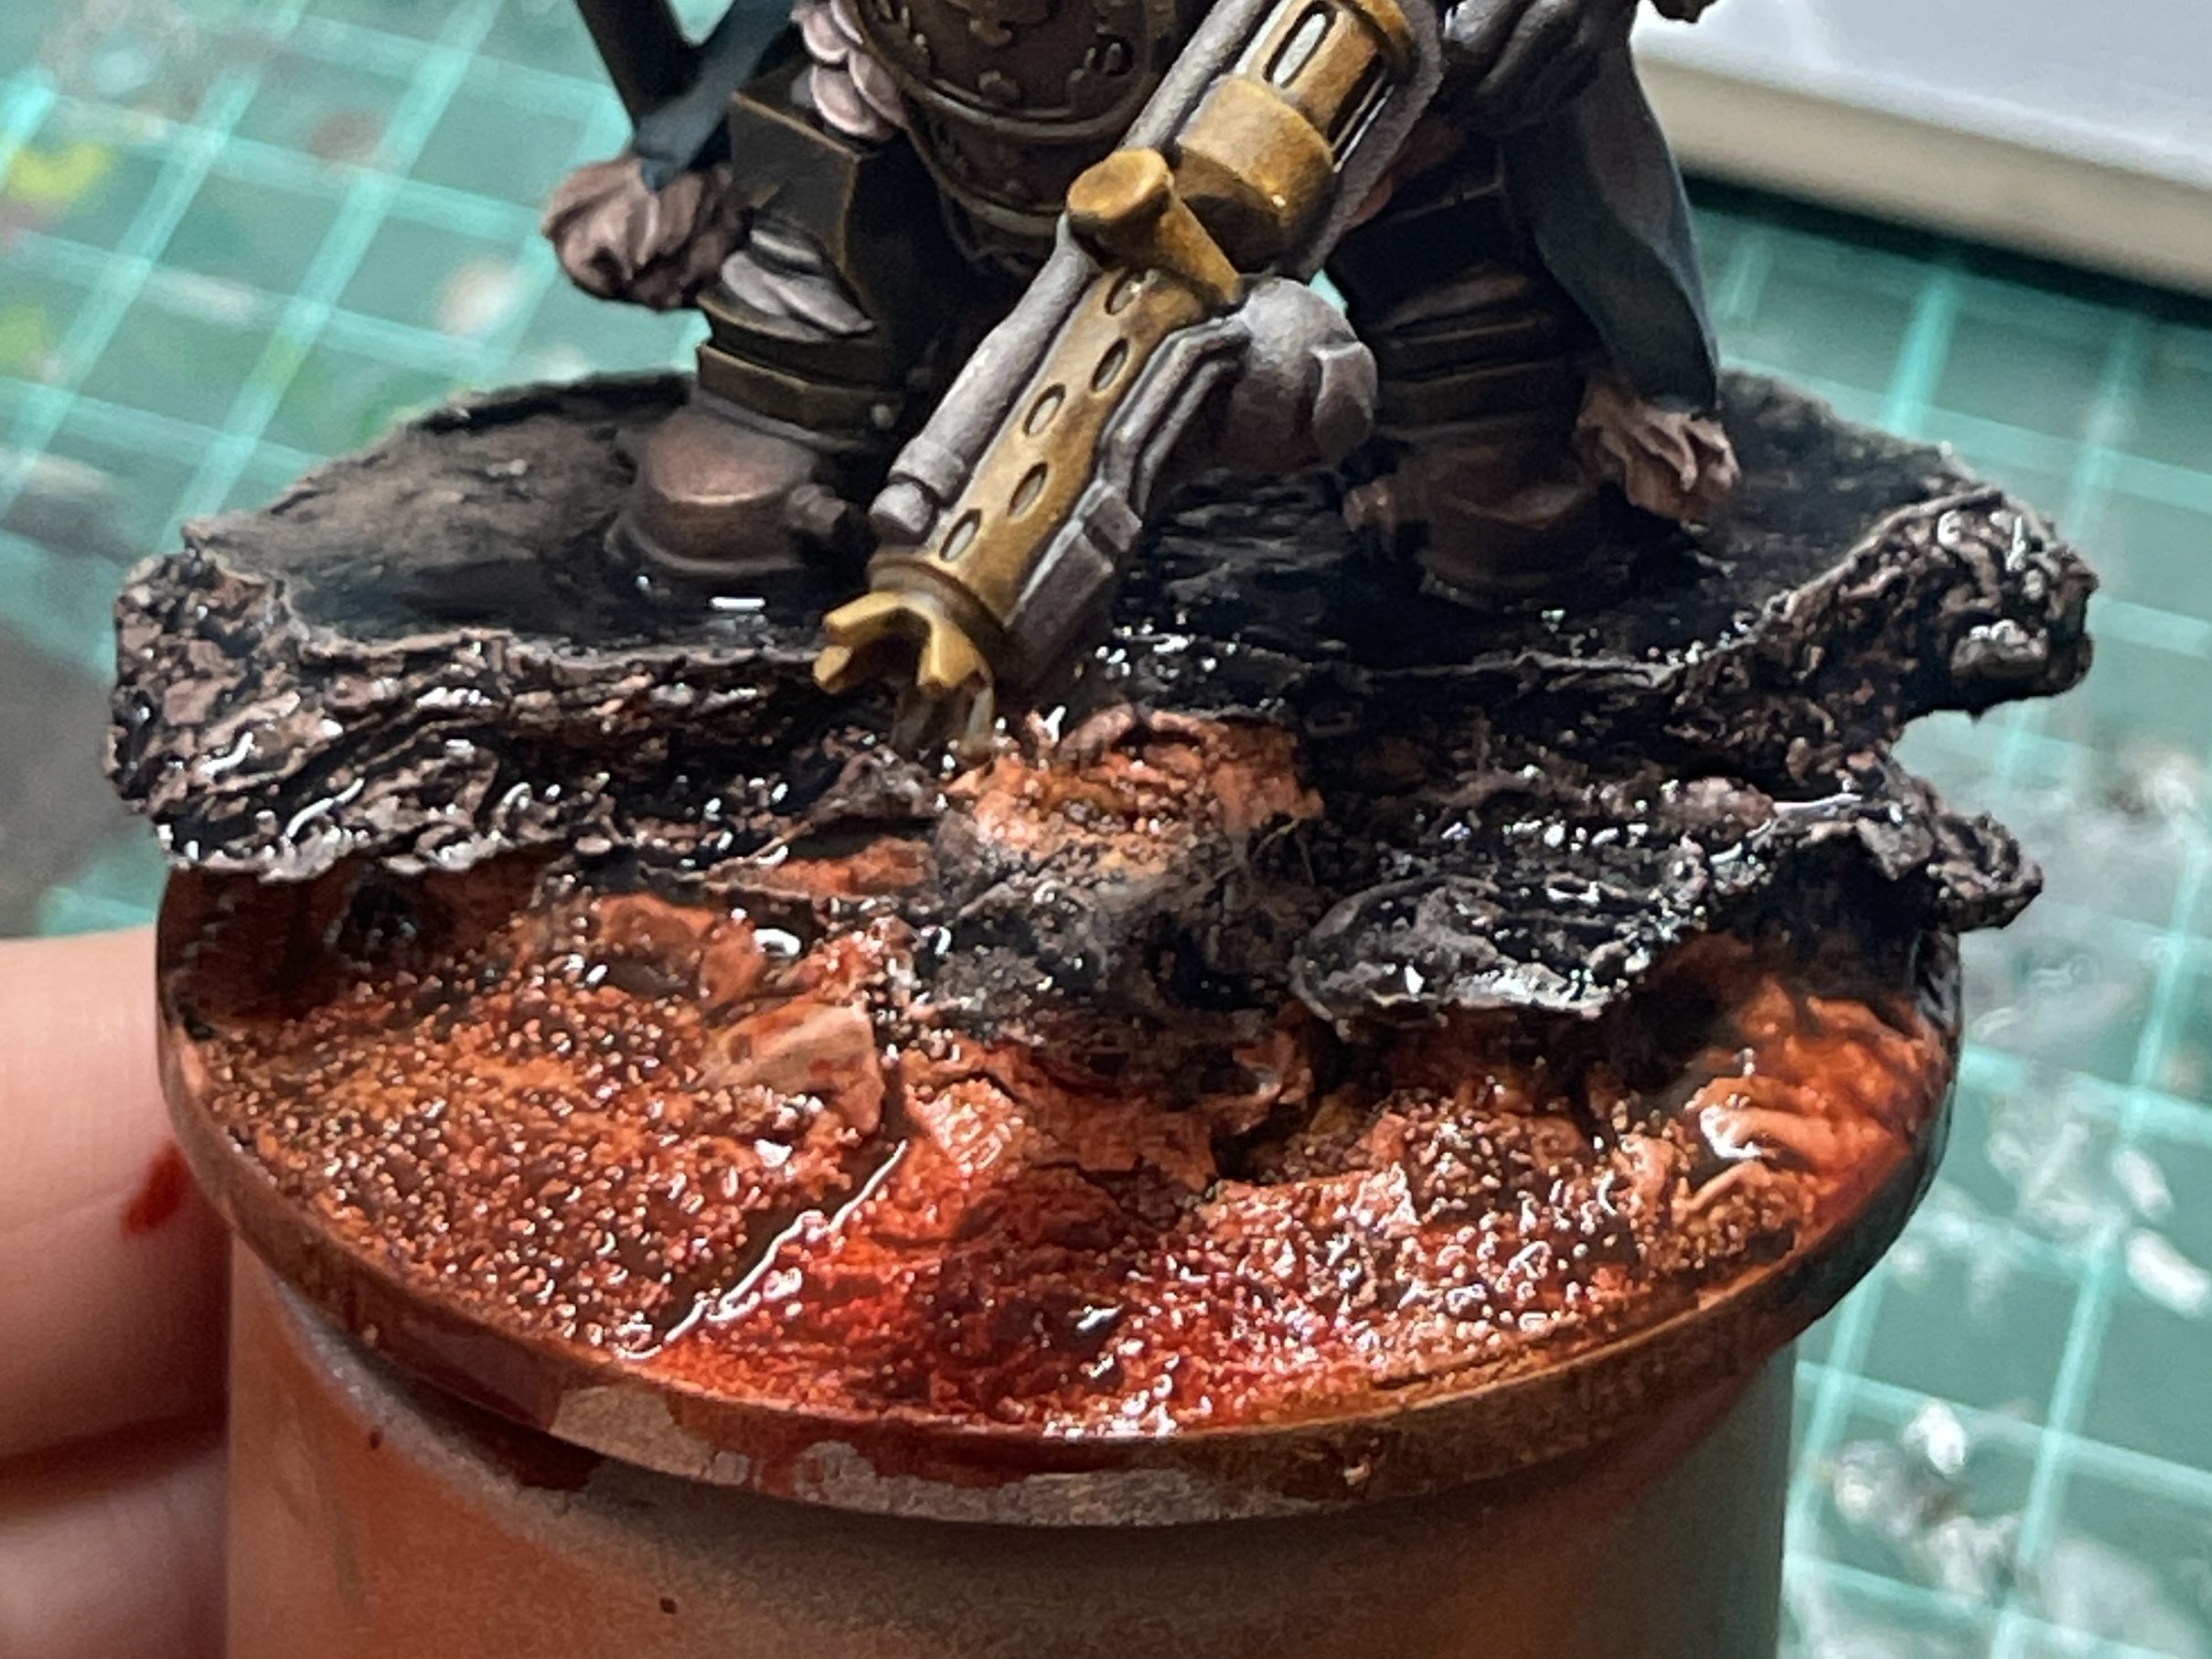
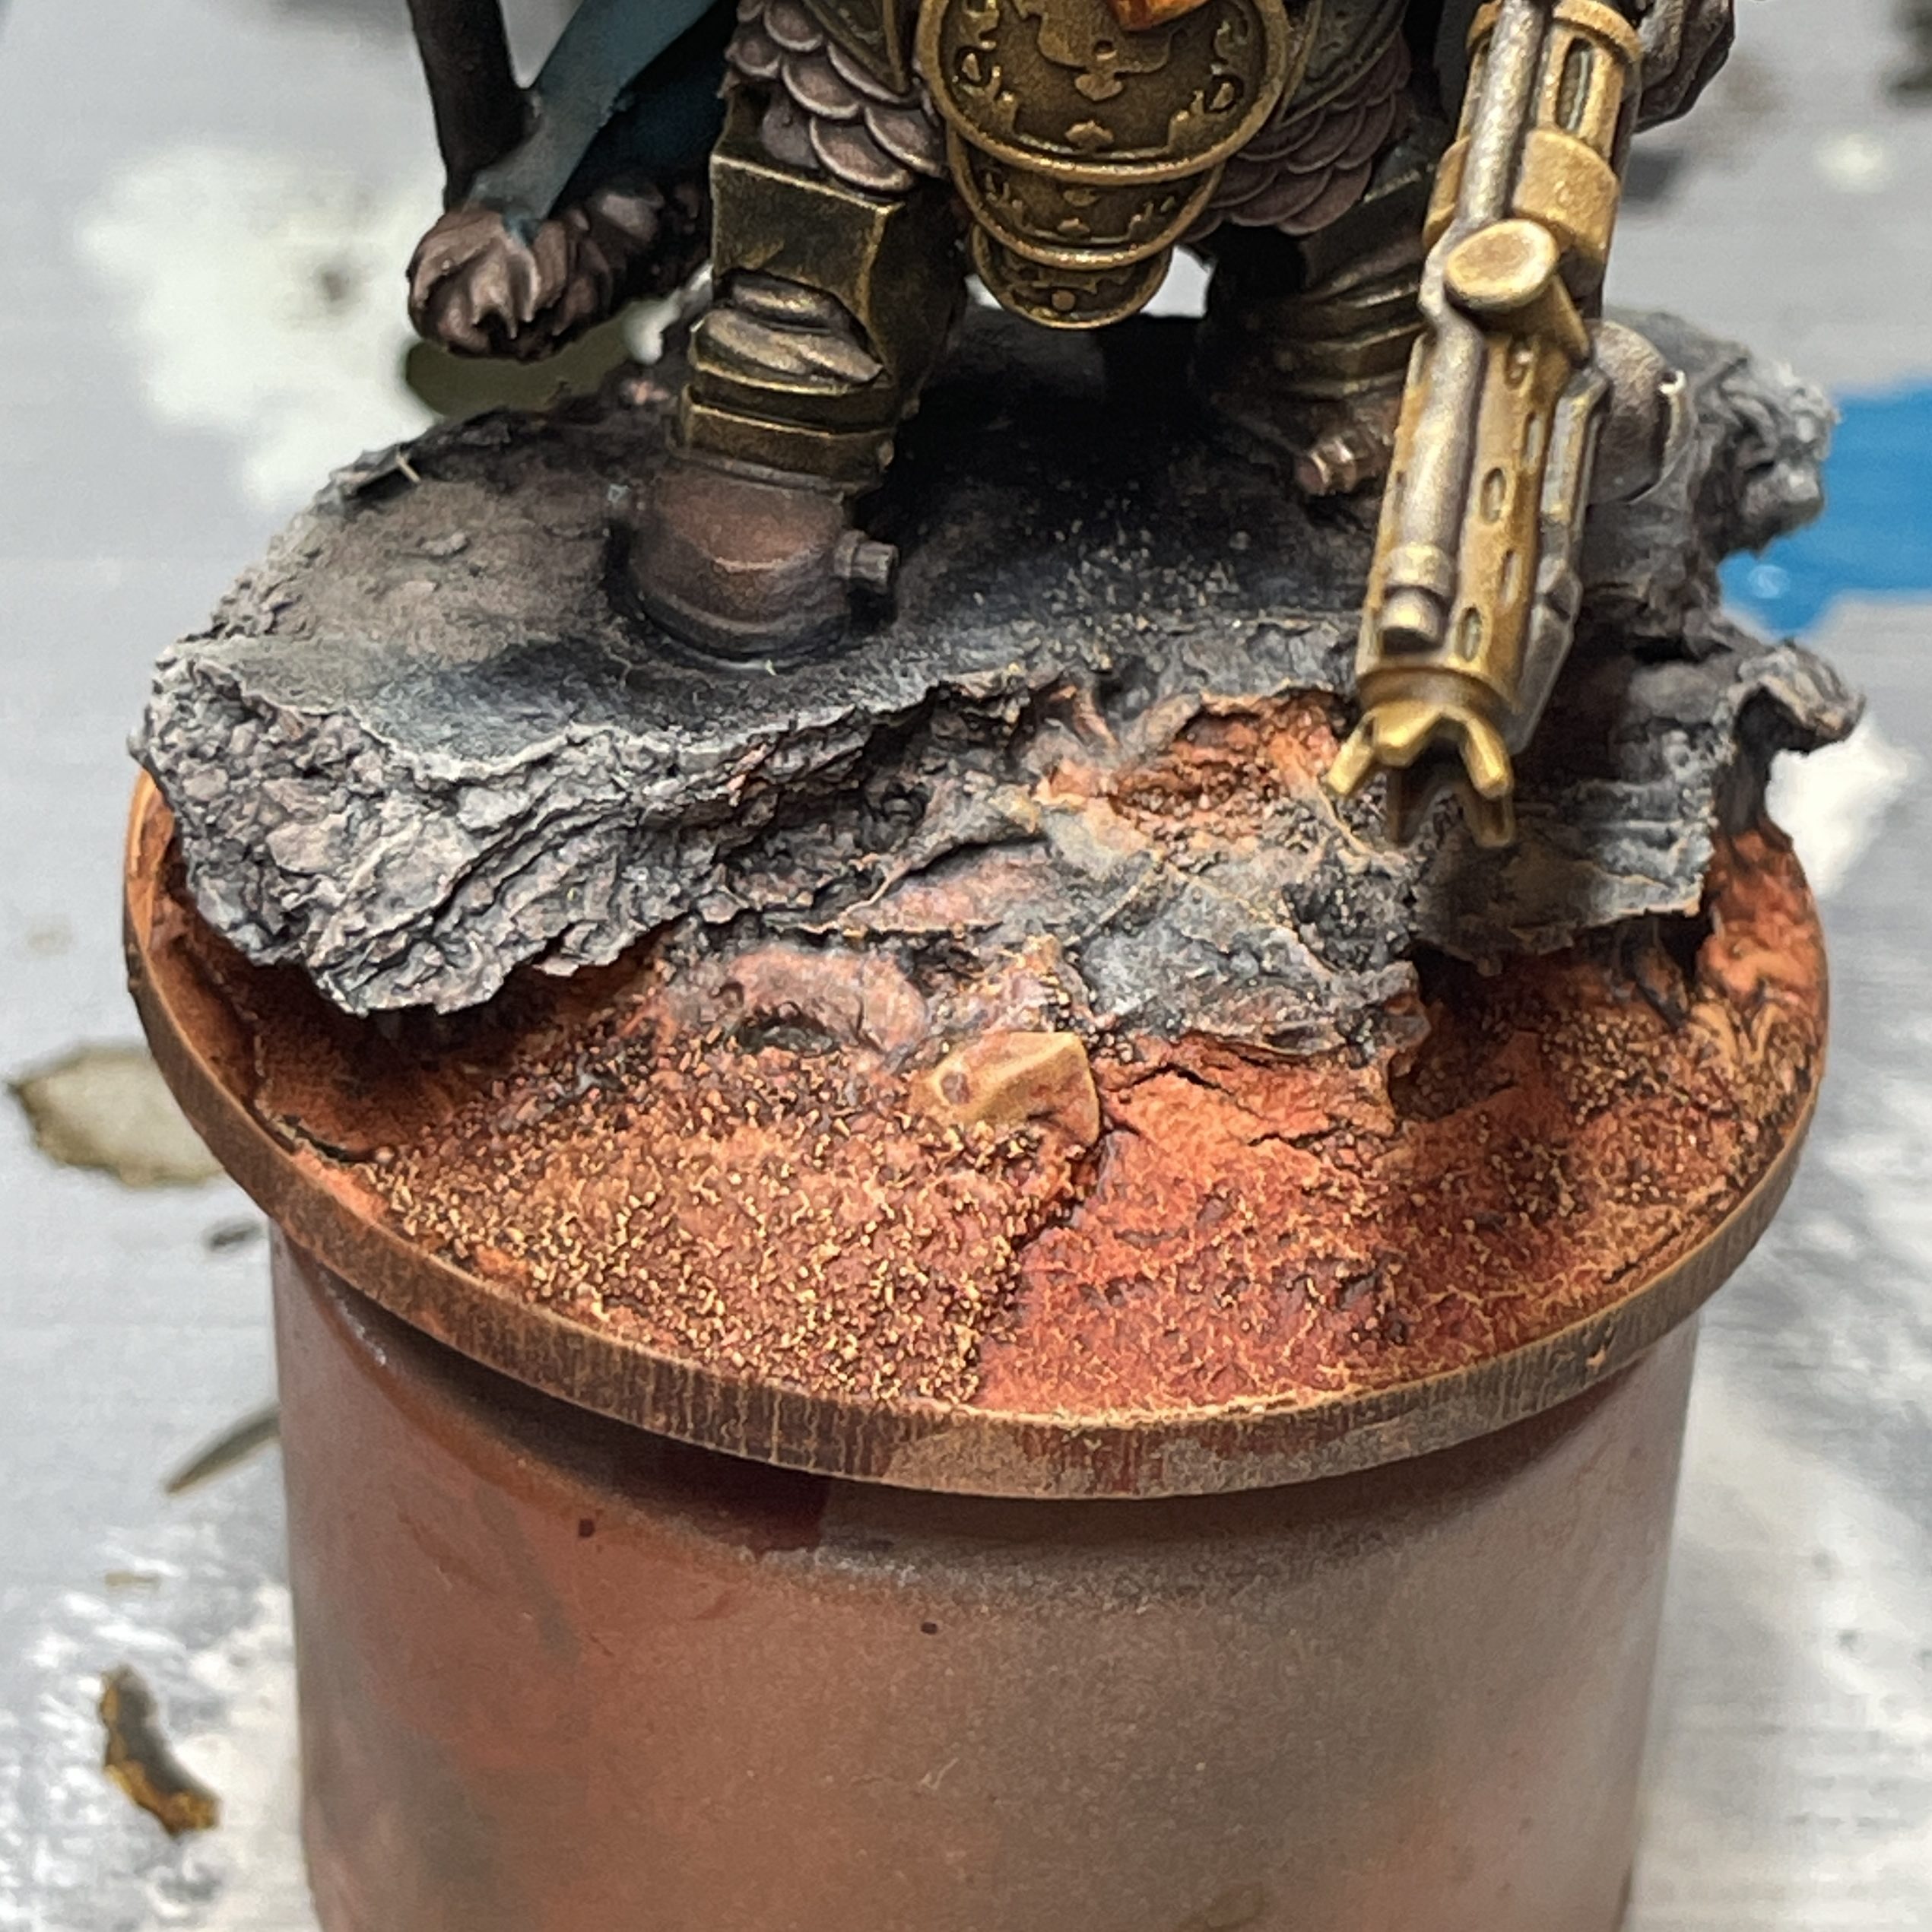
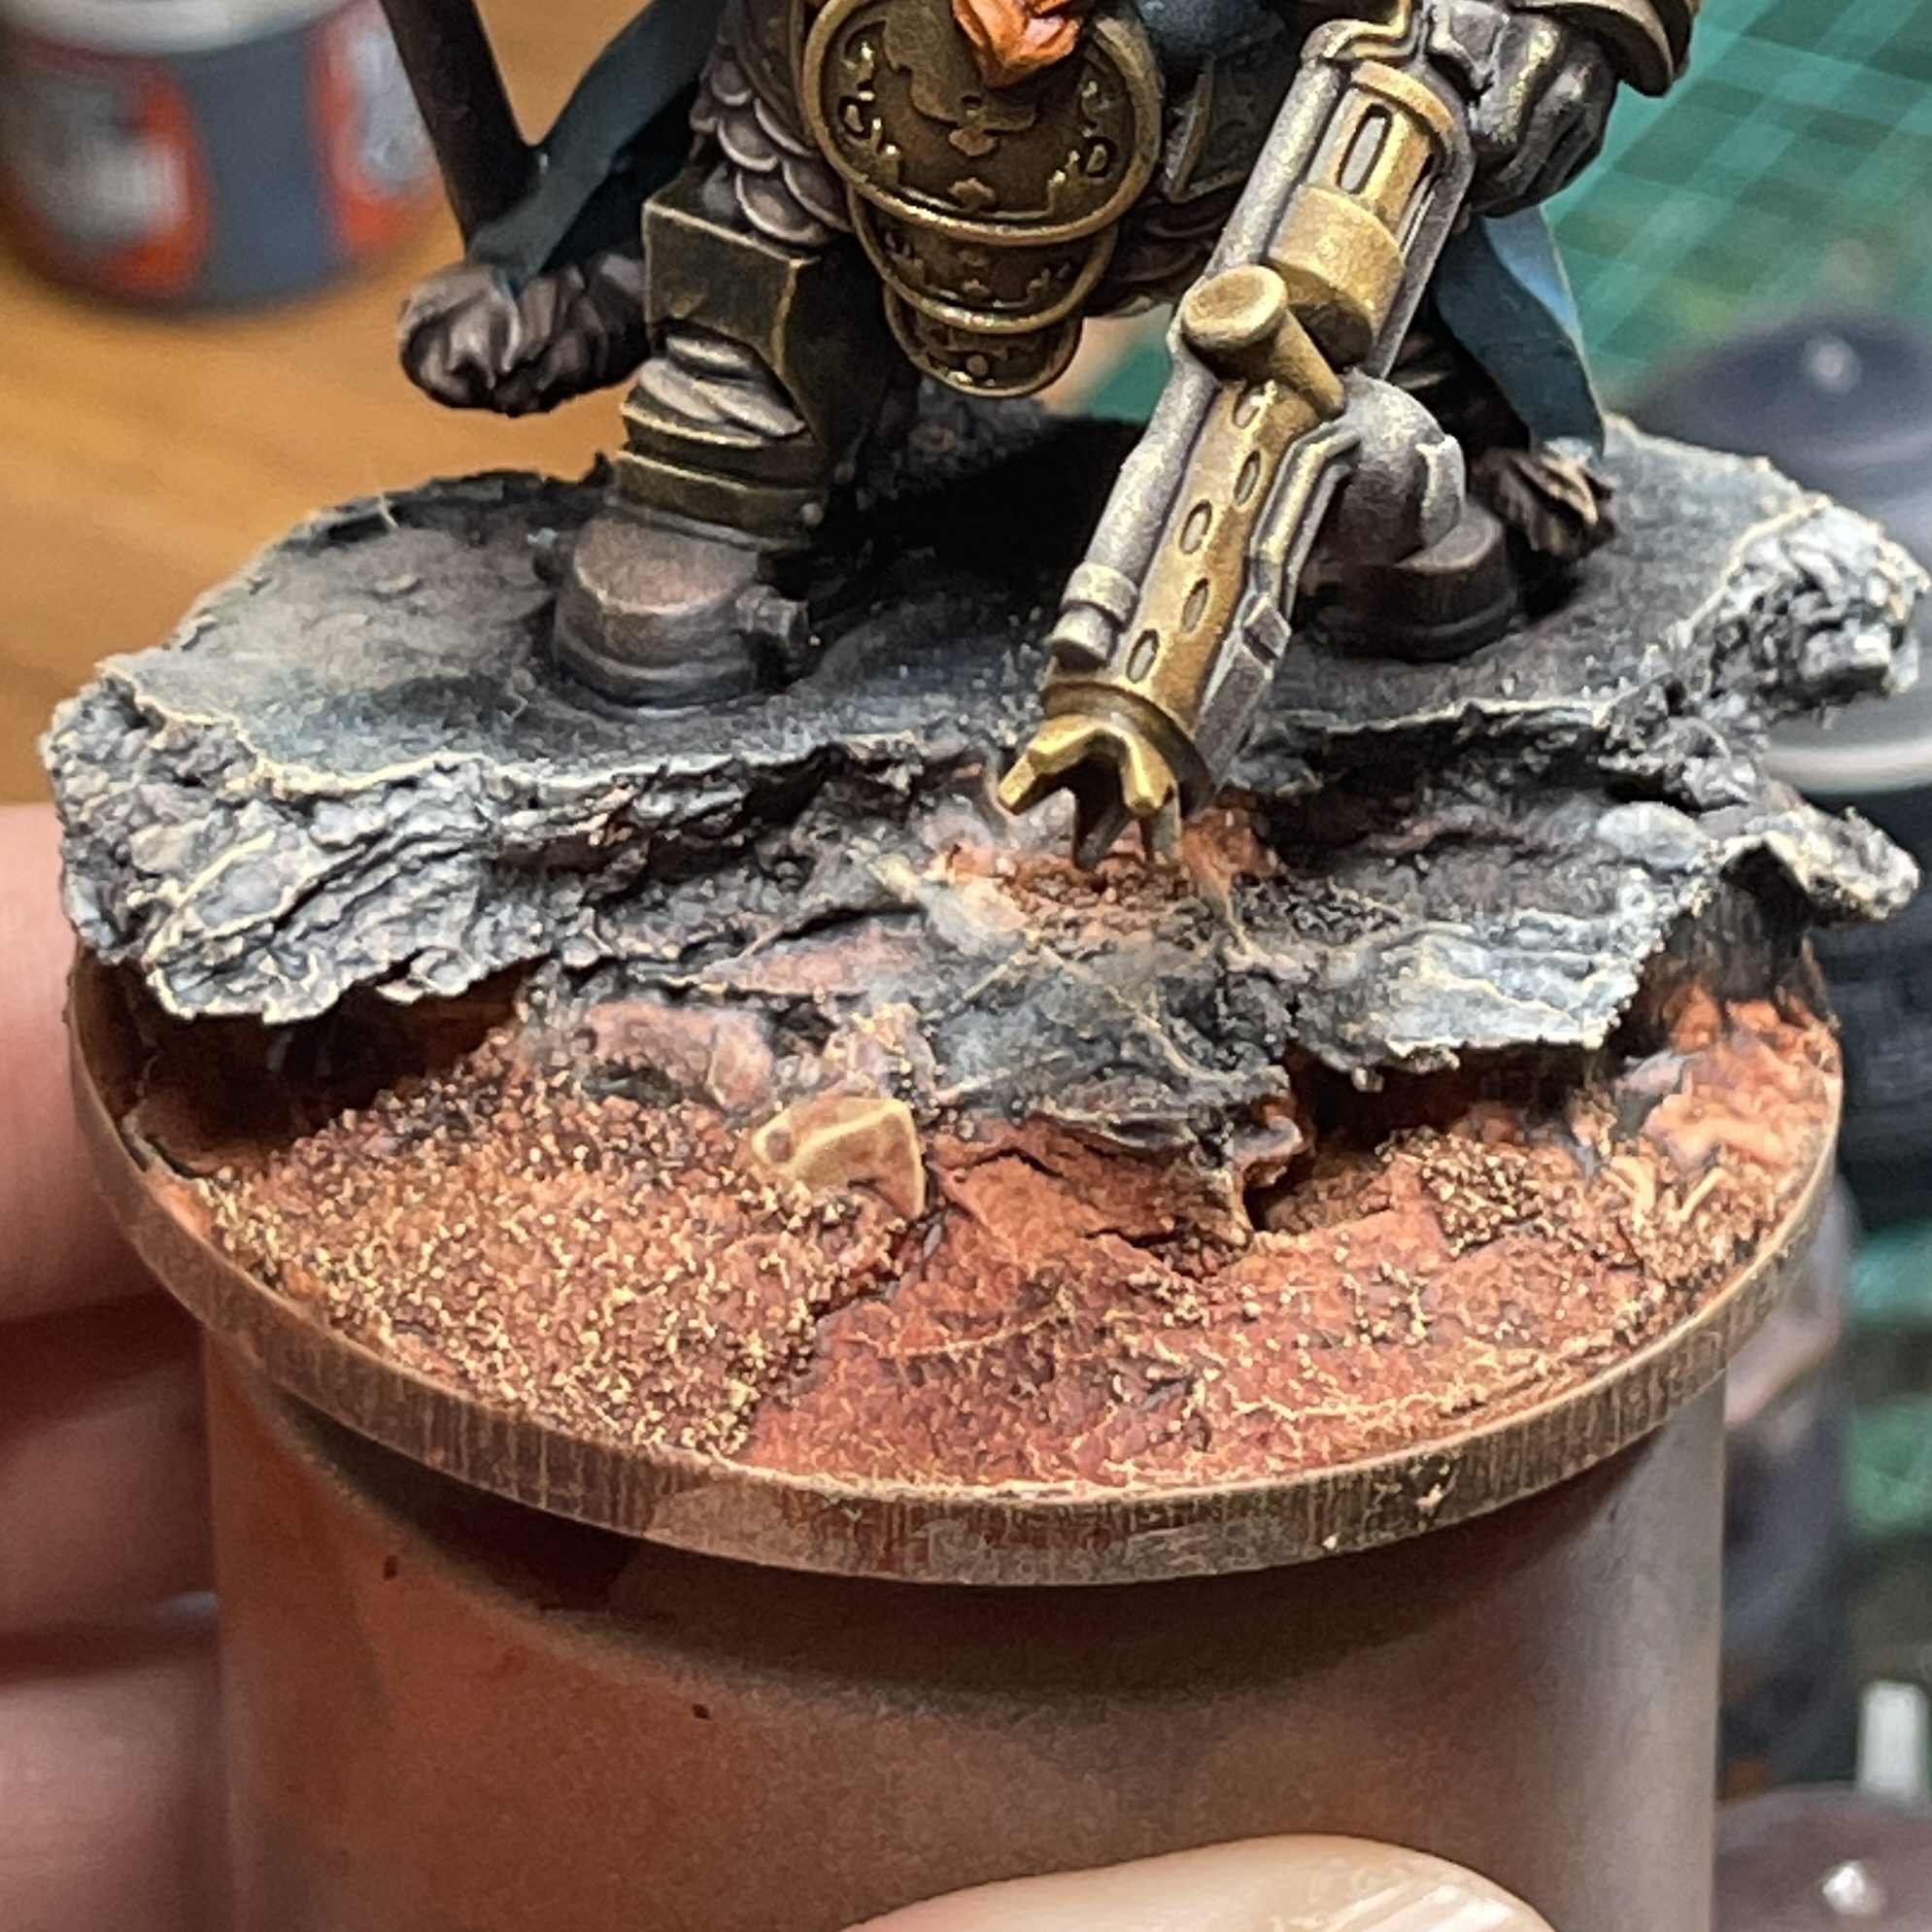
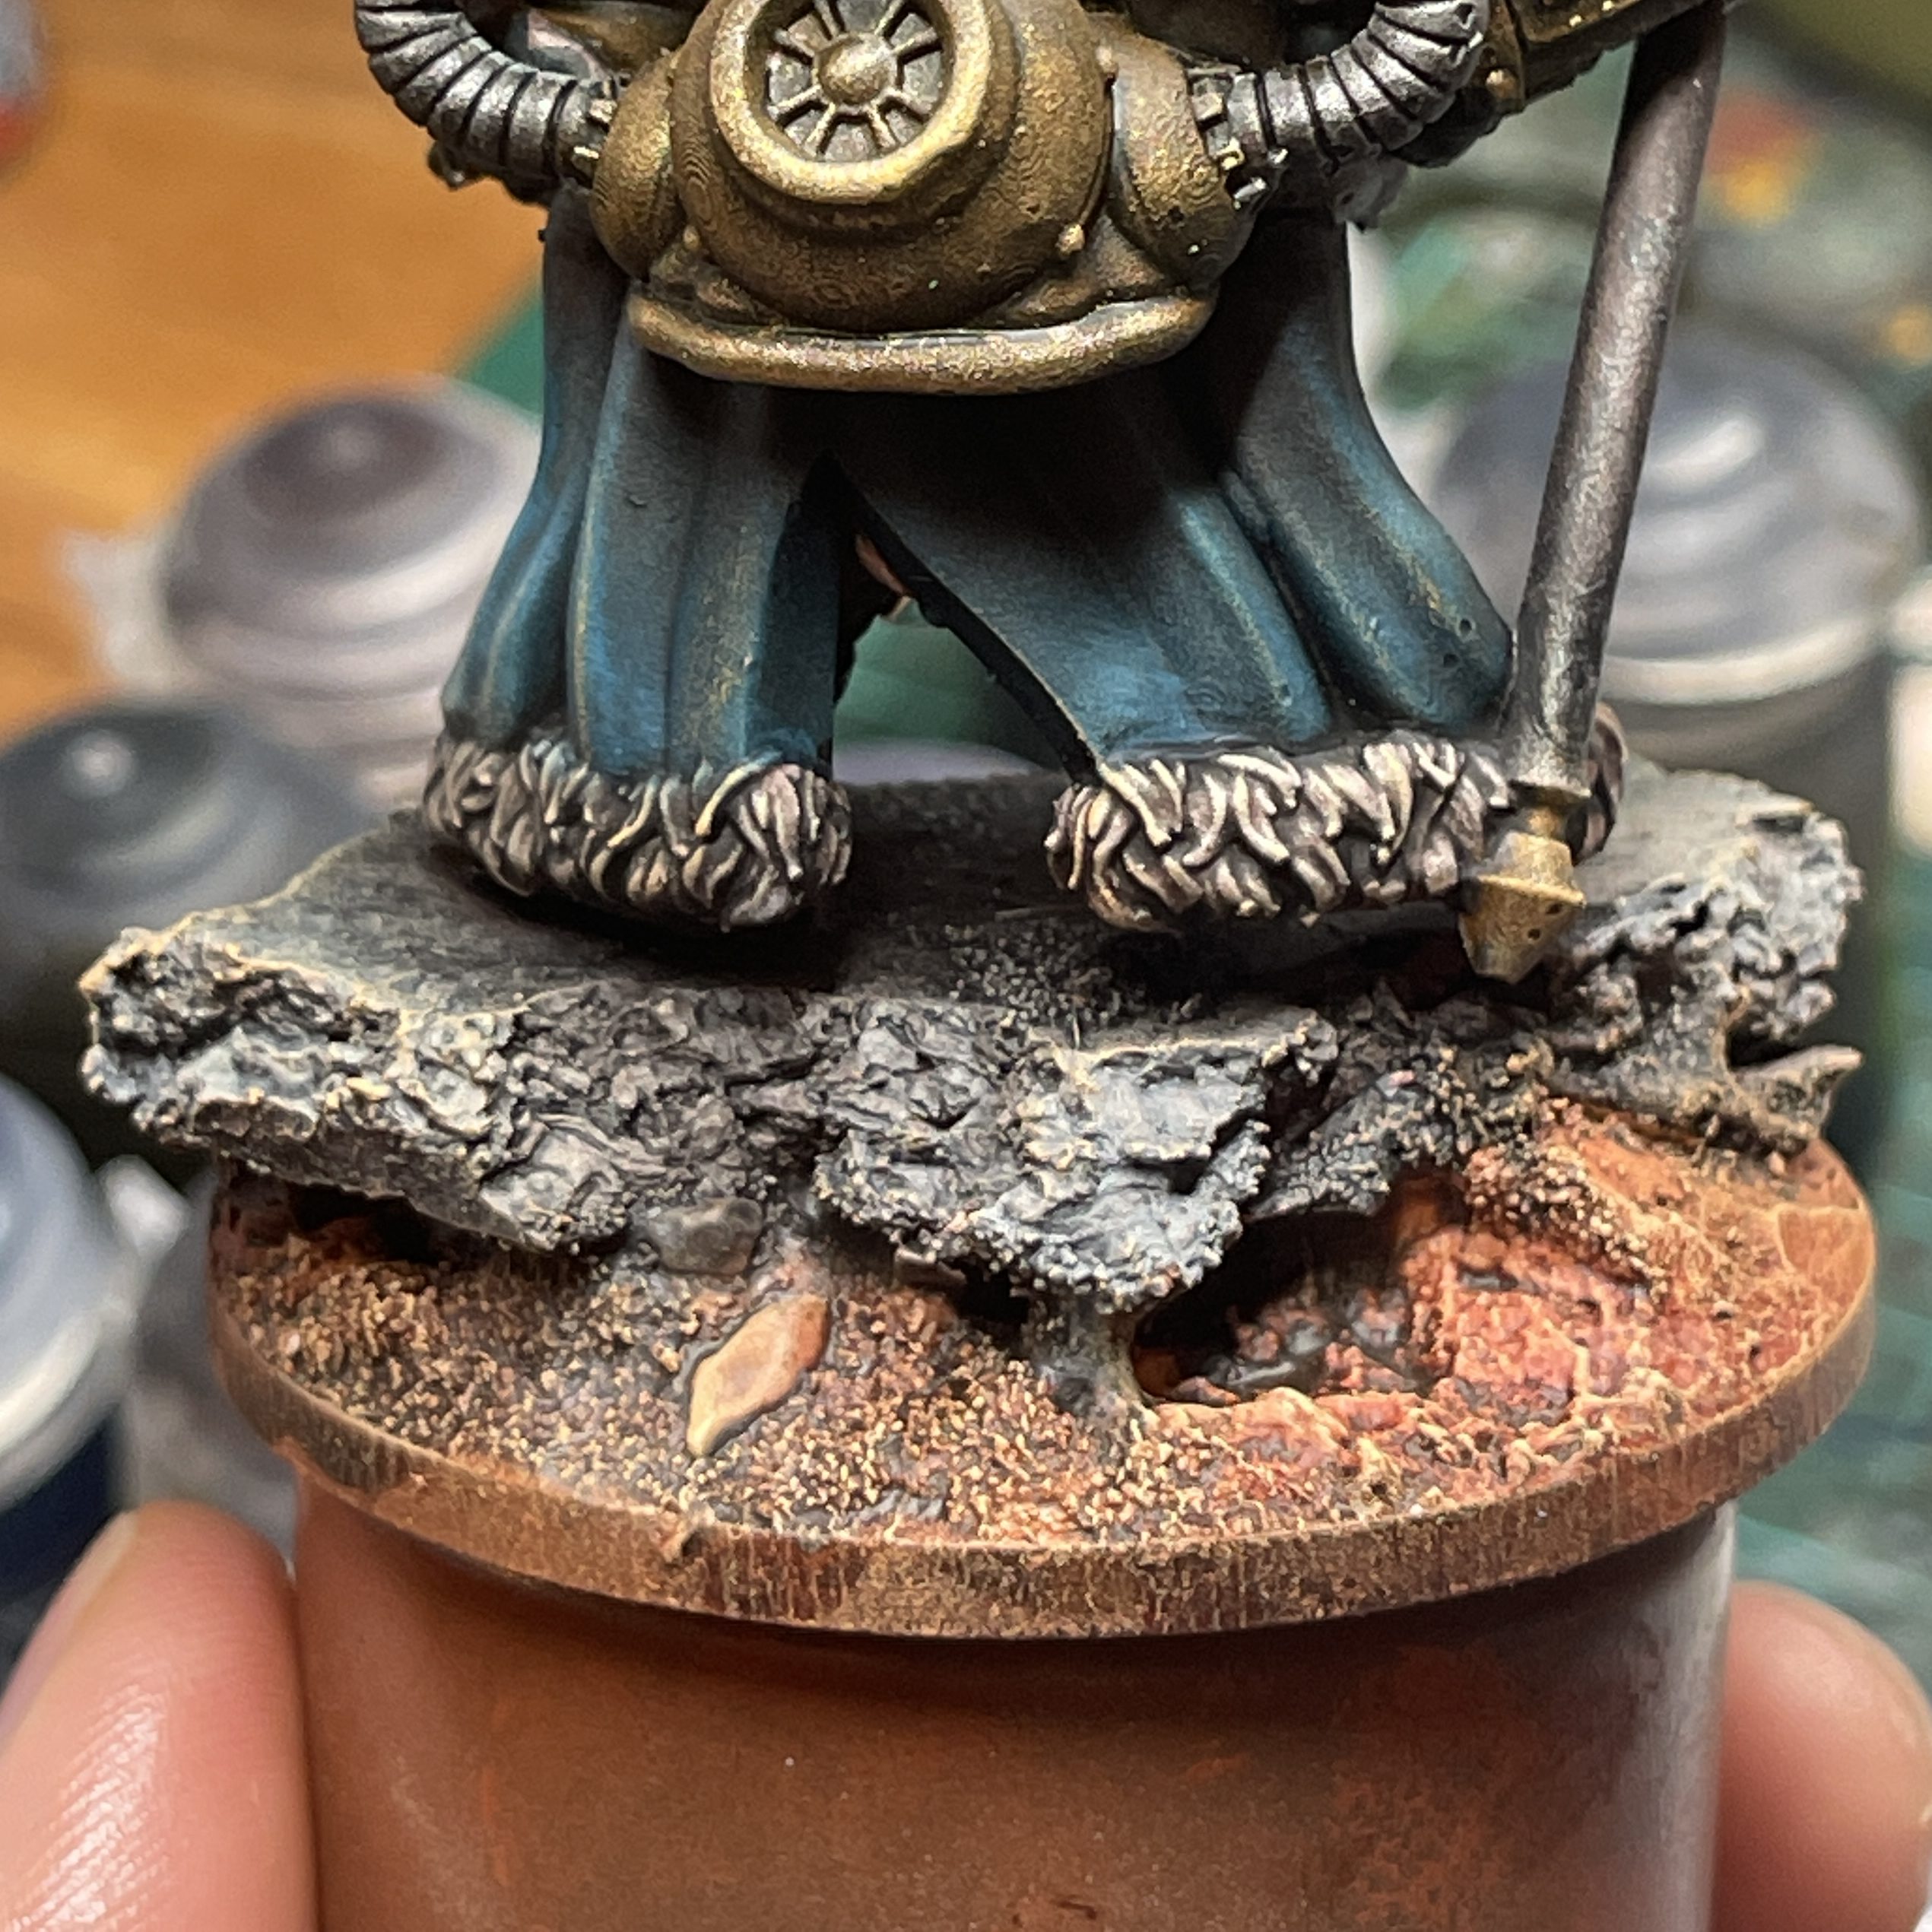
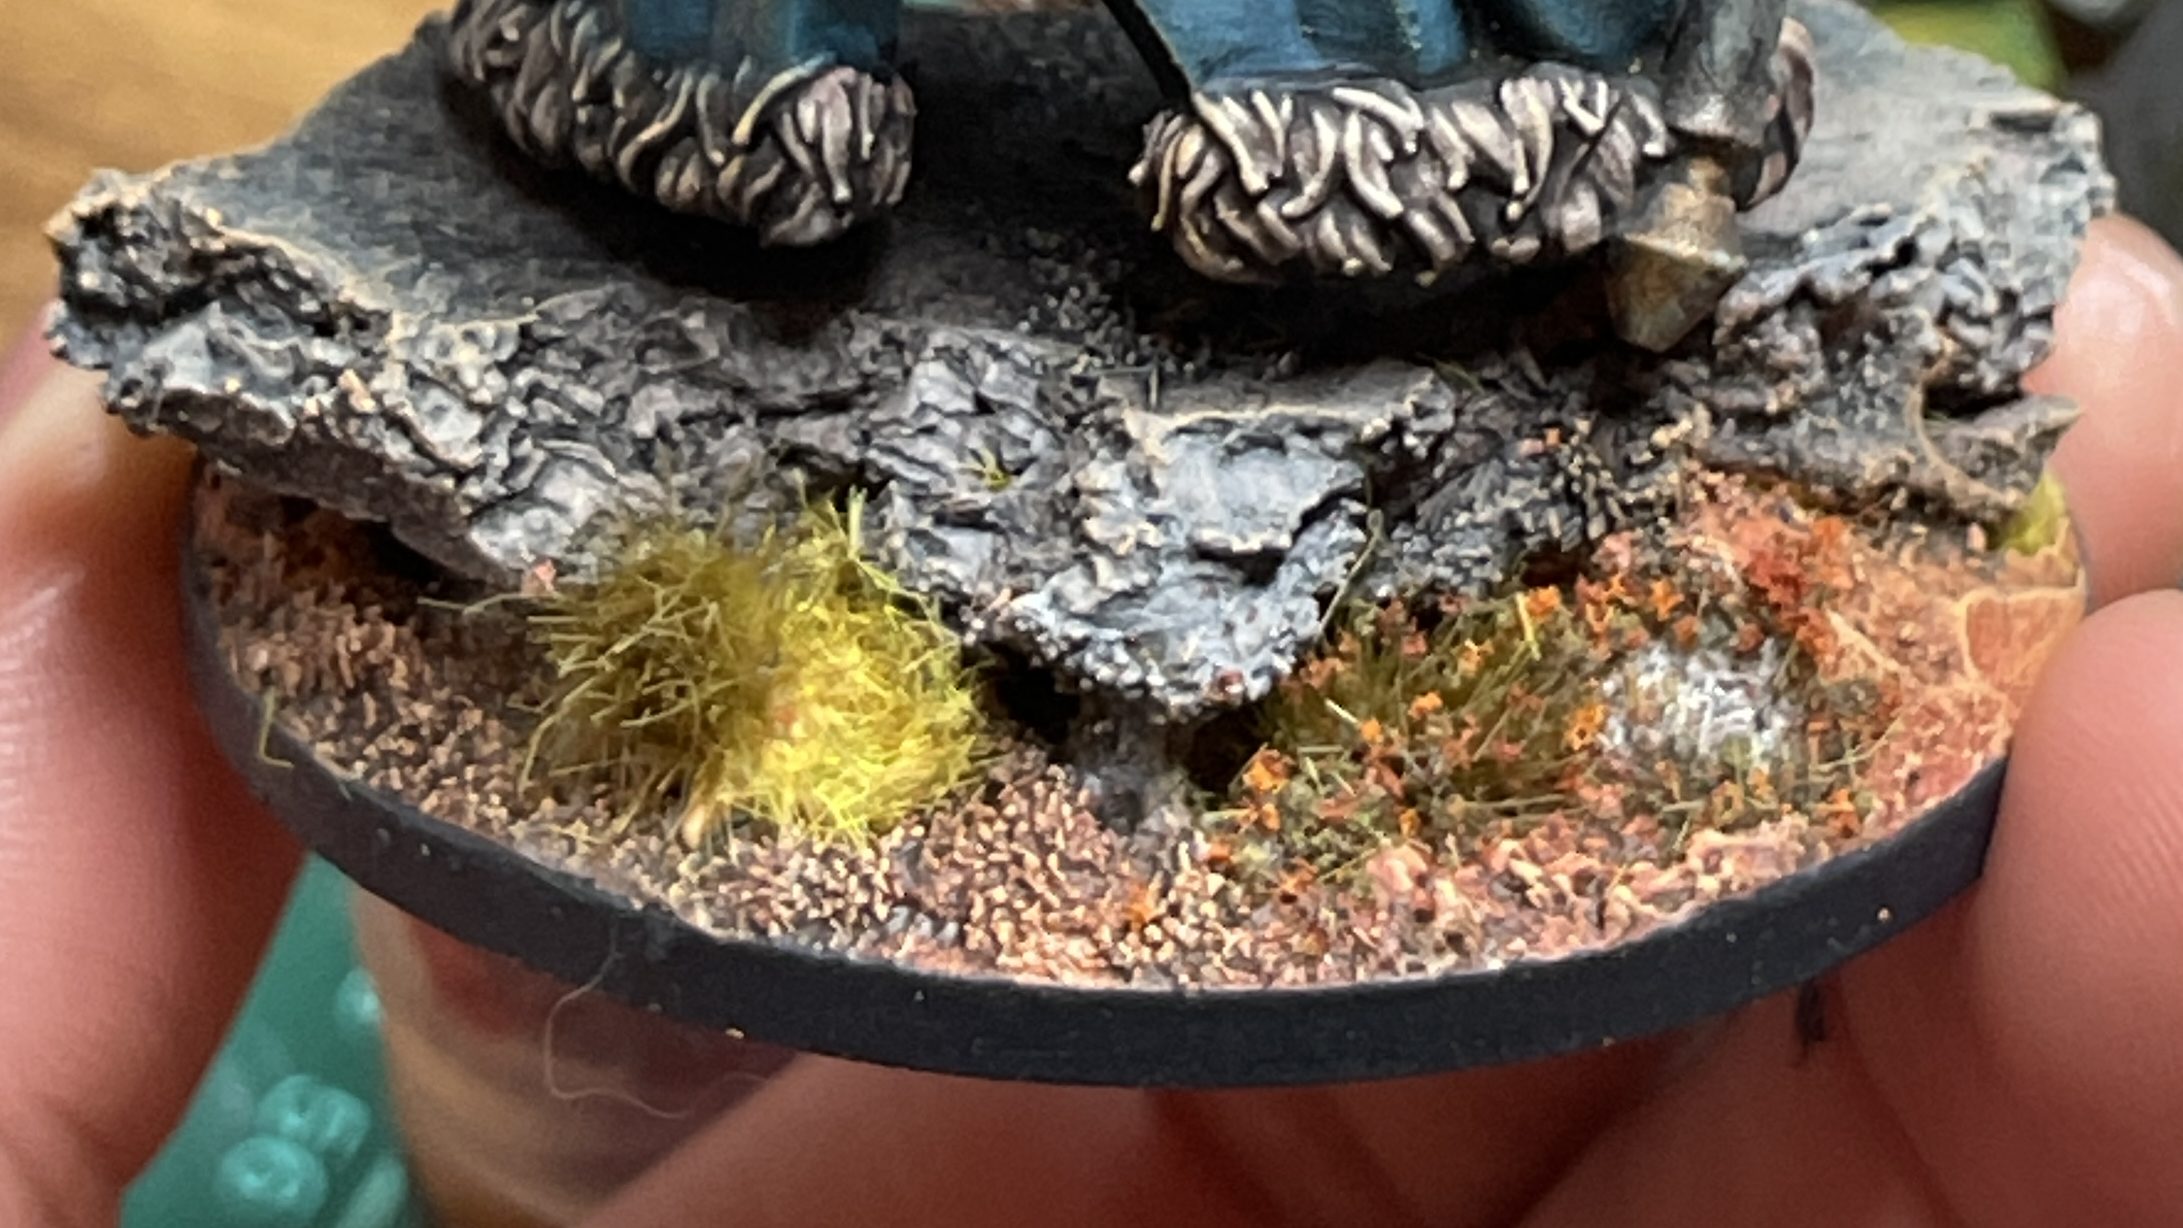
13. Paint base
- ⬢ Basilicanum Grey (Citadel — Contrast)
- Gryph Charger Grey (Citadel — Contrast)
- Dark Oath Flesh (Citadel — Contrast)
14. Apply shade to beard and head
- Reikland Flesh Shade (Citadel — Shade)
15. Apply wash to cloak and chain mail
- Nuln Oil (Citadel — Shade)
16. Dry brush beard
Dry brush Wild Rider Red first, then top off with Flash Gitz Yellow.
- Wild Rider Red (Citadel — Layer)
- Flash Gitz Yellow (Citadel — Layer)

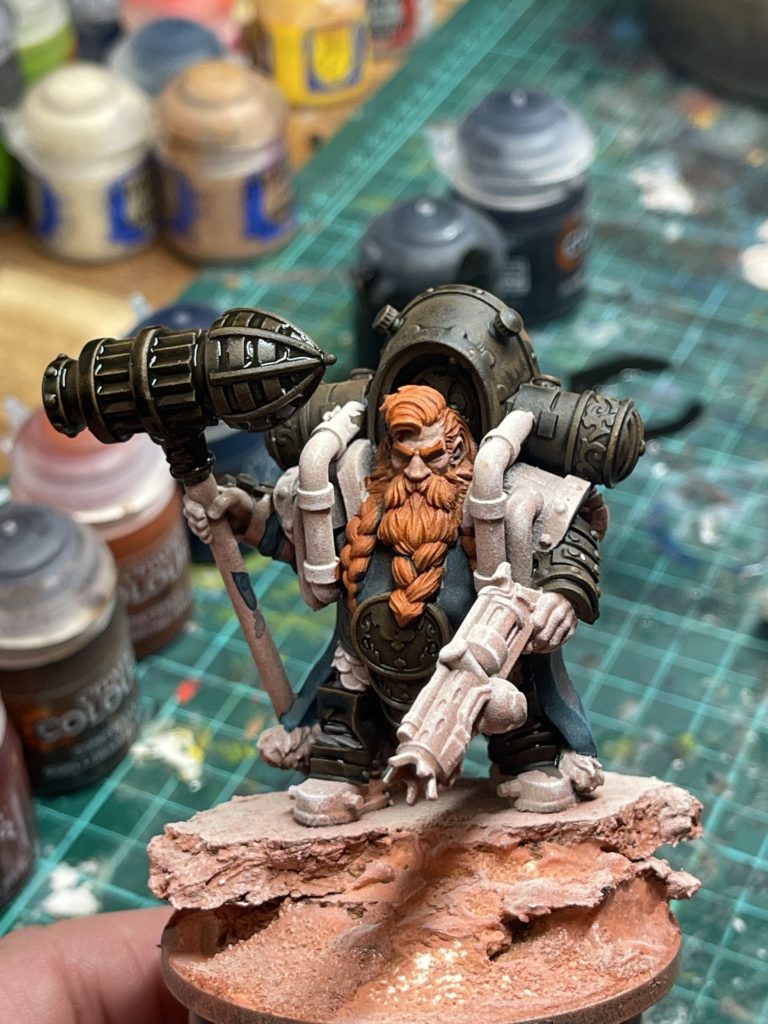
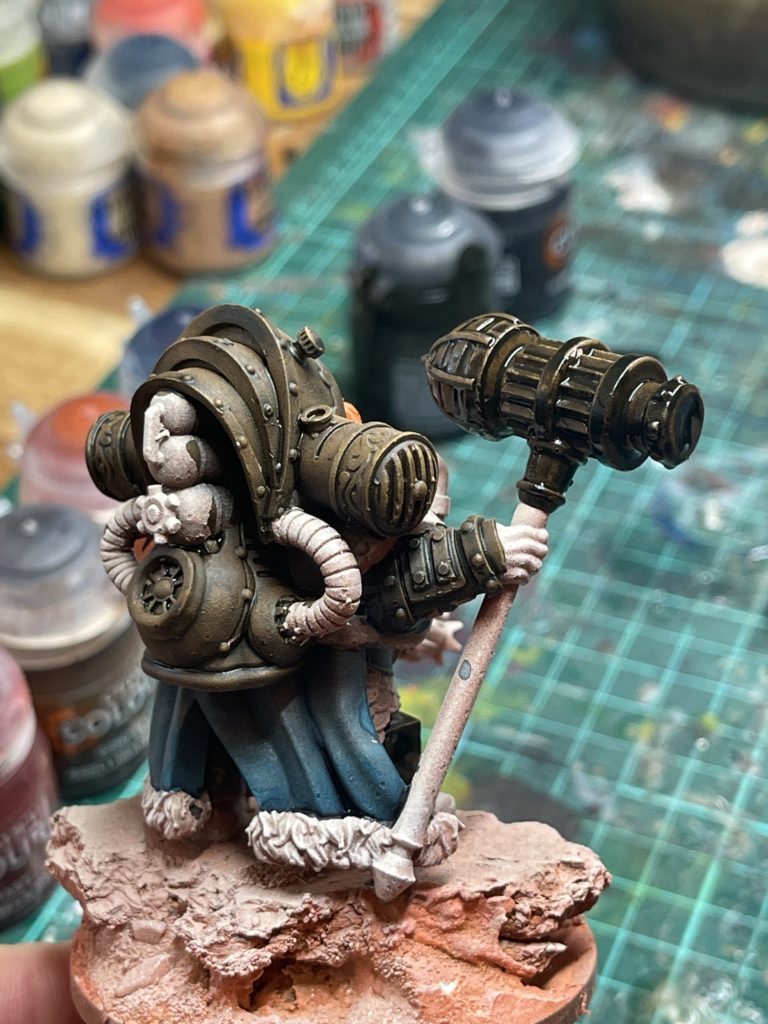
17. Dry brush brown/gold armour & gun highlights
- Auric Armour Gold (Citadel — Layer)
- Retributor Gold (Citadel — Base)
18. Dry brush silver pipes and gun
- Stormhost Silver (Citadel — Layer)
19. Dry brush cloak
- Sotek Green (Citadel — Layer)
20. Dry brush rocks
- Celestra Grey (Citadel — Base)
21. Dry brush ground
Pull up onto cloak to tie together.
- Cadian Flesh Tone (Citadel — Contrast)
- Flayed One Flesh (Citadel — Contrast)
22. Highlight facial features
- Cadian Flesh Tone (Citadel — Layer)
- Reikland Flesh Shade (Citadel — Shade)
23. Line base rim
- German Grey 995 (Vallejo — Pigment) (Substitute with Mechanicus Standard Grey)
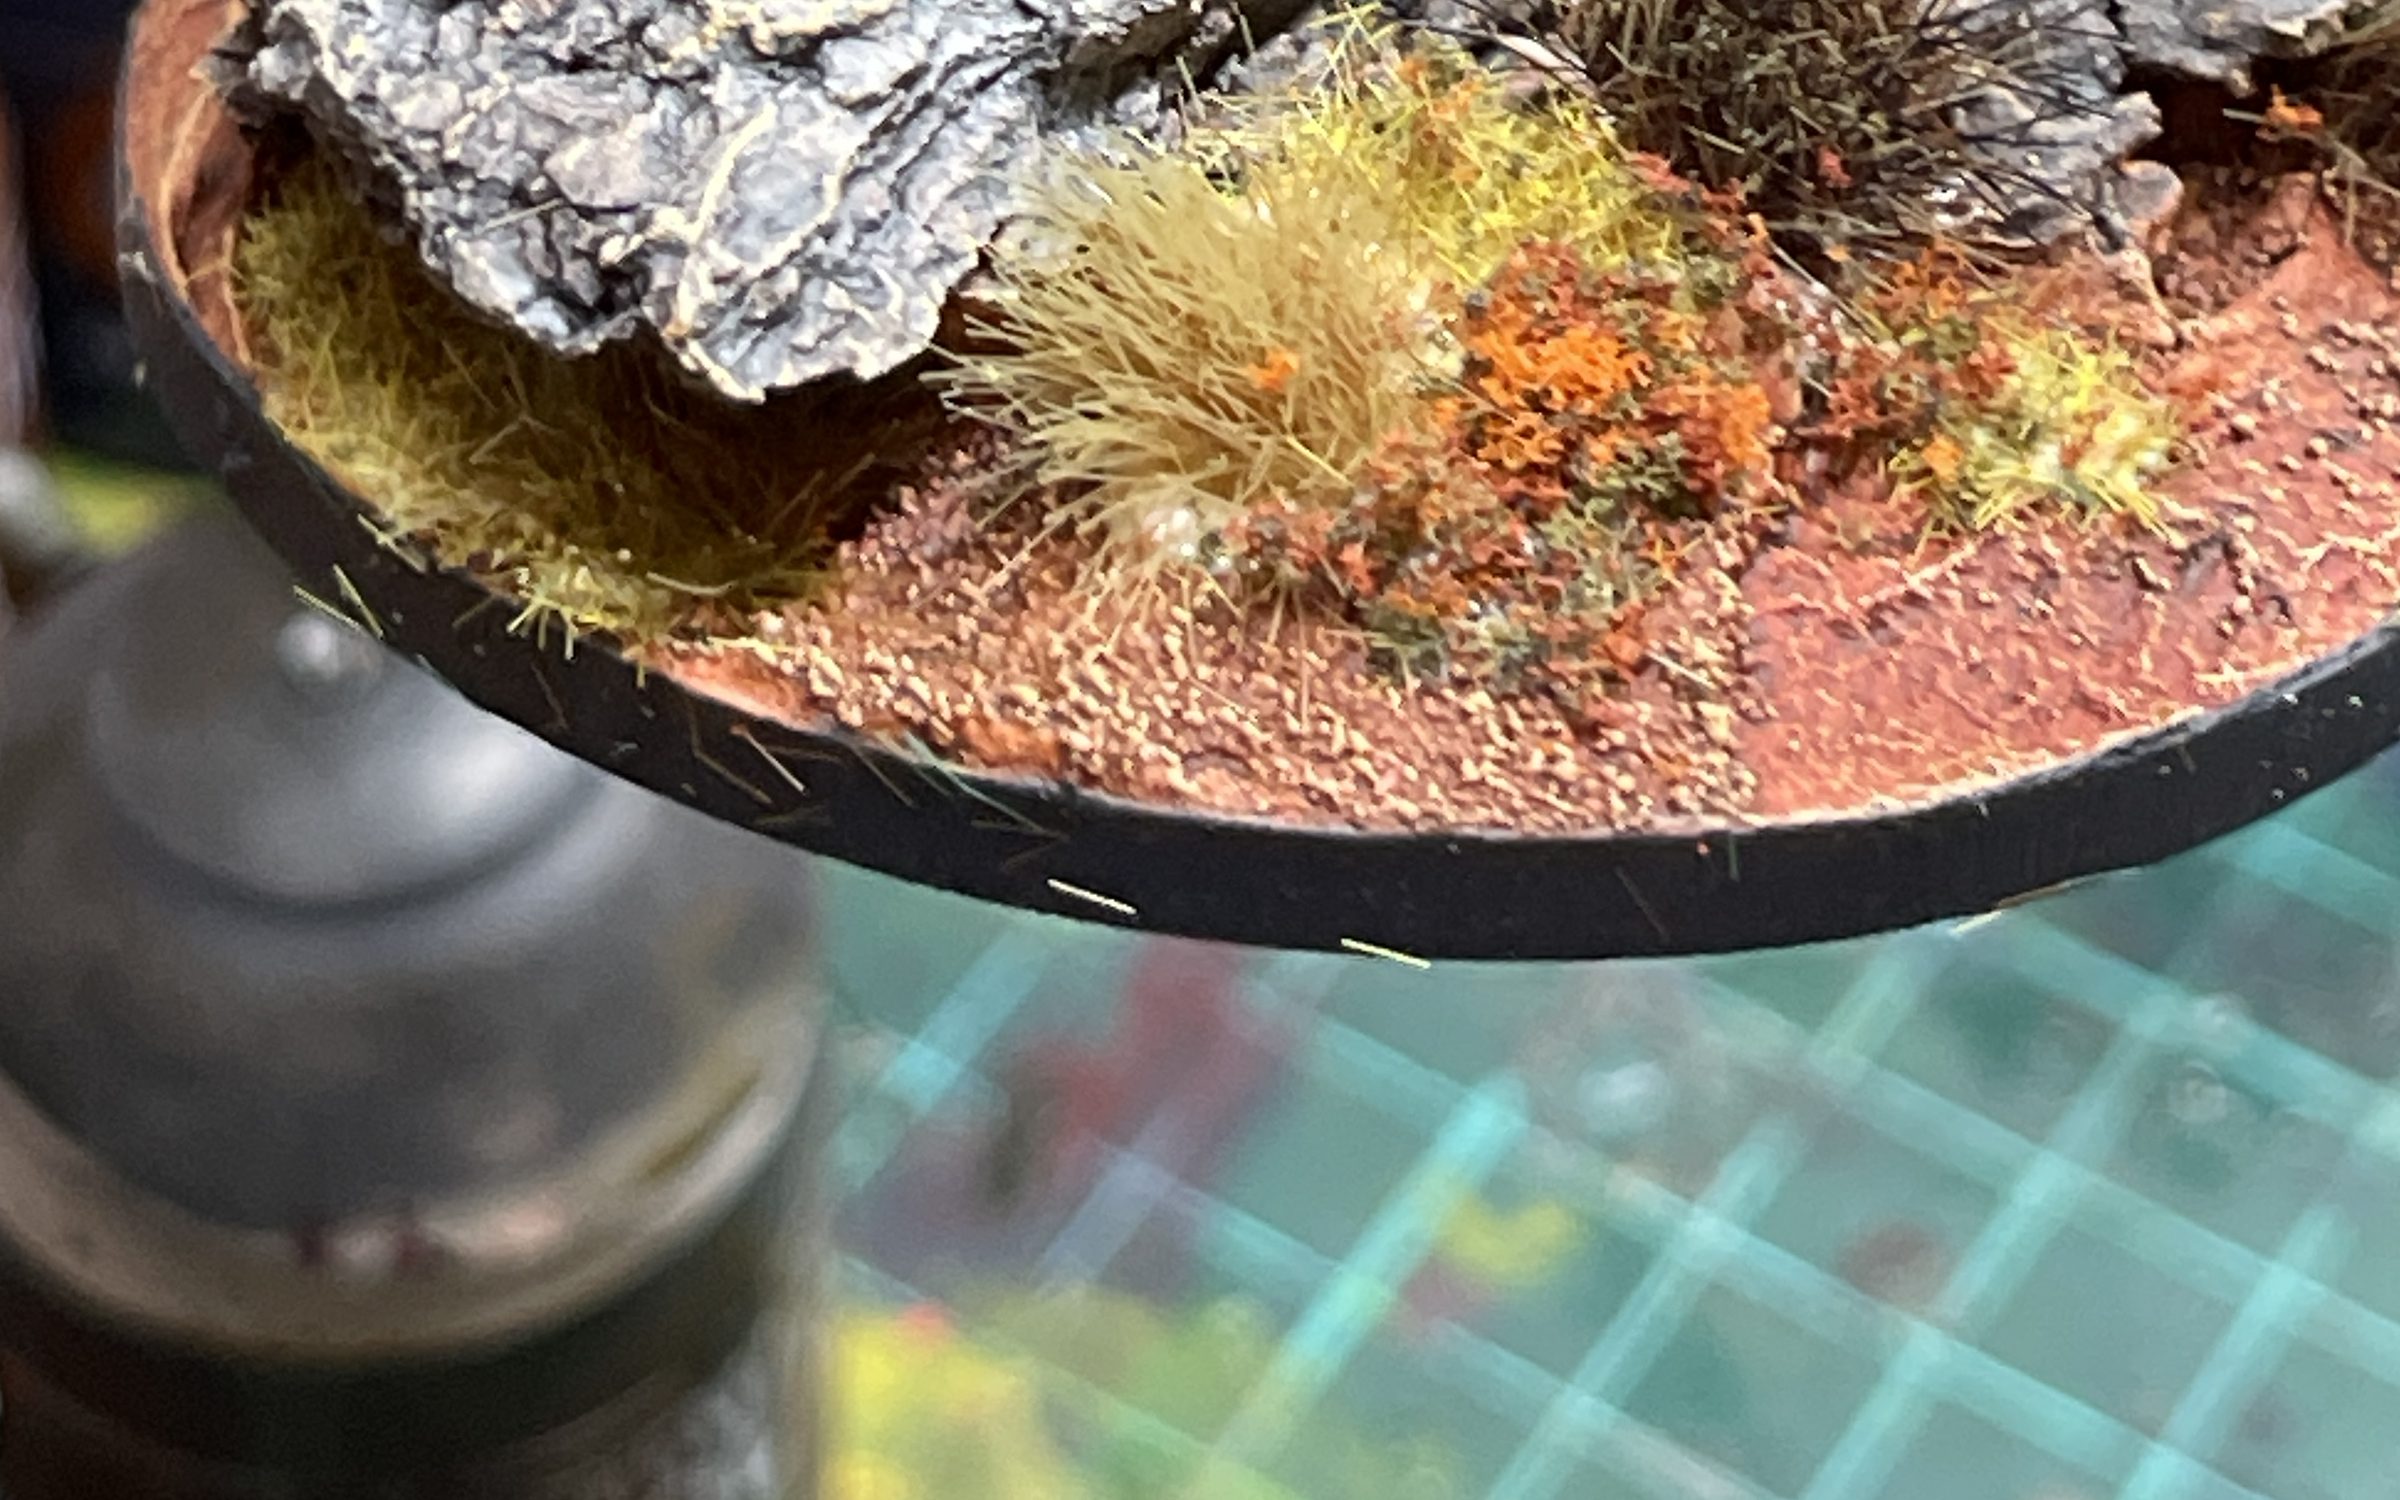
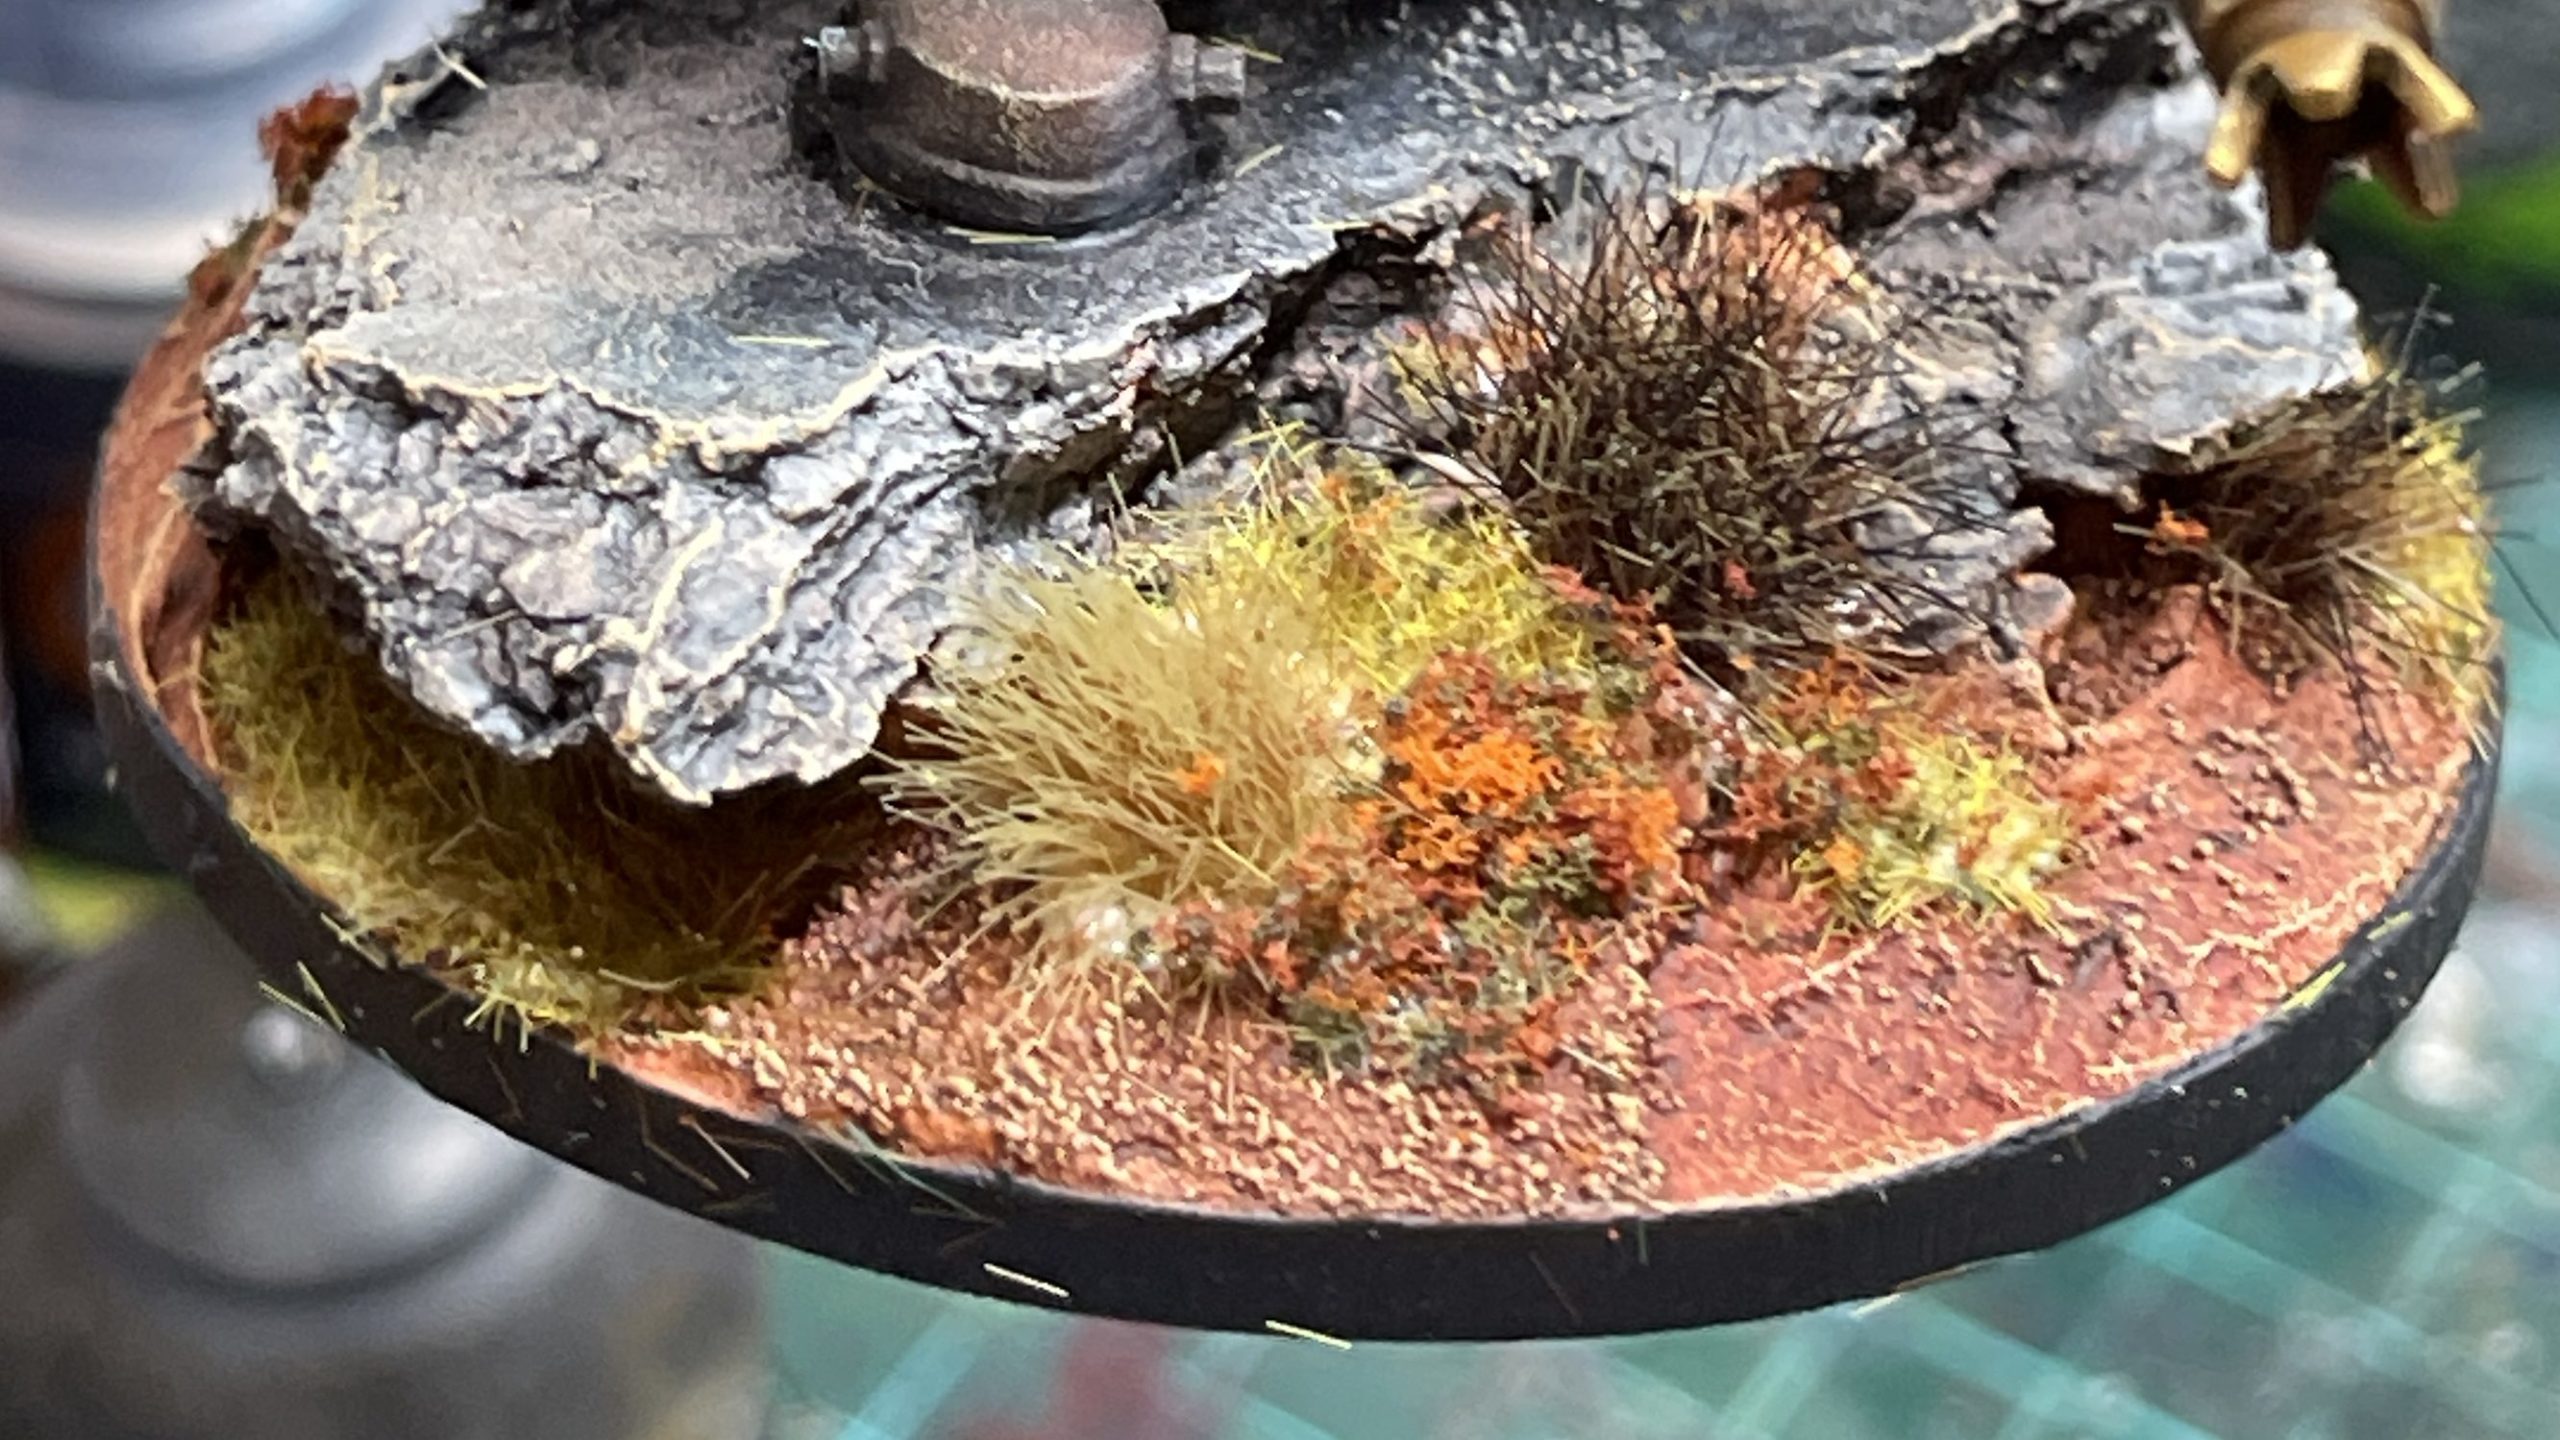
24. Add plant details
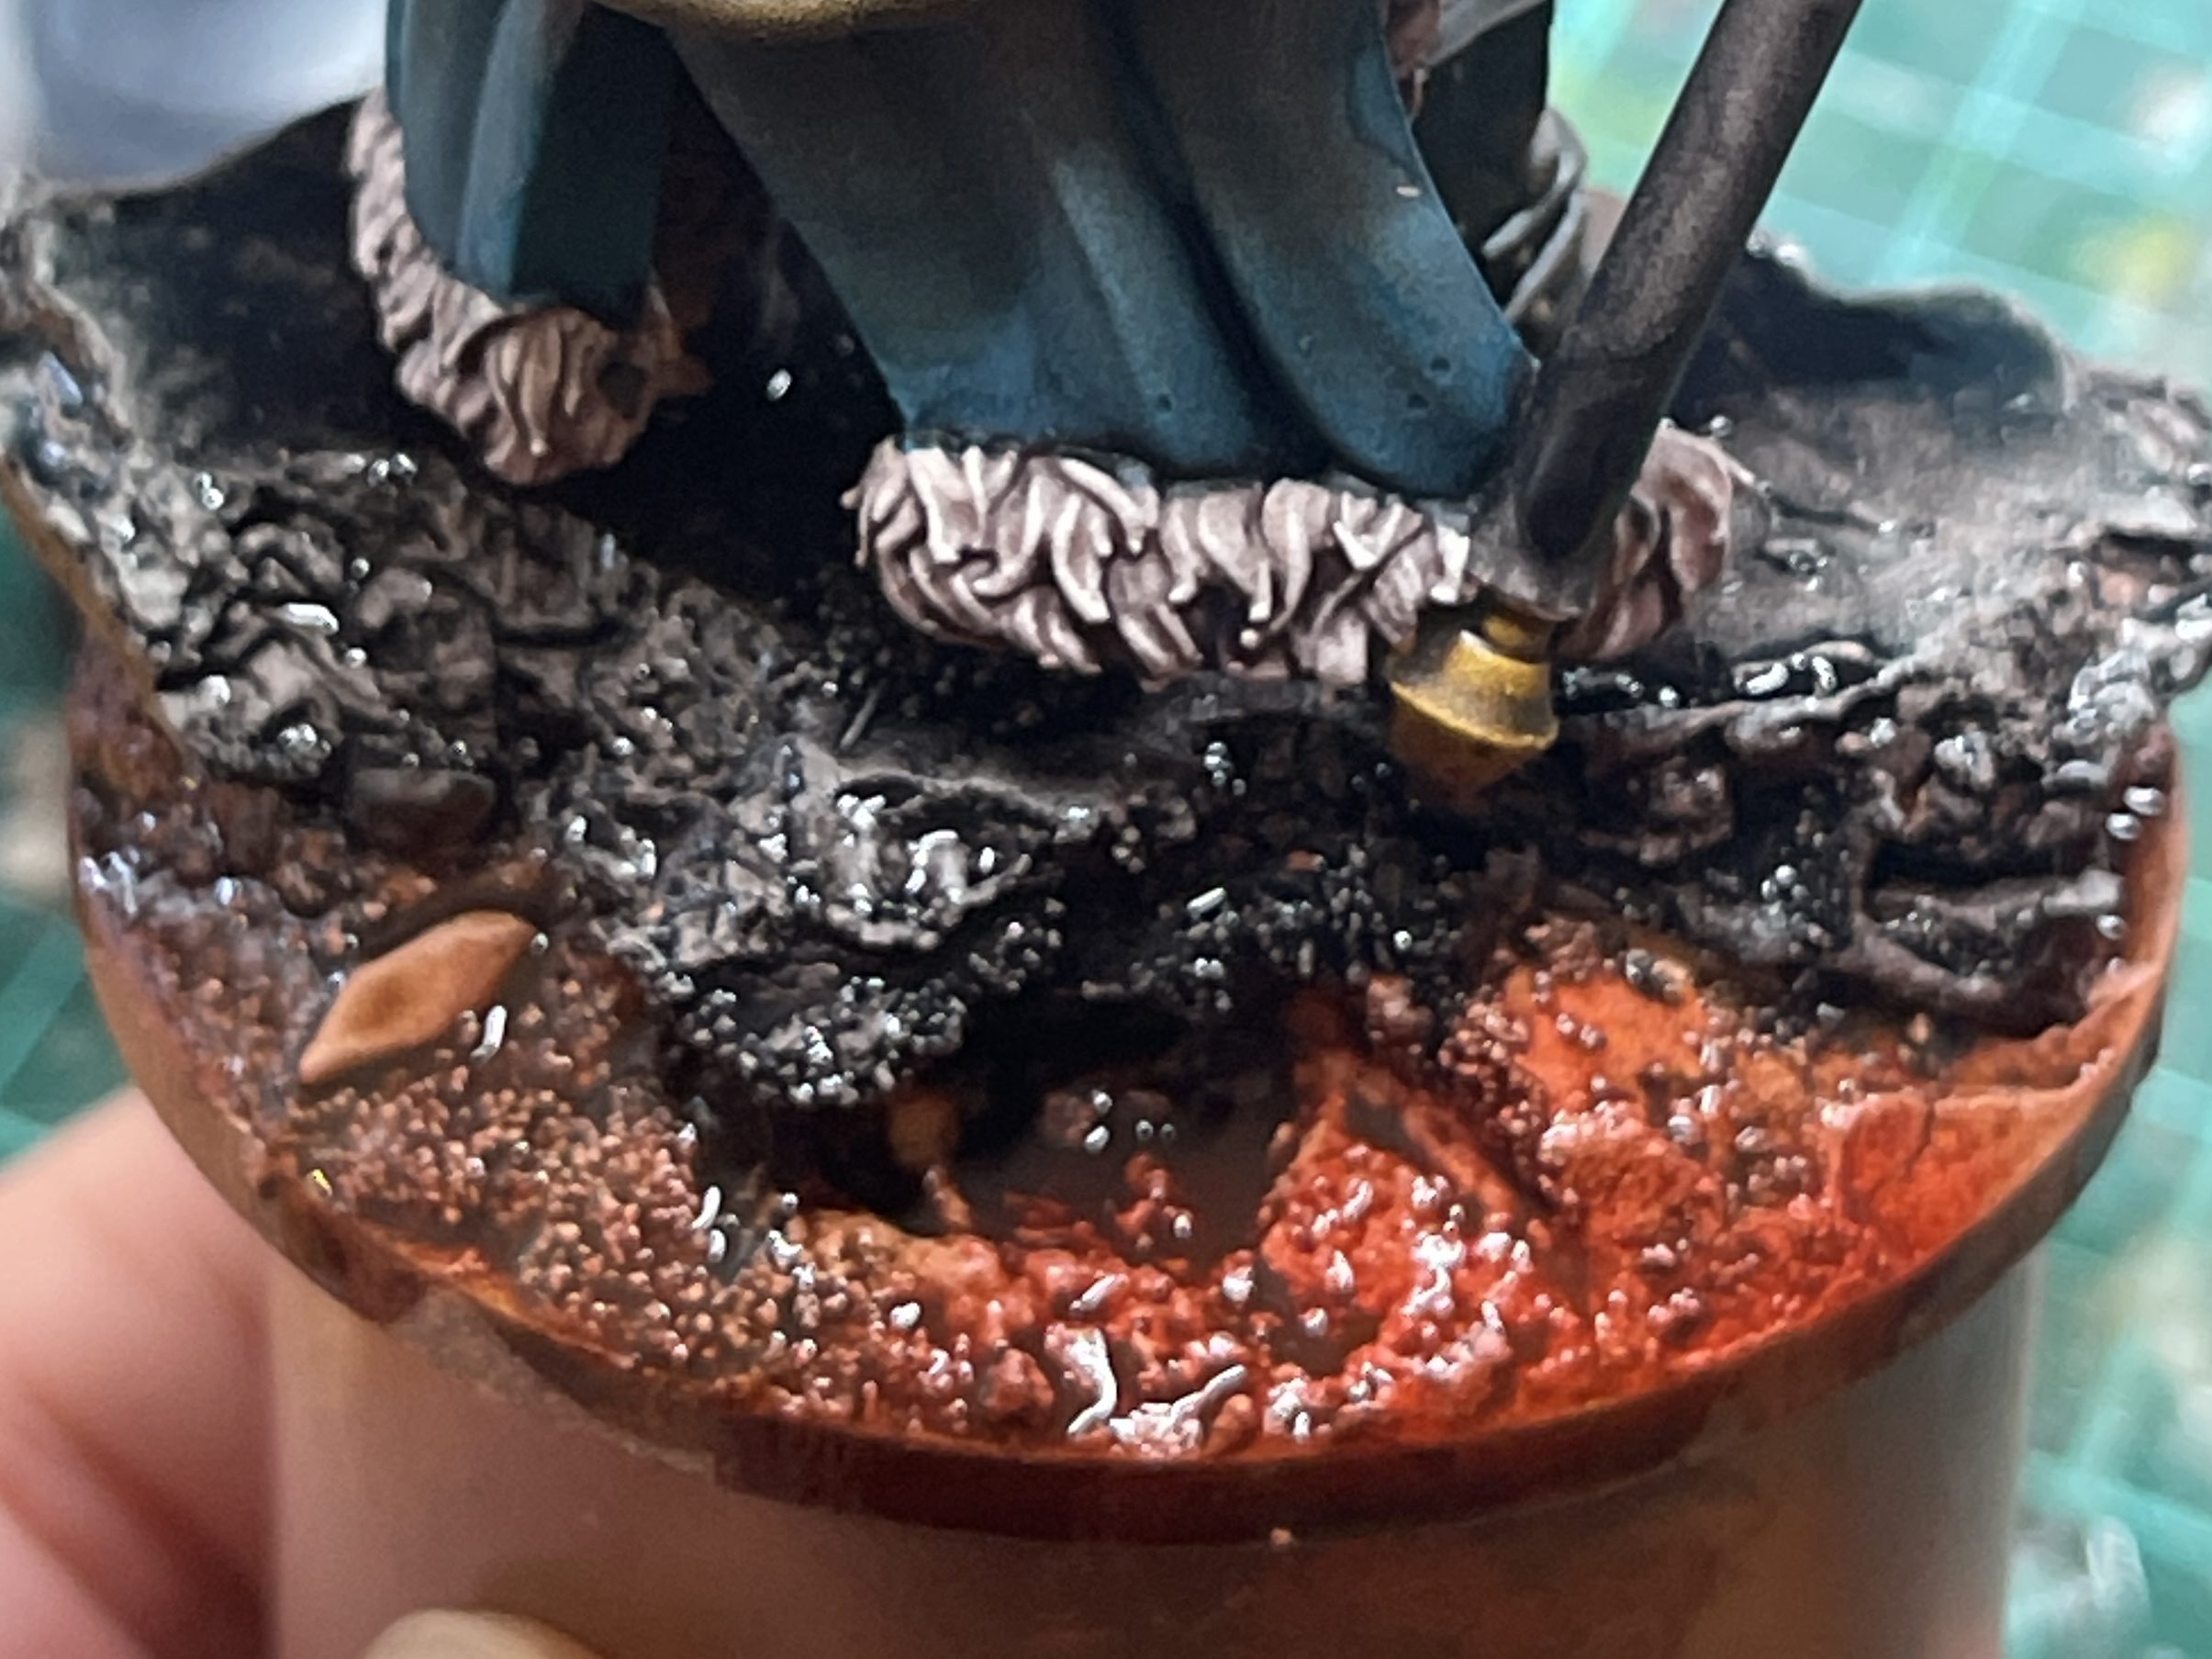
25. Detail weathering on hammer and armour
Apply Typhus Corrosion sparingly — it adds a light gritty texture and can be easily over-applied. Nihilak Oxide should also be painted on with a gentle hand; a little goes a long way.
- Typhus Corrosion (Citadel — Technical)
- Nihilak Oxide (Citadel — Technical)
And done!
Supplies & Materials
Adhesives
Revel Contacta Liquid Glue — Recommended by Thomas for assembling plastic minis.